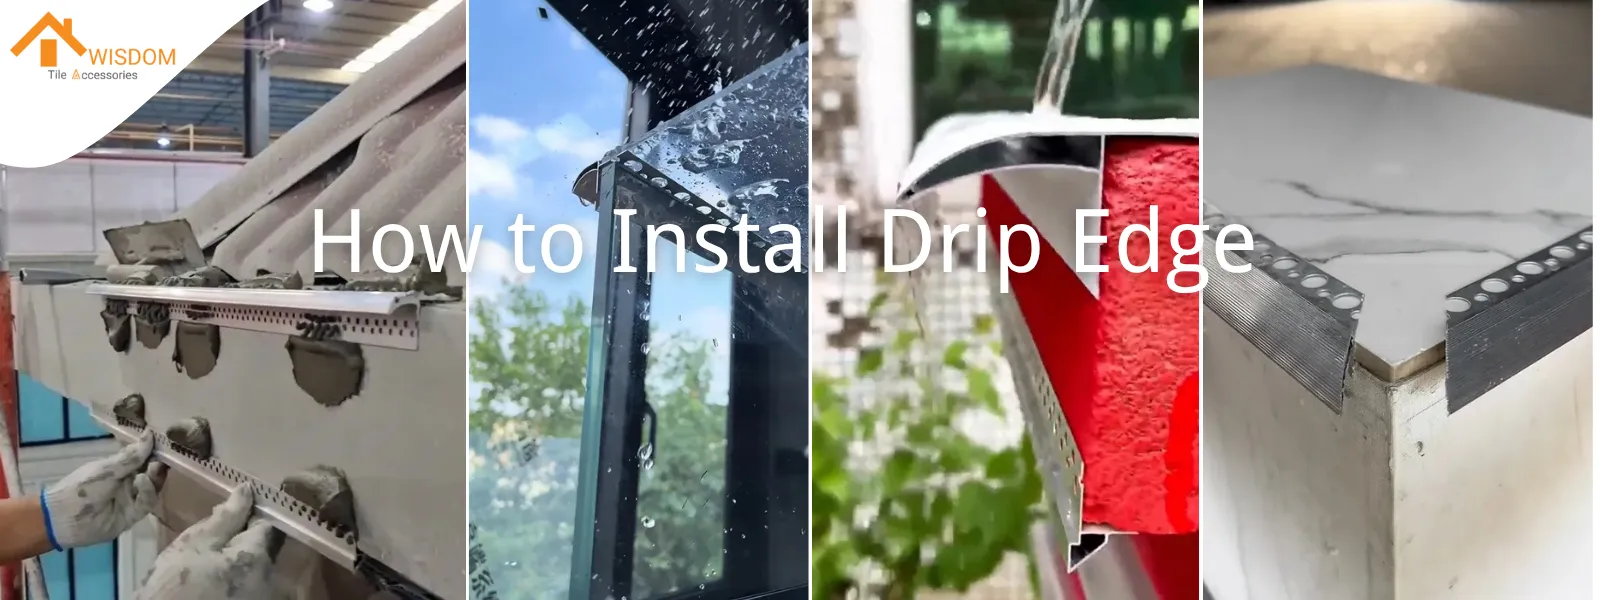
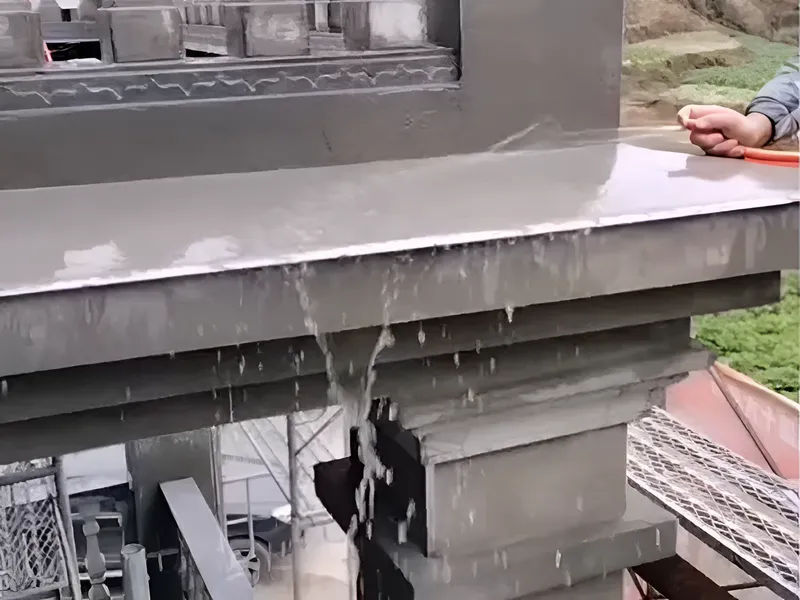
Water stains create unnecessary callbacks. They make a perfect finish look sloppy, and the problem is never the paint. It is physics. Water clings, curling under any horizontal edge and pulling dirt down the wall.
An aluminum drip edge gives the water a sharp, clean break. It cannot hang on; it is forced to drop clear. This simple profile is the difference between a clean facade and one streaked with grime. This guide details the two professional methods for a proper installation—wet mortar and dry fix. It is how you ensure a job stays clean long after you have left the site.
Tools and Materials
A job starts in the truck, not on the scaffold. Have everything ready before you begin. A second trip for a forgotten tool is wasted time.
Required Tools
Tape Measure, Level, and Chalk Line:
For establishing straight, true lines. Nothing looks worse than a wavy drip edge on a long run.
Aviation Snips (Tin Snips):
For clean, straight cuts and for notching corners. A set of left-cut and right-cut snips makes the work cleaner.
Trowel and Putty Knife:
For applying mortar and adhesive. The right size gives you proper control.
Hammer:
For setting fasteners in the dry fix method. Use it to seat the nail, not to beat the profile into submission.
Caulking Gun:
For sealing overlaps and corners. A quality, dripless gun gives you a clean bead, not a mess.
Safety Glasses and Gloves:
Non-negotiable. Metal edges are sharp, and you only get one set of eyes.
Pro Tip: For Perfect Corners
While snips work, a miter saw with a non-ferrous metal blade delivers a perfect, factory-quality 45-degree cut on aluminum profiles. It is the fastest way to achieve a professional corner joint that lines up flawlessly.
Material Checklist
Drip Edge Profiles:
Aluminum or PVC, in the required profile type for the job. Always order 10% extra for cuts and waste.
Fasteners:
Use corrosion-resistant nails (galvanized or aluminum). For aluminum profiles, aluminum nails are best to prevent galvanic corrosion over time.
Adhesive (for Dry Fix Method):
A high-grade exterior polymer construction adhesive or polymer-modified tile adhesive. This is the primary bond; do not use cheap alternatives.
Exterior Sealant:
A polyurethane or high-quality siliconized acrylic sealant for all overlaps and joints. This is your second line of defense.
Interface Agent / Primer (for Dry Fix Method):
A liquid primer applied over the metal flange to ensure the finish plaster bonds securely and does not delaminate.
Fiberglass Mesh Tape (for Dry Fix Method):
This tape bridges the join between the metal profile and the existing wall, preventing cracks from appearing in the finish coat.
Choosing Your Drip Edge
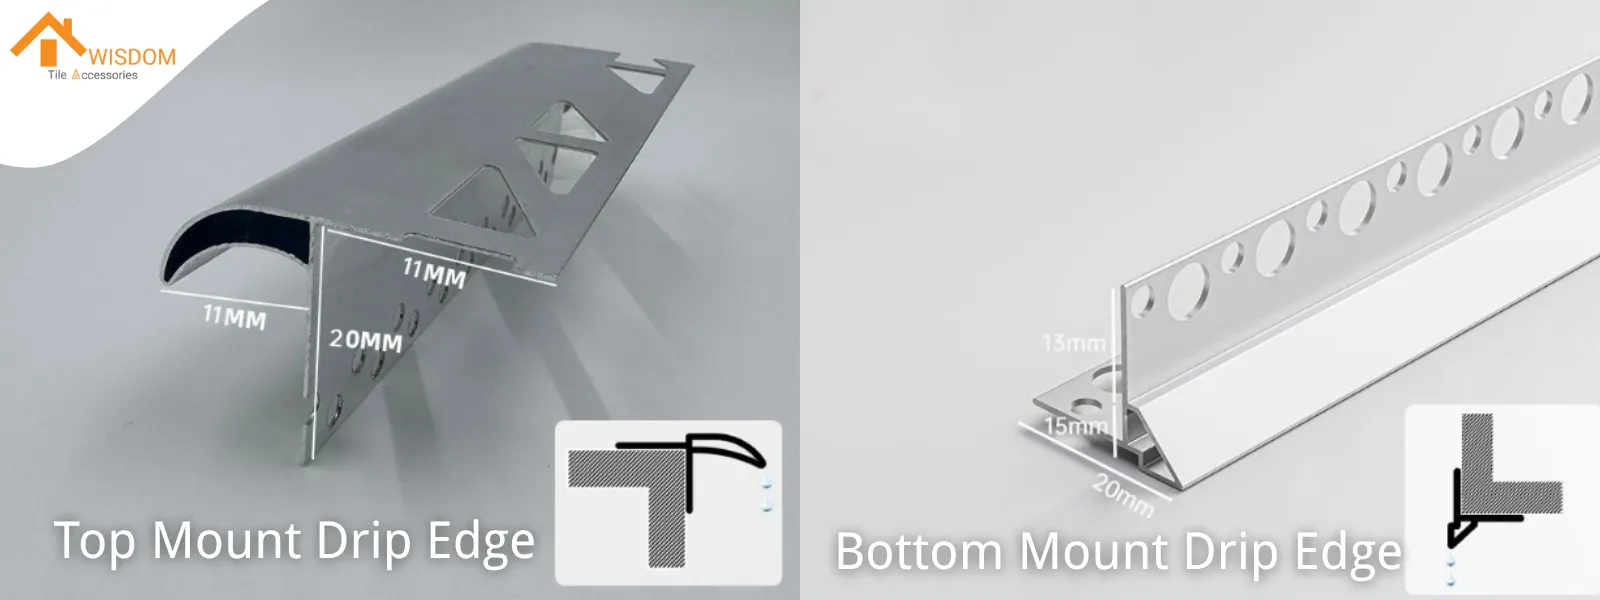
The right profile depends on the job. The names tell you where the work starts: on top of the slab, or on the bottom corner. Selecting the wrong one means fighting the material instead of working with it.
Top Mount Profile For Surface Finishing
This is your go-to for finishing the top surfaces of balconies, windowsills, and parapet caps. Its installation flange sits flat on the horizontal surface, becoming part of the floor or cap finishing system. The signature "eagle beak" profile hangs over the edge, ensuring water running off the top surface is directed away cleanly. You install this before you lay your final surface material.
Bottom Mount Profile For Soffit And Wall Corners
This L-shaped profile is designed for the underside corner where a horizontal soffit meets a vertical wall. Its vertical flange attaches to the wall, becoming an integrated part of the plastering system. It creates a clean, sharp corner and a drip line in one piece. This profile is versatile; it can be installed with the wet plaster or retrofitted to a finished wall.
Installing The Top Mount Drip Edge
This method is for new construction or full surface renovations. The drip edge is embedded with the mortar bed, creating a single, solid assembly.
Step 1 Surface Preparation
Your concrete slab must be clean. Sweep it free of all dust, dirt, and loose material. A mortar bed needs a solid, clean base to grab onto. If you lay it on dust, you are creating a failure point from the start.
Step 2 Wet Mortar Application
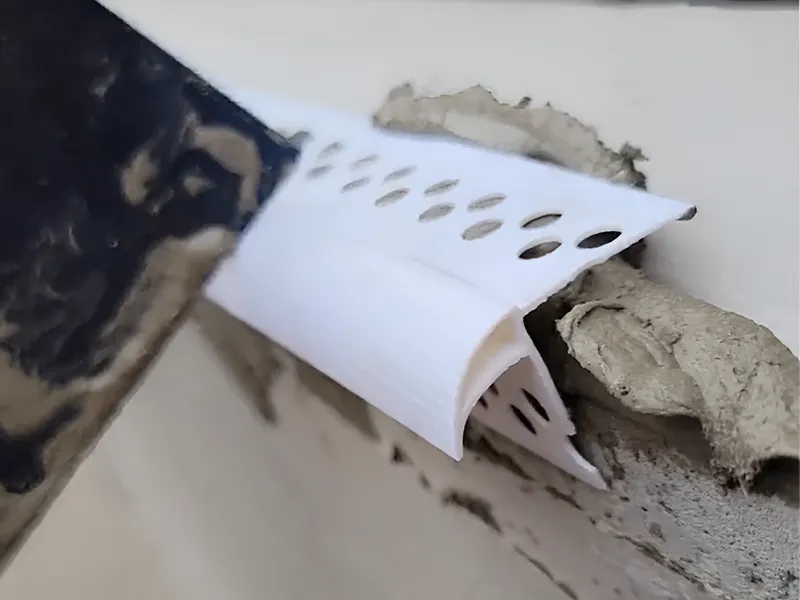
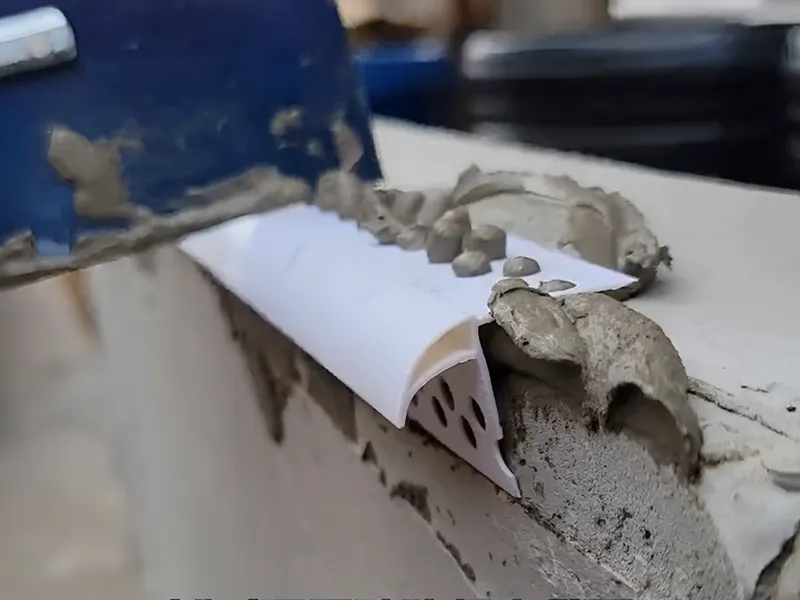
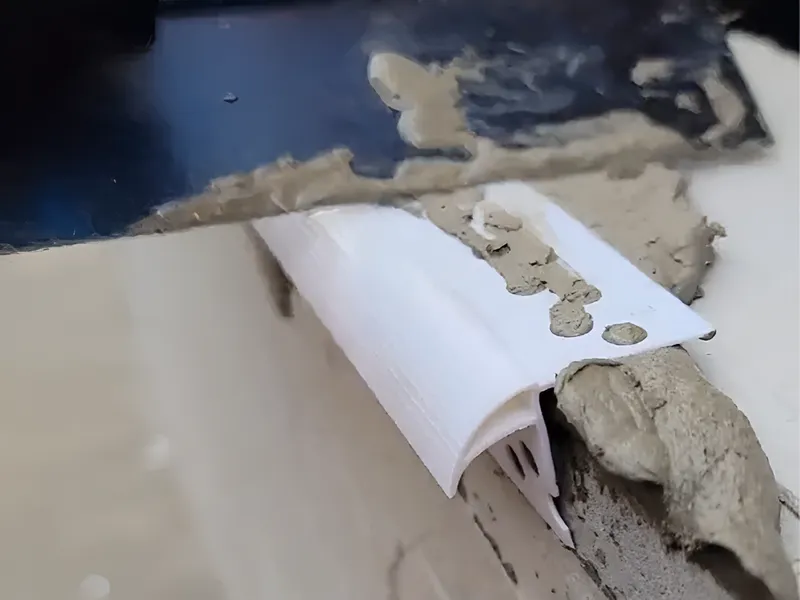
Lay down a consistent bed of polymer-modified mortar along the edge of the slab. Press the Top Mount profile’s perforated flange firmly into the wet mortar. You will see mortar squeeze up through the holes. This is what you want. Those mortar plugs act as rivets, locking the profile into the slab itself. It is no longer just sitting on top; it is mechanically anchored.
Step 3 Creating The Slope
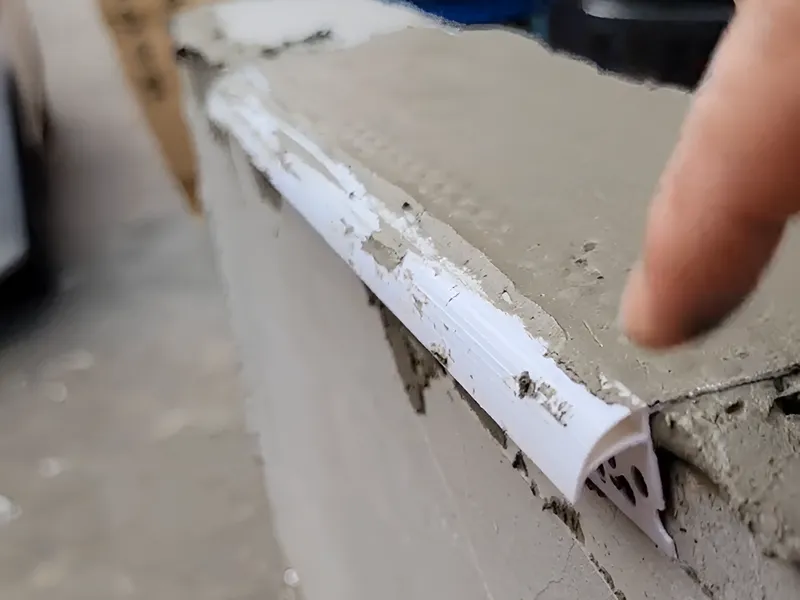
This is the step that separates a professional job from a callback. After covering the flange with a finish coat of mortar, you must shape the surface to create a slight, consistent slope towards the drip edge. The inside edge must be higher than the outside edge. If the surface is dead flat or, worse, slopes back toward the building, water will pool. Pooled water defeats the entire purpose of the installation.
Installing The Bottom Mount Drip Edge
This profile offers two installation paths, depending on the state of the job site.
Method A Wet Mortar Application
Use this method when you are plastering the wall and soffit at the same time. The process is straightforward. As you apply plaster to the corner, embed the profile’s perforated flange directly into the wet material. Use your trowel to ensure the profile is fully seated and the plaster has pushed through the holes, creating that same mechanical lock. The profile becomes your guide for a perfectly straight, hard corner.
Method B Dry Fix Application
This is the method for installing the profile onto an existing, finished wall. It requires a different approach because you are bonding new material to a cured surface. Skipping a step here guarantees a crack will appear.
- Apply Adhesive: Start by applying a continuous bead of high-grade construction adhesive to the back of both flanges of the profile. Press it firmly into the corner. This is your primary bond.
- Add Mechanical Fasteners: While the adhesive is wet, use corrosion-resistant nails to mechanically fasten the profile to the wall. Drive the nails through the perforations in the top flange only. This secures the profile while the adhesive cures and provides a permanent mechanical hold.
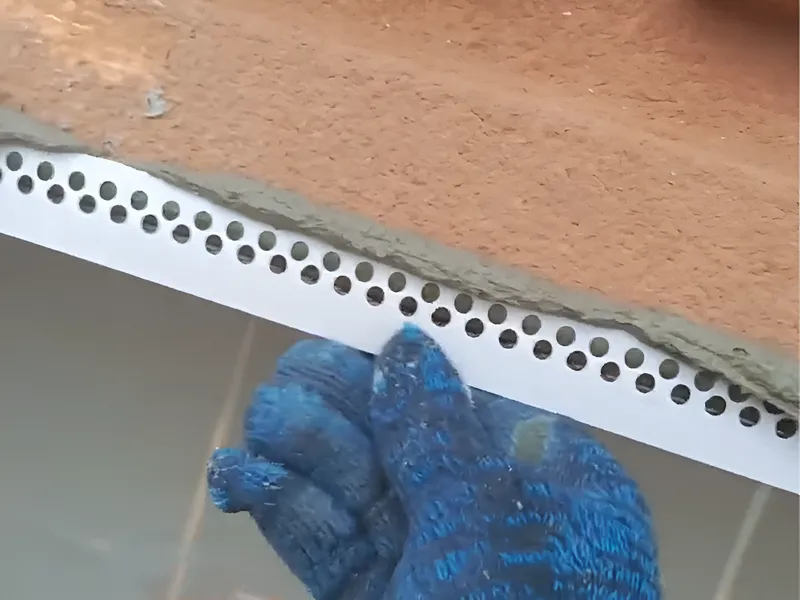
- Bridge the Joint: Once fixed, you must address the transition from metal to plaster. First, apply a suitable interface primer over the metal flange and the adjacent wall area. After it dries, embed a strip of fiberglass mesh tape over the joint, covering the edge of the flange and the wall. This combination is non-negotiable. It ensures the final skim coat of plaster will bond to the metal and will not crack along the join over time.
Why the Extra Steps on Dry Fix?
A thin skim of plaster applied directly over a metal flange will crack. It's a matter of when, not if. The different materials expand and contract at different rates. The primer provides chemical adhesion, and the fiberglass mesh provides the physical reinforcement to prevent that movement from telegraphing through to the surface as a hairline crack. Doing it right takes ten extra minutes. Doing it wrong means coming back to fix a crack that spans the entire length of your work.
Professional Finishing Techniques
A straight run is easy. The corners and joints are where craftsmanship shows. These details are not just for looks; they are critical points in the water management system.
Handling Outside Corners
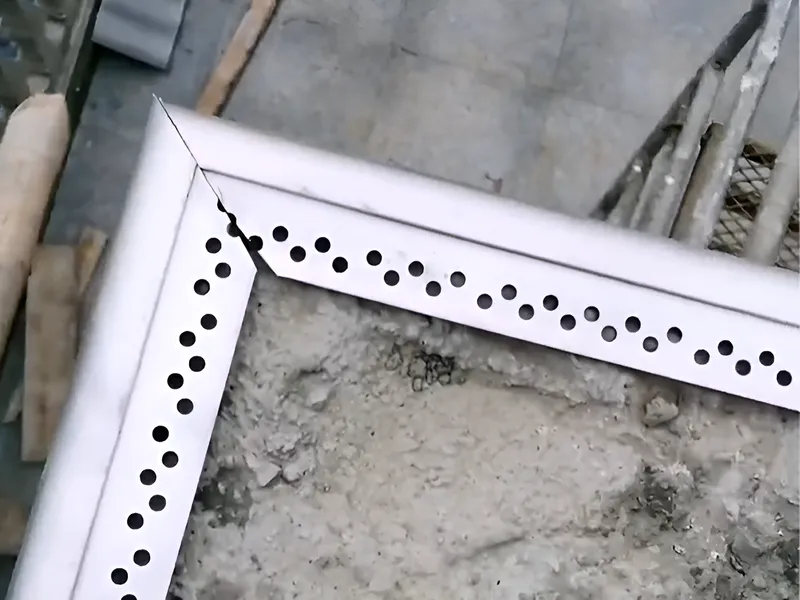
A simple butt joint at a corner is an open invitation for water. The only professional way to handle an outside corner is with a mitered, overlapping joint.
- Cut the Miters: Cut the ends of the two profiles that will meet at the corner to a perfect 45-degree angle. A miter saw provides the cleanest result.
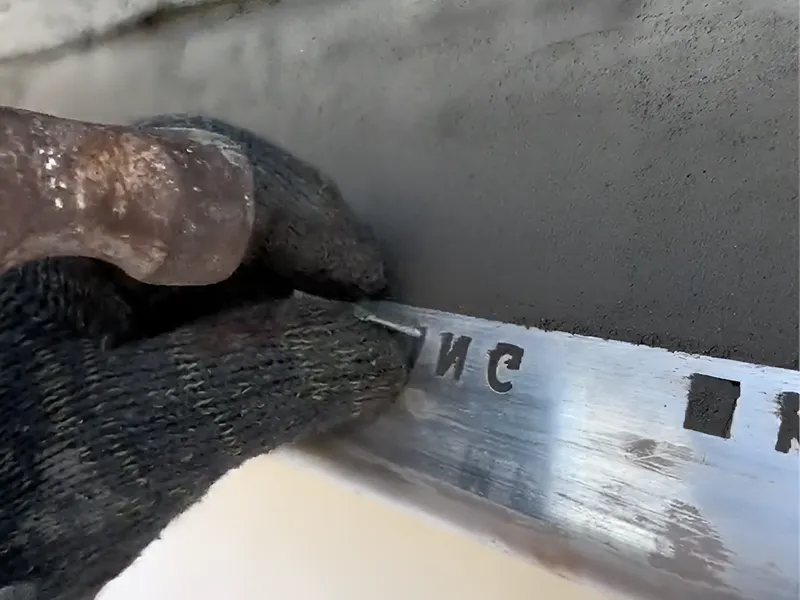
- Create the Overlap: On one of the mitered pieces, use your snips to make a small cut along the profile's main crease, about one inch (2.5 cm) long. Then, cut away the top perforated flange for that same one-inch length.
- Form the Tab: This leaves a small, bendable tab of the vertical face of the profile.
- Assemble the Corner: Install the uncut profile first. Then, install the notched piece, allowing its mitered edge to fit flush against the first. The tab you created will wrap cleanly around the exposed end of the first piece, creating a solid, sealed corner. This ensures that water cannot find a vertical seam to penetrate.
Managing Long Runs
No wall is perfectly straight. For runs over 4 meters (about 13 feet), a chalk line is your best friend. Snap a straight line from end to end before you start the installation. Install the drip edge profiles to the line, not to the wall. This guarantees a visually straight edge, even if the underlying structure has minor imperfections. Your eye will notice a wavy line long before it notices a small gap that gets filled with mortar.
Sealing Overlaps
Every joint where two pieces of drip edge meet is a potential entry point for moisture.
- Overlap Length: Each section must overlap the next by a minimum of 2 inches (5 cm). A shorter overlap will pull apart with thermal expansion.
- Apply Sealant: Before you overlap the pieces, apply a small bead of high-quality polyurethane sealant to the top surface of the lower piece. When you press the next section on top, the sealant will spread to create a watertight gasket between the two layers. This is a small step that provides a huge amount of security against wind-driven rain.
Common Mistakes To Avoid
These are the errors that lead to callbacks. They are all avoidable.
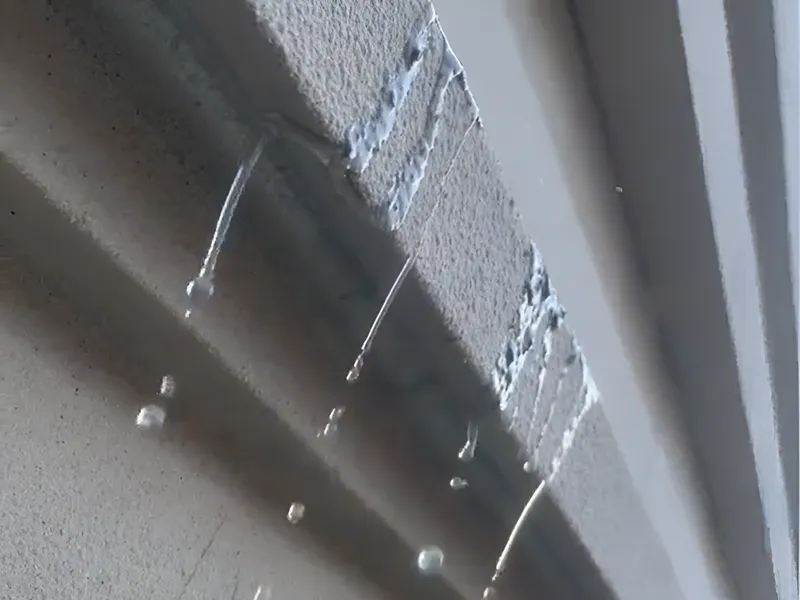
Incorrect Slope
The Mistake: Installing a Top Mount profile on a dead-flat or negatively sloped surface.
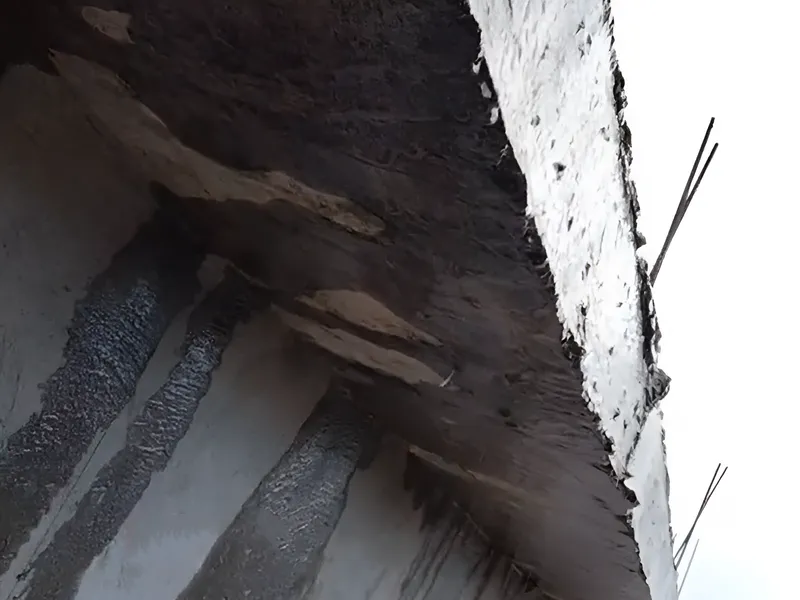
The Result: Water pools behind the drip edge instead of flowing over it. In winter, this trapped water freezes, expands, and can destroy the mortar bed. The entire system fails.
Mortar Contamination
The Mistake: Allowing the front, exposed "eagle beak" or L-profile to be smeared with mortar or plaster.
The Result: The smooth surface of the profile is designed to shed water cleanly. A rough, contaminated surface will hold water, allowing it to dribble and stain the wall below. It negates the purpose of the product. The front face must be kept perfectly clean.
Inadequate Fastening
The Mistake: Using the wrong fasteners, spacing them too far apart, or skipping the adhesive in the Dry Fix method.
The Result: The profile will eventually work itself loose. Aluminum nails must be used with aluminum profiles to prevent corrosion. In the Dry Fix method, adhesive provides the primary, continuous bond; the nails are just there to hold it in place while the adhesive cures and to provide a backup. Relying on nails alone will lead to failure.
Poor Corner Treatment
The Mistake: Creating simple butt joints at corners instead of a proper, overlapping mitered joint.
The Result: The corner will leak. It is the most vulnerable point for water intrusion, and a simple butt joint provides a direct path. Water will get behind the profile and damage the wall. It is a guaranteed failure.
Frequently Asked Questions
Can I install a drip edge after the final paint is done?
It is not recommended. The Bottom Mount profile can be retrofitted onto a finished plaster wall using the Dry Fix method, but this process requires priming, taping, and applying a new skim coat over the flange. This will always require repainting the area. Installing the drip edge as an integrated part of the plastering or finishing process is the correct approach.
What is the best way to cut aluminum drip edge?
For straight cuts, a miter saw with a carbide-tipped blade rated for non-ferrous metals provides the fastest, cleanest, and most accurate results. For notches, curves, or on-site adjustments, a good pair of aviation snips (tin snips) is the standard tool. Always wear safety glasses and gloves when cutting metal profiles.
Do I need to use a sealant on every overlap?
While not strictly required in all conditions, it is a professional best practice. Applying a bead of quality polyurethane sealant at every 2-inch overlap creates a secondary waterproof barrier. This step is strongly recommended in areas with heavy rainfall or wind-driven rain, as it provides an extra layer of security against water intrusion at the seams.
Should I choose an aluminum or PVC drip edge?
Choose aluminum for durability and a premium finish. It is stronger, holds a cleaner line over long runs, and is less susceptible to degradation from UV exposure. Aluminum is the professional standard for a long-term installation. Choose PVC for budget-sensitive projects or in coastal areas where salt spray corrosion is a primary concern. PVC will not corrode, but it may become brittle over many years.


