Tile leveling systems create a flat surface, but their removal is what truly defines the final quality. A single misstep in this final procedure can result in chipped tiles or plastic remnants stuck fast in the grout line, compromising the entire installation. This guide moves beyond simple instructions. It details the correct techniques for a clean break every time and, more importantly, provides the professional solutions for when things go wrong. We will cover the essential timing, methods, and troubleshooting to ensure your work remains flawless.
When to Remove Tile Leveling Clips
The most common and costly mistake an installer can make with a leveling system happens before the grout is even mixed. It is the mistimed removal of the clips. This is not a step to be rushed or judged by feel; it is a decision dictated by the curing process of the thin-set mortar.
Adhering to Mortar Instructions
The sack of thin-set mortar is not just packaging; it is the most important instruction manual on the job site. Every manufacturer provides a technical data sheet, either on the bag or online, that specifies the mortar's cure times. This is the first and final authority. A product engineered for a rapid set may be ready in as little as two to four hours, while a standard or thick-bed mortar will require a much longer period. Ignoring these instructions in favor of a general rule is a gamble with the entire installation.
The 24-Hour Guideline
As a general industry standard, waiting approximately 24 hours is the most reliable practice for standard-set mortars. This is not an arbitrary number. During this period, the mortar undergoes hydration, a chemical reaction where cement particles form crystalline structures that give the adhesive its strength. It needs this time to develop a bond strong enough to lock the tiles in place, ensuring they can resist the lateral force of the clip removal without shifting or slumping. A 24-hour wait ensures this chemical process is sufficiently advanced.
Factors Affecting Curing Time
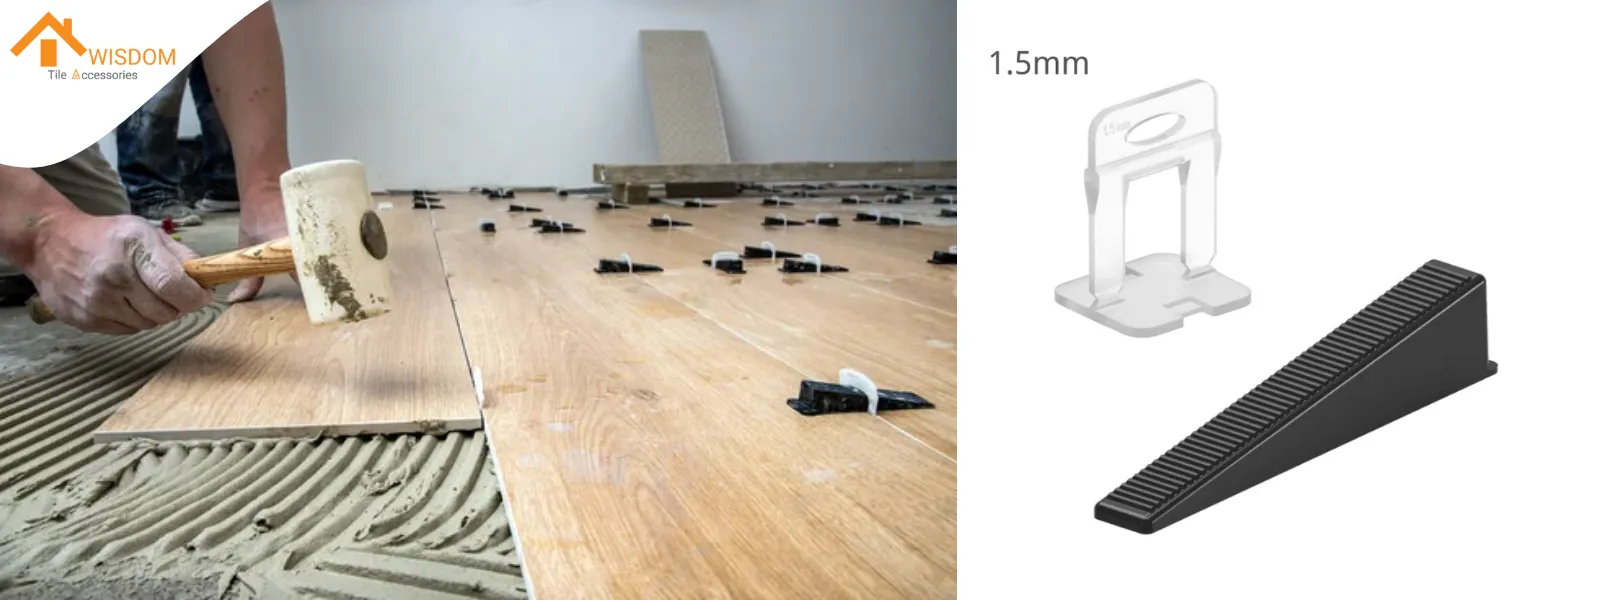
A professional knows that the 24-hour guideline is a baseline, not an absolute. Real-world job site conditions can significantly alter the actual curing time.
- Mortar Type: As mentioned, this is the most critical factor. A rapid-set mortar is chemically formulated to accelerate hydration, allowing for much earlier clip removal. Using a standard mortar with a rapid-set timeline will lead to failure.
- Temperature and Humidity: Mortar curing is a chemical reaction, and these reactions slow down in the cold. A cool job site below 60°F (15°C) will extend the cure time. High humidity has a similar effect by slowing the rate of water evaporation from the mix. In damp, cool conditions, waiting 48 hours may be necessary.
- Tile and Substrate Type: The porosity of the materials plays a direct role. A non-porous porcelain tile installed over a waterproofing membrane creates a sealed environment. Moisture can only escape through the grout joints, dramatically slowing the cure. This is different from a porous ceramic tile on a cement backer board, which can wick moisture away more quickly. Large format tiles also cover more area, trapping moisture and requiring longer cure times.
Risks of Wrong Timing
The consequences of misjudging the removal window are severe.
- Removing Clips Too Early: If the mortar has not achieved sufficient bond strength, the force from removing the clips will break the fragile bond. The tiles, especially heavy large format ones, will shift or sink back into the wet mortar. This completely negates the purpose of the leveling system and creates the very lippage it was designed to prevent, often requiring a full tear-out of the affected area.
- Removing Clips Too Late: Waiting several days is less catastrophic but creates its own problems. The mortar can cure to a point where it encases the clip's base like a concrete anchor. This makes the clip far more difficult to break and significantly increases the chance of it snapping high, leaving a plastic remnant in the grout joint that must be tediously removed by hand.
INFOBOX: Leveling Clips vs. Traditional Spacers: Why Removal Times Differ
A common point of confusion is the advice to remove traditional 'X' or 'T' spacers within 20-30 minutes. This does not apply to tile leveling clips.
- Traditional Spacers are passive. They simply maintain a gap and are not under tension. Removing them early has minimal consequences.
- Tile Leveling Clips are part of an active mechanical system. The wedge or cap places the clip under significant tension, actively pulling adjacent tiles into a flat plane. Releasing this tension before the mortar is cured allows the tiles to move, ruining the flat surface. They are fundamentally different tools with different rules.
How to Remove Tile Leveling Clips
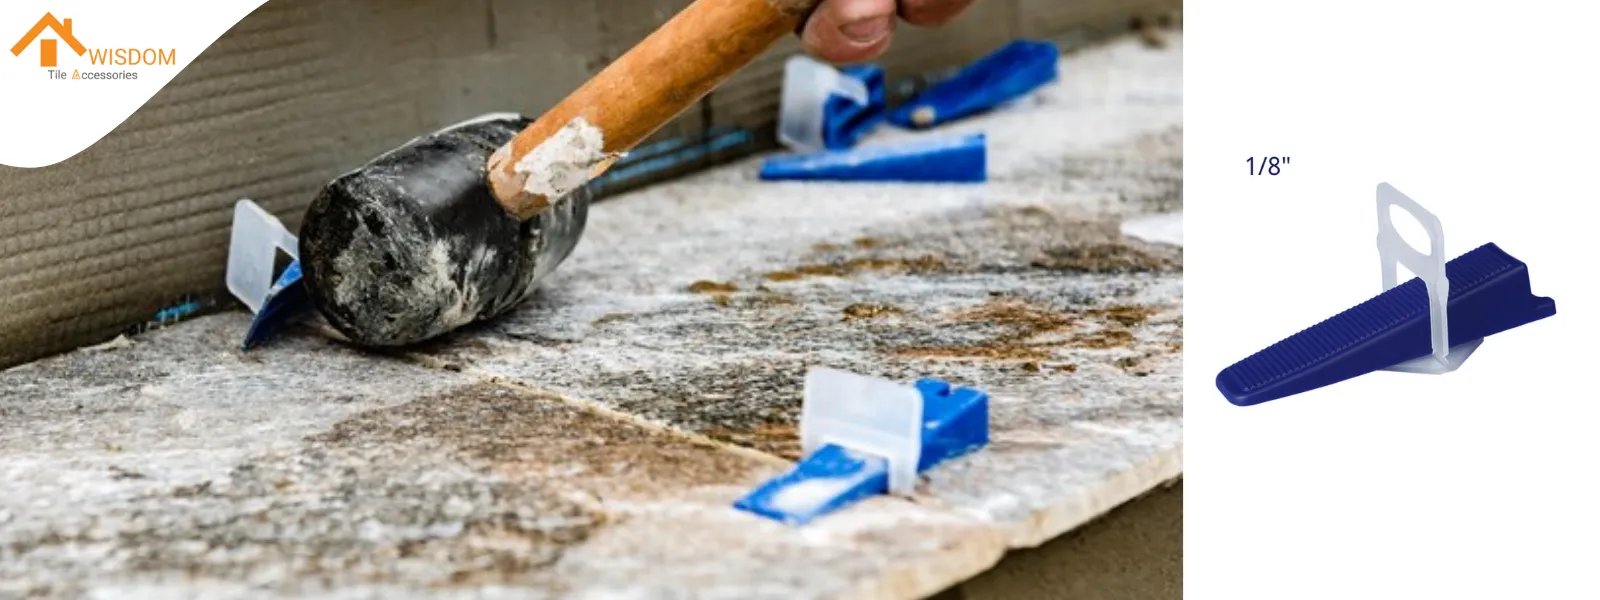
Once the mortar is properly cured, the removal process shifts from a science of timing to an art of technique. The goal is a clean, efficient break that leaves the grout joint clear and the tile unharmed. This is achieved with the right tools and a precise, repeatable motion.
Required Removal Tools
The professional’s toolkit for this job is simple but specific.
- Rubber Mallet: This is the primary and universally recommended tool. It is essential to use the soft, rubber face, not a hard plastic or steel face which can easily chip or crack the tile. The rubber mallet delivers enough force to snap the clip without transferring damaging impact to the tile itself.
- Work Boots: On floor installations, a swift kick with a sturdy work boot is a common and efficient method used by experienced tilers. The principle is the same as with a mallet, aiming for a sharp, clean strike.
- Tools to Avoid: Never use steel hammers or pliers. A hammer all but guarantees tile damage. Attempting to pry or twist a stuck clip with pliers concentrates immense pressure on the delicate tile edge, often resulting in a chip.
The Parallel Strike Technique
The single most important element of removal is the direction of the strike. The clip must be struck parallel to the grout line. This is not a suggestion; it is a directive based on the clip's design.
Every leveling clip has an engineered break-point, a small notch or thinner section of plastic at its base, designed to sit below the bottom of the tile.
- A Correct, Parallel Strike: This motion creates a clean shear force directly across that weak point. The force is focused precisely where it needs to be, causing the clip to snap cleanly as designed. The base remains hidden under the tile, and the joint is left completely clear.
- An Incorrect, Perpendicular Strike: Hitting the clip towards the tile creates a bending force. The plastic post flexes and absorbs the impact, often causing it to break at a stronger point higher up, flush with or above the tile surface. This results in the most common removal failure.
The motion itself should be quick and decisive. A sharp, crisp tap is far more effective than a long, winding swing.
Removing Clips from Walls
For vertical installations, the rubber mallet is the only viable tool. The parallel strike technique is even more crucial on walls. Gravity is not assisting the process, and any high-breaking clips will require tedious, eye-level repair work. A clean, consistent technique saves significant time and frustration.
Handling Tight Corners
In tight spaces, such as an inside corner or against a vanity where a sideways mallet swing is impossible, the technique must be adapted. The correct method is to strike the top of the wedge or cap with a sharp, downward blow from the mallet. This transfers the force vertically down the post to the break-point, achieving the same clean snap without needing lateral space.
How to Fix Common Clip Removal Problems
Even with precise technique, problems can occur on site. Knowing how to professionally diagnose and resolve these issues is a mark of true craftsmanship. This section provides field-tested solutions to the most common removal frustrations, moving beyond simple fixes to explain the reasons behind them.
Clips Breaking Too High
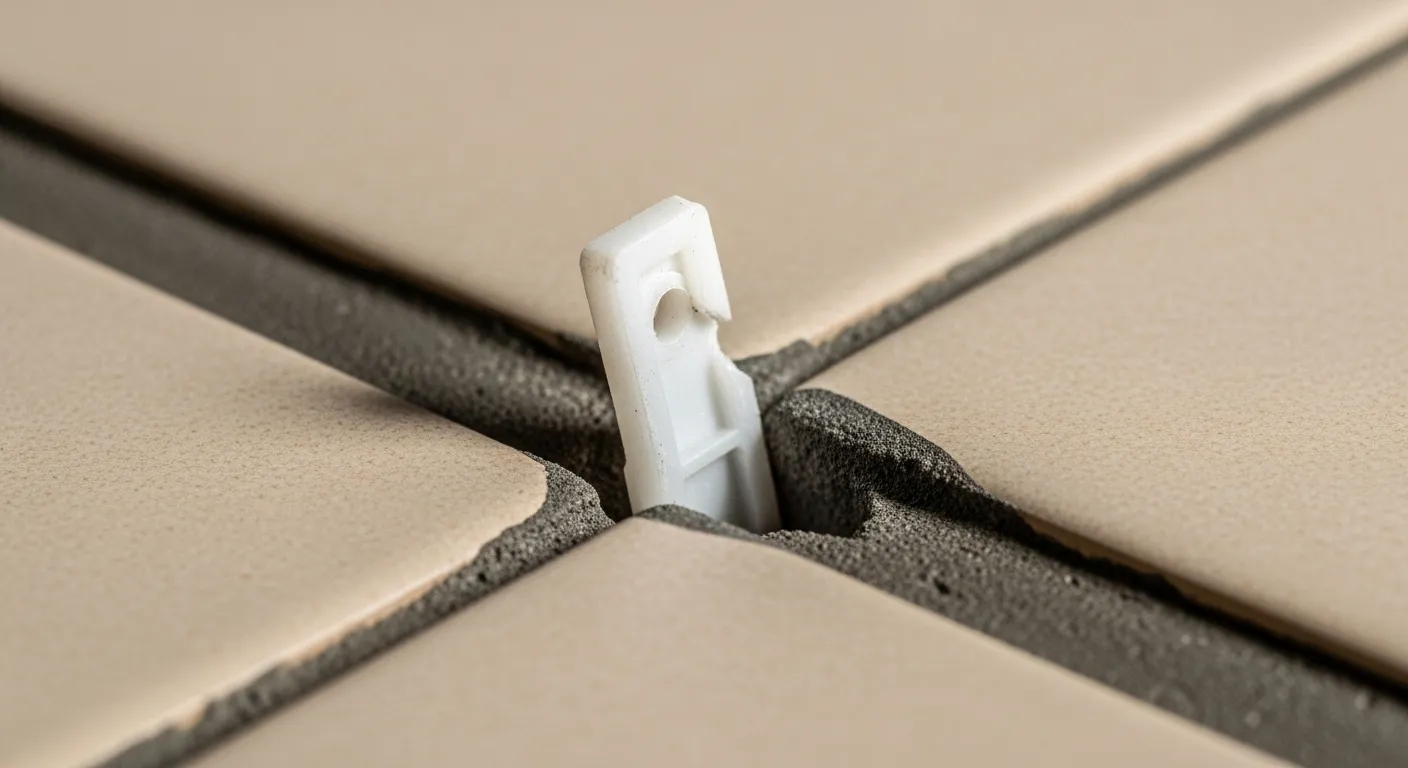
This is the most frequent and frustrating issue: a piece of the plastic clip remains lodged in the grout joint. This obstruction is not just an inconvenience; it will prevent proper grout coverage and compromise the joint's integrity. It must be removed.
Diagnosis: Understanding Why It Happens
A high break is rarely a random failure of the clip itself. It almost always stems from preventable on-site conditions.
- Excess Mortar in the Joint: This is the primary culprit. As tiles are pressed into the bed, mortar often squeezes up into the grout line. If this excess is not cleaned out while wet, it hardens into a concrete-like collar around the clip’s base. This hardened mortar effectively reinforces the clip’s engineered weak point, so the force of removal causes the clip to snap at a stronger point higher up. This is why diligent cleaning of grout lines as you work is not just about neatness, but about function.
- Incorrect Removal Technique: The second leading cause is flawed technique. Striking the clip perpendicularly towards the tile, rather than parallel along the joint, creates a bending force. The clip is designed to shear, not to bend, and this incorrect force leads directly to a high break.
Solutions: A Hierarchy of Methods
When you face a high break, approach the fix with this escalating series of professional methods:
- Manual Cutting: The first line of attack is a sharp utility knife. A long, thin blade is ideal for getting deep into the joint to carefully slice away the plastic. For wider joints or where hardened mortar is also an issue, a manual grout saw can be used to grind away both the plastic and surrounding material.
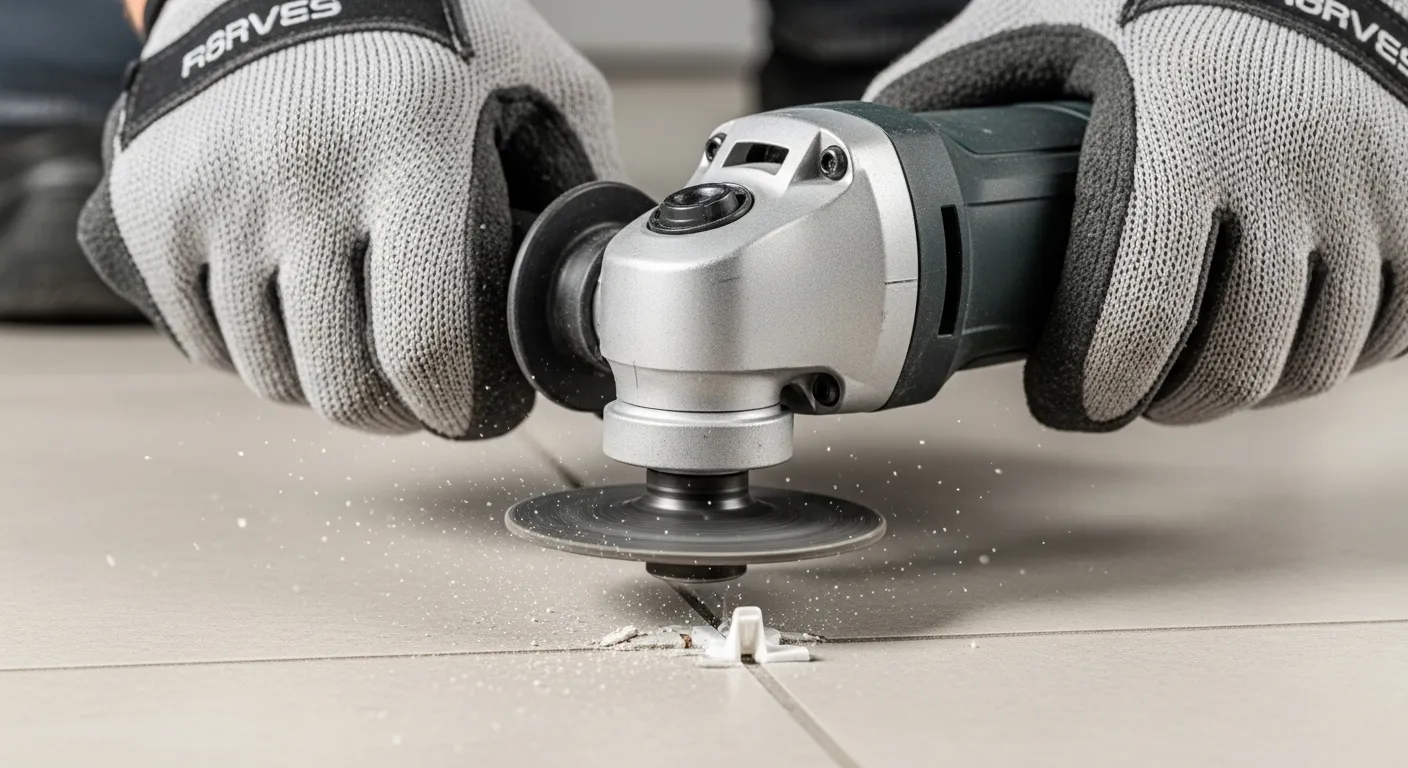
- The Oscillating Multi-Tool: When dealing with multiple failures, an oscillating multi-tool fitted with a grout removal blade is a powerful time-saver. It can quickly grind down the plastic remnant and clear the joint. This tool demands respect and a steady hand, as a careless slip can easily chip or score the tile edge.
- Thermal Application (Expert Level): This highly effective professional technique involves using a small torch or heat gun to heat a utility knife blade, then using the hot blade to melt cleanly through the plastic. This method must be approached with serious caution. It produces noxious fumes, requiring excellent ventilation, and presents a significant burn risk. Thick leather gloves and proper eye protection are mandatory.
Chipping or Damaging Tiles
A chipped tile edge is a permanent, visible flaw. Prevention is the only acceptable outcome.
Diagnosis: Identifying the Stress Points
Chipping is almost always caused by applying the wrong kind of force or pressure to a vulnerable edge.
- Improper Tools: Attempting to pry out a stuck clip with pliers is a notorious cause of chipping. The twisting motion concentrates immense pressure on a tiny point on the fragile tile edge, causing it to fracture. A steel hammer delivers a sharp, unforgiving impact that tile glaze cannot withstand.
- Unsupported Edges: If there are voids in the mortar beneath the tile (a result of poor troweling), the edge is unsupported. It has no backing to absorb the mallet strike and becomes extremely vulnerable to chipping. This underscores the importance of achieving full mortar coverage.
Prevention: The solution is entirely in the setup and execution. Use only a rubber mallet. Ensure complete mortar coverage, back-buttering tiles when necessary. For delicate, high-gloss surfaces, use compatible anti-friction shields between the leveling cap and the tile to prevent scratches and distribute pressure.
Retrofitting a Broken Clip
If a clip breaks during installation, you do not need to tear out the perfectly set tile. The professional solution is to retrofit a new clip. Using an oscillating multi-tool with a carbide blade, carefully grind a channel in the cured mortar directly beneath the unsupported tile edge. The channel only needs to be large enough to slide the flat base of a new leveling clip into position.
Troubleshooting Clip Removal: A Quick Guide
Issue | Primary Cause | Solution | Prevention |
|---|---|---|---|
High Break | Excess Mortar | Knife / Multi-Tool | Clean Joints |
Chipped Edge | Wrong Tool / Voids | (Prevention Only) | Rubber Mallet / Full Coverage |
Stuck Clip | Pinched by Tiles | Clear Mortar / Strike Hard | Use Narrower Clips |
Scratched Tile | Cap Friction | Polish / (Prevention) | Use Protection Shields |
Professional Tips for Using Leveling Systems
Beyond troubleshooting, several expert-level concepts can fundamentally improve your results and prevent problems from ever occurring.
Avoiding Voids Under Tiles
A critical misunderstanding is that leveling systems can fix an un-flat substrate. They cannot. Their sole purpose is to prevent lippage—height variation—between adjacent tiles. If you use a system to pull a low tile up to match a high one, you are creating a hollow void of un-bonded space beneath it. This unsupported tile is weak and destined to crack under load. The substrate must be flat before the first tile is set. This often requires preparatory work, such as applying a self-leveling underlayment.
Using Narrower Clips with Spacers
This is a highly effective technique used by veteran tilers to guarantee an easy clip removal. The method involves intentionally using a leveling clip that is narrower than the desired final grout joint. For instance, for a 3mm (1/8") grout line, you would use 1.5mm (1/16") leveling clips, and then use separate, traditional 3mm spacers to establish the final, correct joint width. This simple step prevents the leveling clip from being pinched between the tiles, allowing it to snap cleanly and with significantly less force.
INFOBOX: Wedge vs. Screw-Type Clips: A Quick Comparison
Both systems create flat surfaces, but their mechanics differ. Understanding this helps you choose the right tool for the job.
- Wedge Systems are often faster. Their linear force is a workhorse for standard jobs, but can sometimes push tiles apart if not used carefully.
- Screw-Type Systems can apply more controlled pressure, making them ideal for very large, heavy, or bowed tiles. Their twisting action requires a steady hand to prevent tile movement.
Neither is universally superior. The choice depends on the specific demands of your project.
Conclusion
Success with tile leveling clips boils down to this: respect the mortar's cure time, strike the clips parallel to the joint with a rubber mallet, and start with a quality system. Nearly every problem, from a clip breaking high to a chipped tile, can be traced back to a failure in one of these areas. Ultimately, using reliable Tiling Tools and a well-made Tile Leveling System is not an extra cost; it is your best defense against having to fix mistakes.
Frequently Asked Questions
Do I need a special tool to remove tile leveling clips?
No, a special tool is not required for removal. The standard and most recommended tool is a simple rubber mallet. For floor tiles, a firm kick with a work boot is also effective. The success of the removal depends on the correct technique, not a specialized device.
How many leveling clips should be used per tile?
For most standard tiles (up to 24 inches), placing one clip approximately 2-3 inches from each corner is sufficient. For large format tiles, you may need to add one or more clips along the longer sides to prevent bowing and ensure the surface remains perfectly level.
Can you grout over tile leveling clips?
No, you must never grout over tile leveling clips. The clips are designed to be removed after the mortar has cured but before the grouting process begins. Grouting over them will trap the plastic in the joint, preventing proper grout coverage and creating a weak point in the installation.
What happens if you grout over a leveling clip by mistake?
If a clip is accidentally grouted over, its removal becomes extremely difficult and risks damaging the surrounding tiles. You would need to carefully remove the hardened grout around the clip, likely with a grout saw or an oscillating multi-tool, before you could even attempt to break the clip free.


