Estimated Installation Time | 1~2 hours |
Number of Stair Nosing Types | 1 |
Installation Difficulty | Easy |
Estimated Total Cost | $1.00 to over $30.00 per square foot |
Installing metal stair nosing improves safety and protects the edges of your stairs. This guide will take you through the steps to measure, cut, and install metal stair nosing effectively, ensuring a secure fit. Let’s get started.
What is Metal Stair Nosing
Metal stair nosing is a protective edge that extends over the tread of a staircase, typically made from durable materials like aluminum or brass. Its primary purpose is to enhance safety by providing a slip-resistant surface, reducing the risk of slips and falls.
Additionally, it protects the edges of stair treads from wear and tear, increasing their longevity. Metal stair nosing often features contrasting colors or textures to improve visibility, making it particularly useful in low-light conditions.
>> See 5 Types of Nosing to Upgrade Your Stairs in 2024
Tools and Materials Needed
How to Install Metal Stair Nosing
Step 1: Measure the Stair Treads
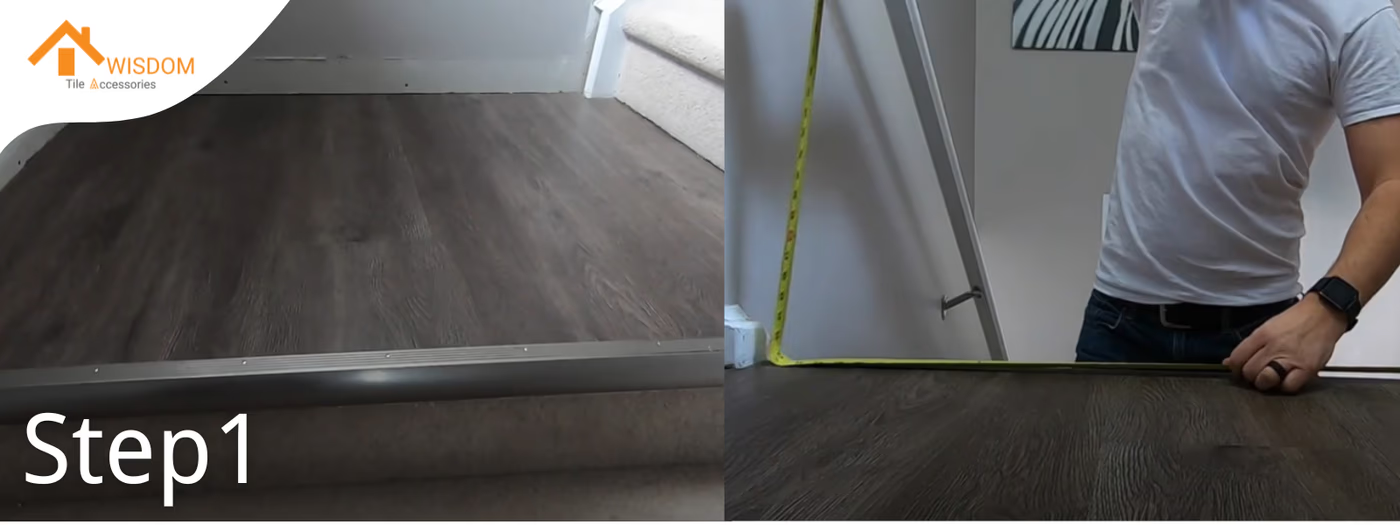
To install metal stair nosing, start by using a measuring tape to determine the exact length and width of each stair tread. Measure from the front edge to the back of the tread to get the correct length, and measure the width at its widest point. Make sure to note any variations between steps, as they may differ in size. Clearly mark your measurements with a pencil or marker.
Step 2: Cut the Metal Nosing
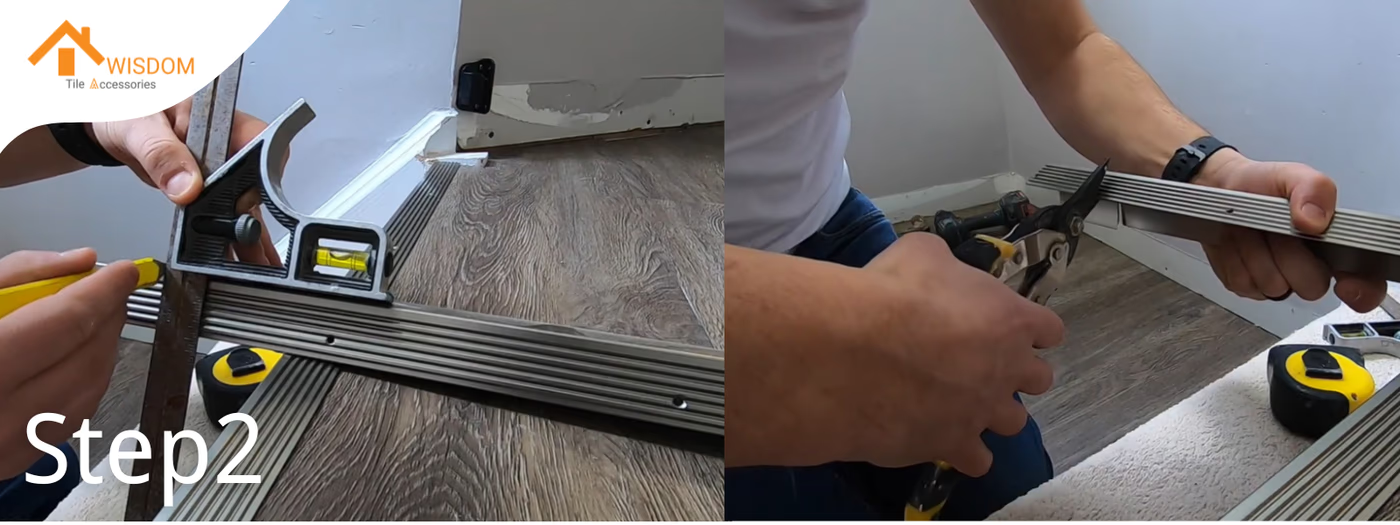
Cut the metal nosing to size using a steel saw, which is ideal for this material. If you have a miter saw, it can provide more precise cuts. Measure twice before cutting to ensure accuracy. It's advisable to cut the nosing slightly longer than needed; you can always trim it down for a perfect fit later.
Step 3: Prepare the Stair Tread
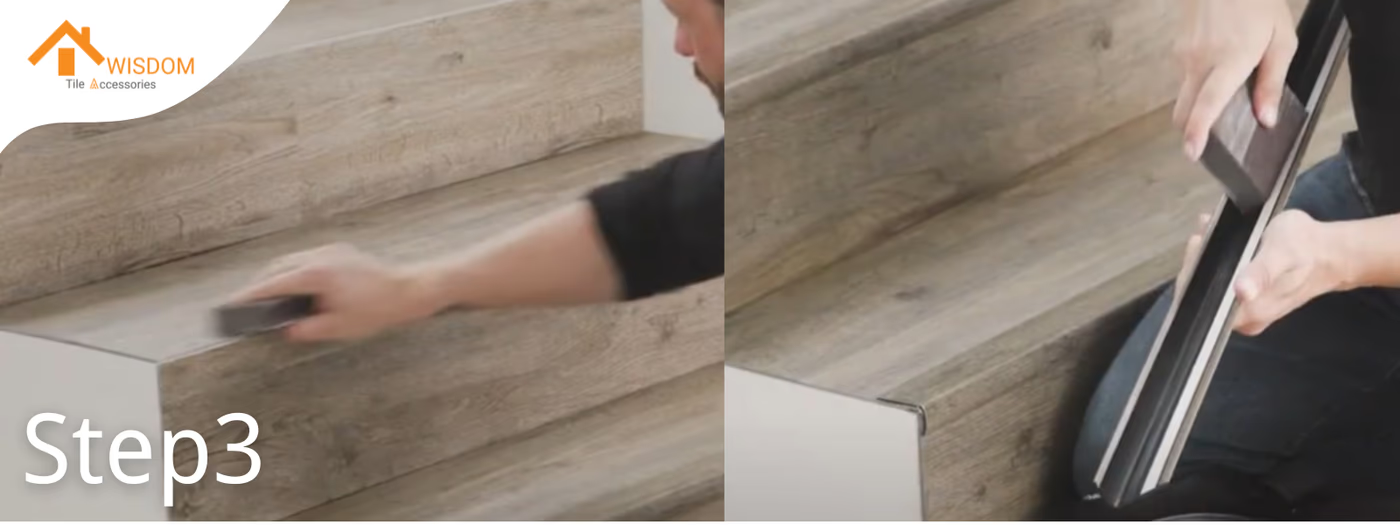
Before installing the metal stair nosing, thoroughly clean the stair tread to eliminate any dust, debris, or remnants of old adhesive. Use a vacuum or a damp cloth for effective cleaning. If the stairs are wooden, inspect for cracks or damage; fill any imperfections with wood filler and allow it to dry completely.
For concrete stairs, ensure the surface is smooth and free from loose material. If needed, apply a primer to enhance adhesion, particularly if the surface condition is compromised. Properly preparing the stair tread will ensure a strong bond for the new nosing, leading to a safer and more durable installation.
Pro Tips:
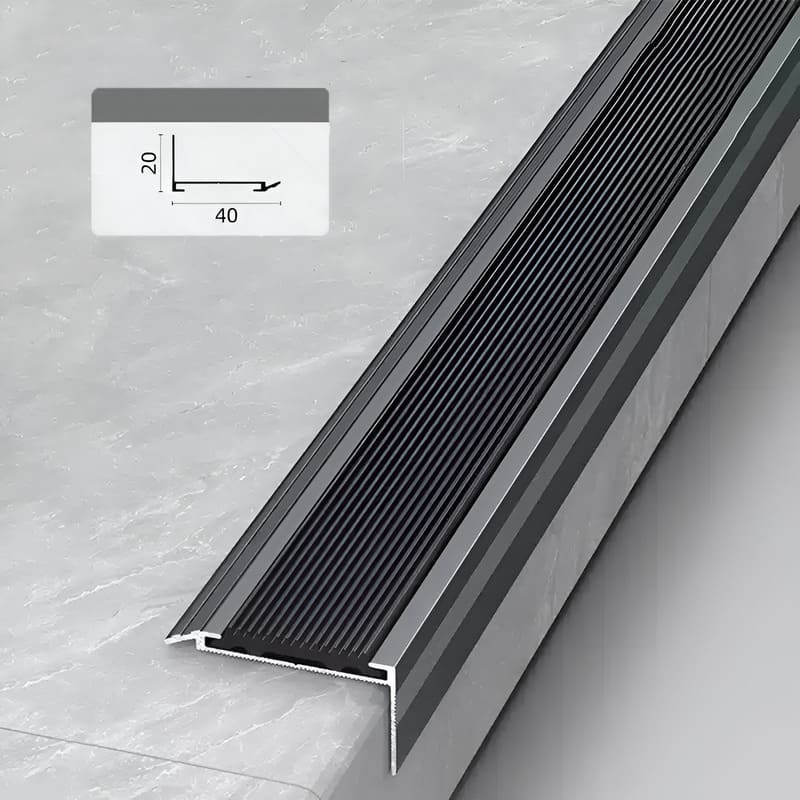
When installing stair nosing on concrete, consider using specially designed products that are easier to install and more effective. These nosings often feature anti-slip surfaces and are tailored for concrete applications, ensuring a secure fit. Look for options that include pre-drilled holes or adhesive backing, which can simplify the installation process. Additionally, using a primer can enhance adhesion, especially if the concrete surface is less than ideal. By choosing the right stair nosing, you’ll improve safety and durability while making the installation process smoother and more efficient.
Step 4: Dry Fit the Nosing
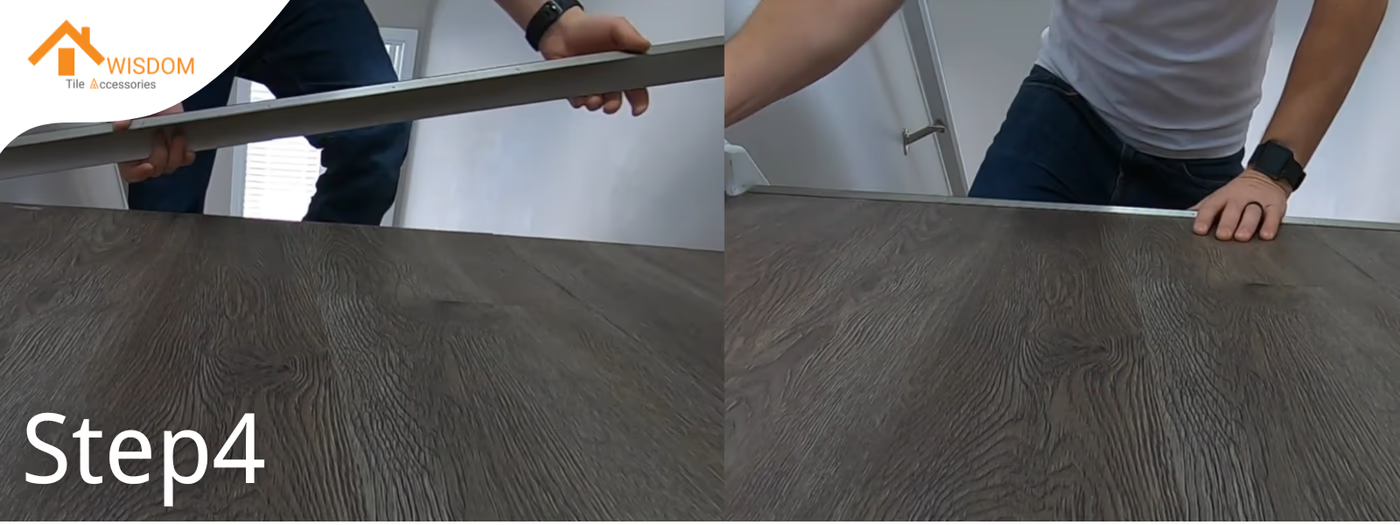
Position the cut metal nosing on the stair tread to verify the fit. Ensure it aligns correctly with the edges of the tread and covers the entire width. If the nosing extends beyond the tread or doesn’t sit flush, make any necessary adjustments by trimming it further. A snug fit is essential for effective installation, so take your time to ensure that it sits evenly and securely before proceeding to the next step. This dry fitting process helps prevent issues during final installation and ensures a clean, professional look.
Step 5: Pre-drill Holes
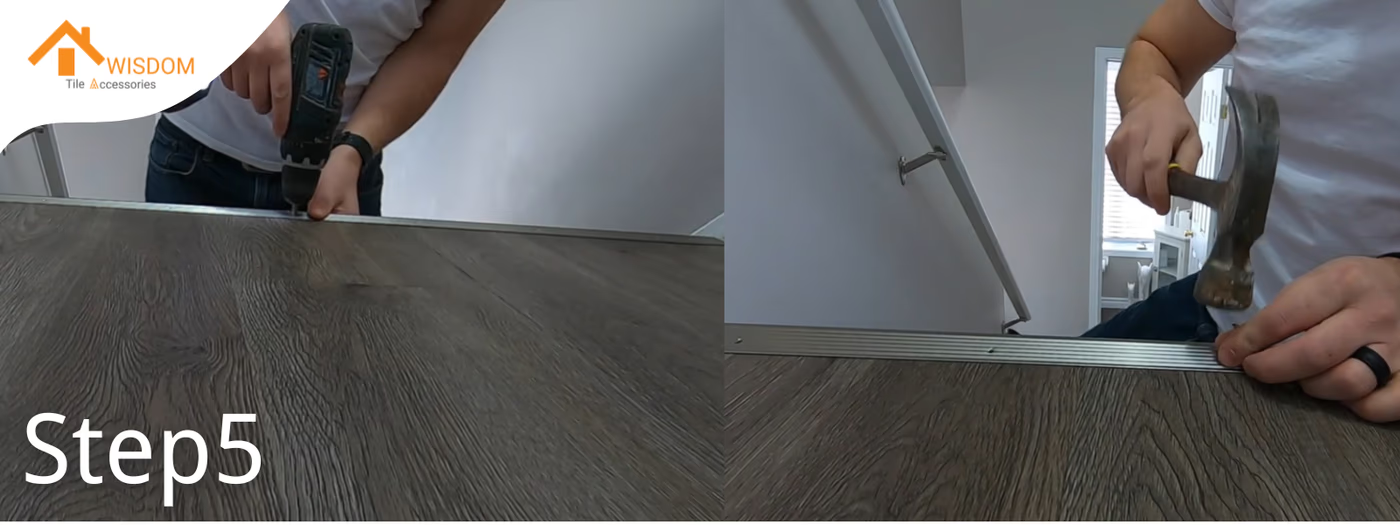
Identify where to drill holes in the metal stair nosing by marking points approximately 50mm from each end and then every 250mm along its length. This spacing ensures stability and proper attachment. Pre-drilling these holes is important, as it helps prevent screws or nails from bending during installation, particularly in dense materials.
Use a drill bit that matches the size of your fasteners to create precise pilot holes. This careful preparation will facilitate a smoother installation process and enhance the durability of the nosing once installed.
Step 6: Apply Adhesive (Optional)
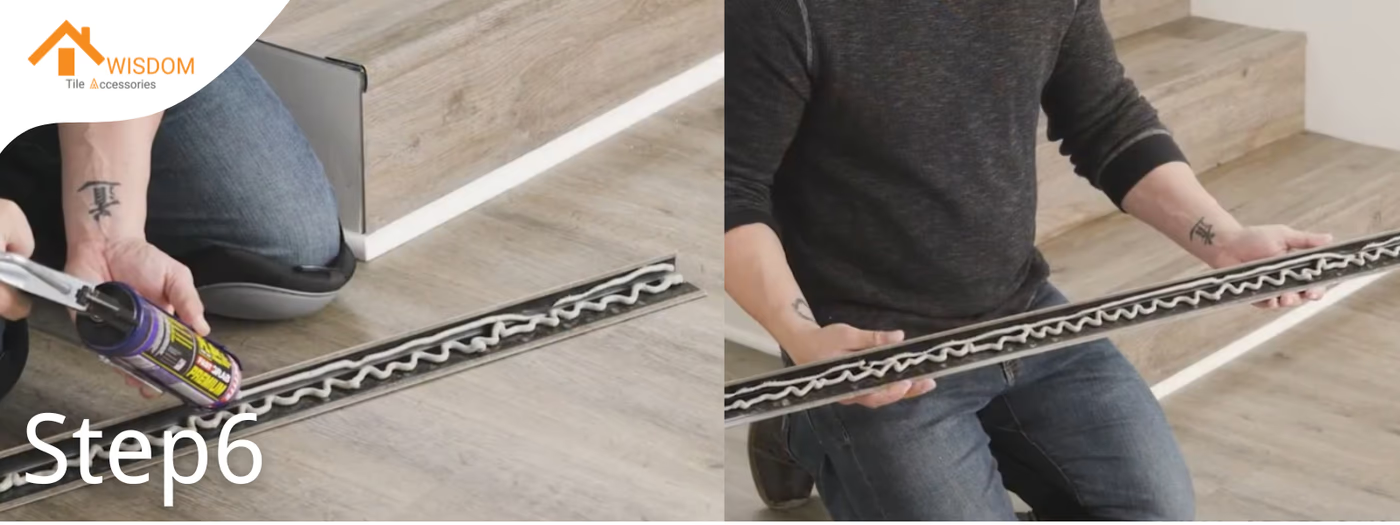
If you want to boost the bond between the metal stair nosing and the tread, consider adding a bead of construction adhesive along the underside of the nosing. This extra step can be especially helpful in busy areas where foot traffic is heavy.
Use a caulk gun to apply an even line of adhesive, making sure not to overdo it—too much can create a mess on your stairs. After applying the adhesive, check the product instructions for how long it needs to set before you fasten everything down. This simple addition can help keep your nosing securely in place for years to come.
Step 7: Secure the Nosing
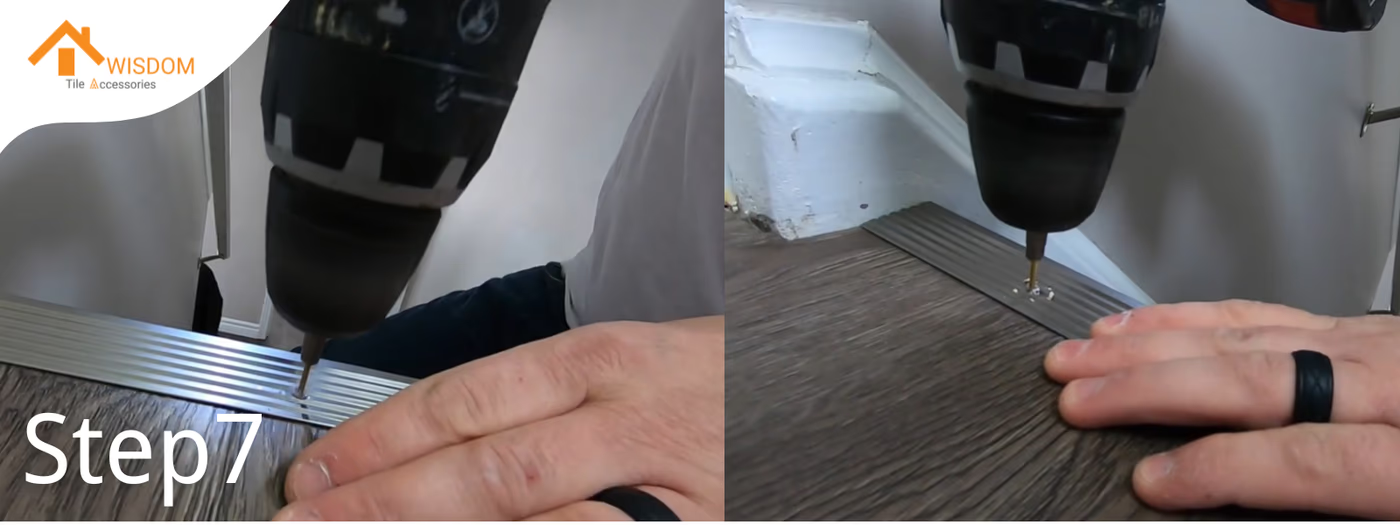
Carefully place the metal nosing on the stair tread, making sure it lines up with the front edge and covers the entire width. Once you’ve got it in position, use screws or nails to hold it in place, starting from the center and working your way outwards.
This method helps prevent any shifting or warping. Be careful not to over-tighten the fasteners, as this could damage the nosing or tread. After securing everything, take a moment to double-check that the nosing is aligned properly. A good fit will keep your stair nosing secure and looking great for years to come.
Step 8: Final Touches
Once all fasteners are secured, check that everything is tight and flush with the edge of the stairs. If you used adhesive, follow the manufacturer’s guidelines for curing time. Allow the adhesive to set fully before letting anyone walk on the stairs. After confirming that everything is secure and the adhesive has cured, your metal stair nosing will be ready for use.
Step 9: Clean Up
After finishing the installation, quickly wipe away any excess adhesive with a damp cloth before it dries. This helps keep your stairs looking neat and prevents sticky spots from forming. Take a moment to check that all edges of the metal stair nosing are smooth and free from sharp edges. A clean finish not only looks better but also helps avoid tripping hazards for anyone using the stairs. These final touches will ensure that your staircase is both safe and visually appealing.
FAQs About How to Install Metal Stair Nosings
What should I do if my stair nosing starts to come loose?
If your stair nosing becomes loose, it’s important to address it immediately to prevent accidents. Check the fasteners and tighten any screws or nails. If the adhesive was used, consider reapplying it and allowing it to cure properly.
How can I choose the right type of stair nosing for my environment?
Consider factors such as foot traffic, exposure to moisture, and the type of surface (e.g., concrete, wood). For high-traffic or wet areas, look for nosings with slip-resistant features and durable materials that can withstand wear.
Are there specific maintenance tips for metal stair nosing?
Regularly inspect your stair nosing for signs of wear or damage. Clean it periodically to remove dirt and debris, and tighten any loose screws or fasteners as needed. Address any issues promptly to maintain safety.
Can I install metal stair nosing over existing carpet?
Installing metal stair nosing over carpet is generally not recommended, as it may not adhere properly and could create a tripping hazard. It's best to install nosing on a clean, hard surface for optimal performance.
What are the common mistakes to avoid when installing stair nosing?
Common mistakes include not measuring accurately, skipping the cleaning step, and failing to pre-drill holes for screws. Additionally, neglecting to follow manufacturer instructions can lead to improper installation and safety issues.
Is it necessary to use adhesive along with screws when installing stair nosing?
While using screws alone can secure the nosing, applying adhesive can provide extra stability, especially in high-traffic areas. It helps prevent movement and enhances the overall bond between the nosing and the tread.
How do I know if my stair nosing is suitable for outdoor use?
Check the manufacturer's specifications for outdoor suitability. Look for materials that are weather-resistant and designed to withstand moisture and temperature fluctuations without deteriorating.
What should I do if my metal stair nosing gets scratched or damaged?
For minor scratches, you can often buff them out with a fine abrasive pad or polish designed for metal surfaces. For more significant damage, consider replacing the affected section of the nosing to maintain safety and appearance.


