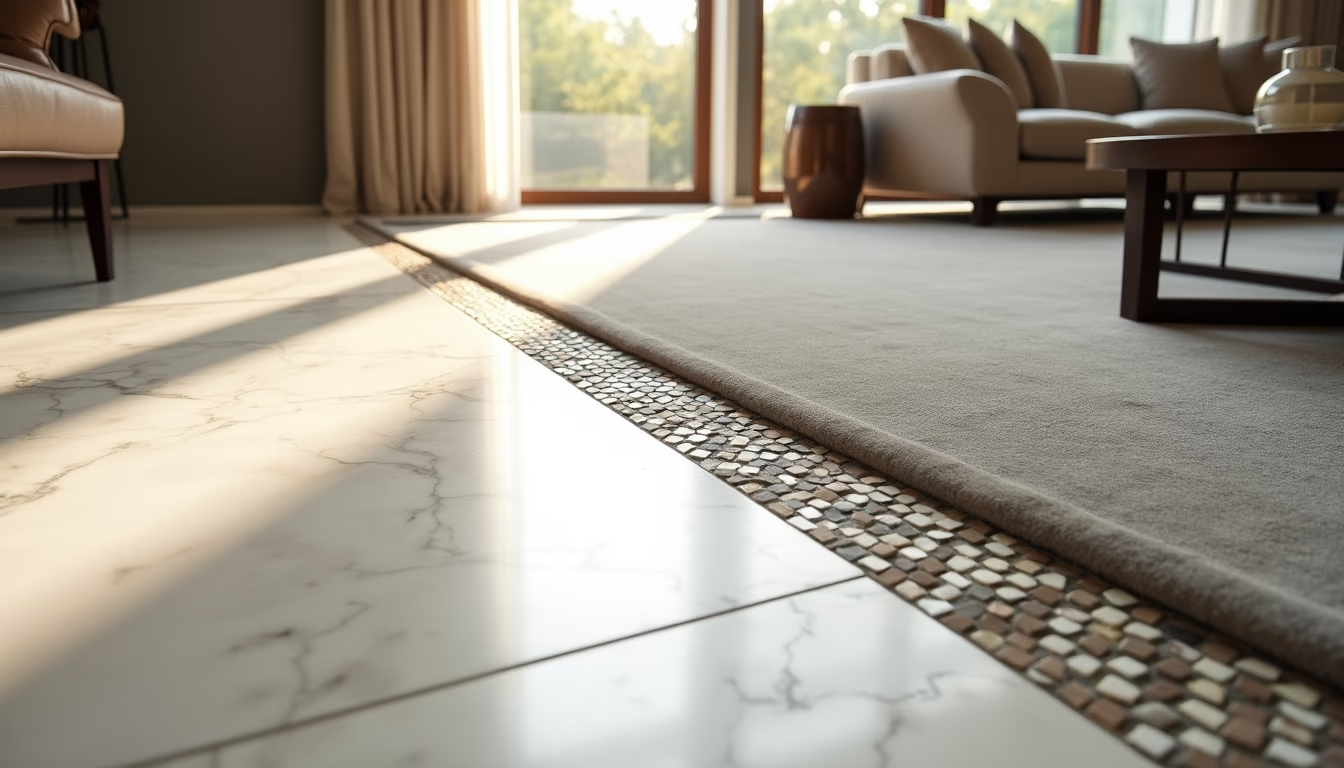
Have you noticed how an awkward carpet to tile transition can make even the most beautiful rooms feel incomplete? That harsh line between different flooring materials might be the one detail keeping your space from true elegance.
You have more options than those simple metal strips, and that's the good news. Modern flooring transition types have evolved into design features themselves - from sleek Z-bars to artistic mosaic borders. These carpet to tile transition ideas can turn tricky floor junctions into stunning design elements when you want to lift your home's esthetic or handle different heights.
Would you like to find 7 stylish solutions that will naturally blend your flooring surfaces? We'll explore these contemporary options that bring both style and function to your modern home.
Premium Z-Bar Transitions
Z-bar transitions are among the most secure and polished options you'll find to create a professional-grade solution between carpet and tile. The name comes from its distinctive Z-shaped profile, which blends both function and style.
Z-Bar Design Features
Z-bar transitions shine because of their clever design. The profile has a hooked base plate that grabs your carpet from below, and the visible top section creates a clean line between your carpet and tile. This option is a great choice because it knows how to bridge different height gaps between your flooring surfaces.
Your Z-bar transition includes these essential features:
- A hidden hook system that locks carpet edges
- A visible top bar that measures 25-40mm wide
- Built-in height adjustment features
- Protection for both carpet and tile edges
Material Options
Z-bar transitions come in several premium materials:
- Premium Brass: The gold standard that lasts
- Aluminum: A light, flexible choice that's easy to handle
- Specialized Variations: Made for extra-thick carpets
Installation Process
The installation needs careful attention, but follows a straightforward path. The base plate must be secured to your subfloor with nails or adhesive. The order matters - you should lay the carpet before the tile to get the best results.
Remember these installation points:
- Your hooked base plate must sit flat on the subfloor
- Keep the carpet underlay away from the Z-bar
- The carpet alone should fit over the hooks
Floor heights that don't match perfectly aren't a problem. The system usually includes shims to raise the base plate just enough. Larger height differences can be fixed with special chocks or shims under the bar to smooth out the transition.
Z-bar transitions work double duty - they create a clean break between surfaces and act as carpet grippers in doorways. This helps maintain proper carpet tension and stops wrinkles from forming.
Decorative Threshold Strips
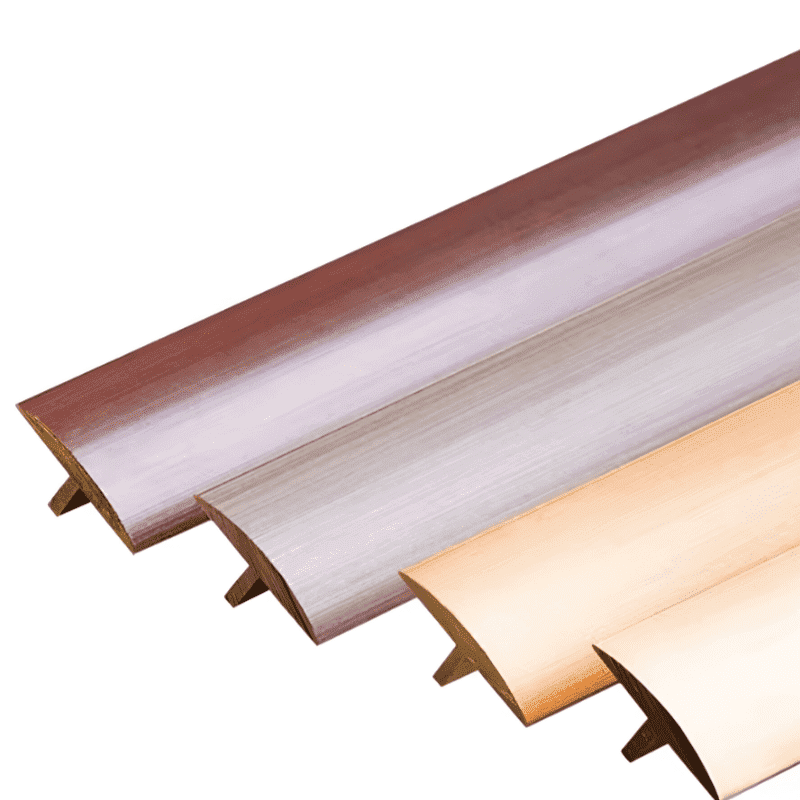
Threshold strips bridge the gap between carpet and tile flooring with a classic touch. These decorative transitions connect different flooring materials and add an elegant finish to your space.
Threshold Design Patterns
Threshold strips can make your doorways more sophisticated. You'll find designs that match your home's esthetic perfectly. Modern profiles and traditional patterns will boost your space's visual appeal. The strips cover transition gaps and stop dirt and moisture from getting under your flooring.
Material Choices
The material you pick for your threshold strip will affect its durability and style:
- Premium Marble: San Dona polished marble delivers a pearly-white finish that suits upscale spaces
- Natural Travertine: Bucak Light Walnut shows off a sandy brown tone that creates warmer esthetics
- Aluminum Options: Delivers excellent durability with multiple finish choices
- Vinyl Varieties: Works great in moisture-prone areas with its water-resistant properties
Prices vary between materials. Premium marble options like Calacata Evora cost around $156.69 for a 4 x 44-inch piece. Budget-friendly aluminum or vinyl options cost nowhere near as much.
Installation Guidelines
The best results come from careful installation of threshold strips. Clean and prepare your subfloor before you begin. Most installations need these steps:
- Take out existing transition strips without damaging nearby flooring
- Clean between floor materials
- Match your transition strip channel to the right size
- Pick the right adhesive for your material
Marble or travertine thresholds need extra care with height differences. These materials usually come in .75-inch thickness. This thickness helps manage small variations in floor heights.
Threshold strips work best when they fit your doorway or transition area properly. A good fit creates comfortable walking spaces and prevents people from tripping. Your chosen strip should look great and handle any height differences between carpet and tile surfaces effectively.
Seamless Height Adjusters
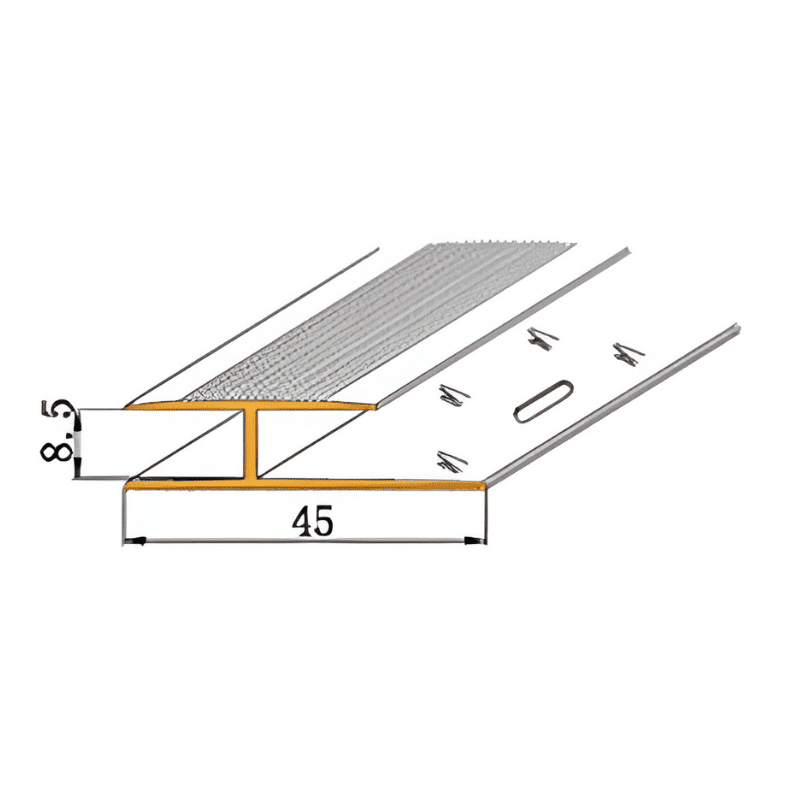
Need a solution for uneven floor heights between carpet and tile? Height adjusters could be your perfect answer to create smooth, safe transitions between different flooring materials.
Height Adjustment Features
Height adjusters prevent people from tripping where floor heights don't match up. Today's adjusters are incredibly versatile and can handle adjustment ranges from 1 to 12 centimeters. You can fix almost any height difference between carpet and tile surfaces with this range.
These features make height adjusters really stand out:
- An arm design that saves you effort during adjustments
- Strong weight-bearing capacity for tough applications
- Precise leveling to get everything lined up perfectly
- Safety features built right in to stop slipping
Material Selection
The quality of materials substantially affects your height adjuster's performance. Premium-grade steel options last longest in high-traffic areas. Here's what to think over when picking materials:
- Traffic Volume: Tough steel works best in busy spots
- Environment: Bathroom installations need moisture-resistant options
- Visual Appeal: Pick finishes that match your floors
- Load Requirements: Choose the right weight capacity for your needs
Your height adjuster's build quality determines how well it works. Look for options that work for both DIY and industrial projects to get professional results.
Maintenance Requirements
Your height adjusters don't need complex maintenance. A quick sweep and occasional wipe with a damp cloth usually does the job. Here's what you should do:
- Skip harsh, abrasive cleaners that might harm the surface
- Check for loose parts regularly
- Fix any damage right away to stay safe
- Keep adjustment mechanisms clean and working well
Good maintenance goes beyond cleaning. Check your height adjusters periodically to make sure they haven't moved because of foot traffic or temperature changes. This matters even more where floating flooring meets tile since these materials expand and contract differently as temperatures change.
The best results come from proper installation from day one. Any wobbling or instability needs immediate attention - waiting only makes things worse.
Mosaic Border Transitions
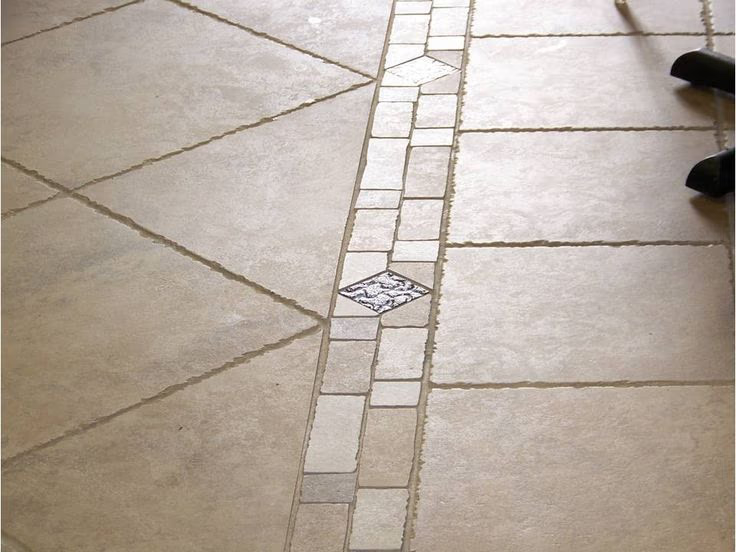
Want to make your floor transitions stand out? Mosaic border transitions blend functionality with decorative flair and turn a simple floor junction into a stunning design feature.
Mosaic Pattern Options
The right pattern choice can make your mosaic transition a conversation starter. Bold geometric statements or intricate designs that look like area rugs - your options are limitless. Here are some eye-catching choices to think about:
- Custom Inlays: Create unique designs with custom-cut subway tiles in white, gray, and steel
- Geometric Patterns: Modern sophistication comes alive with hexagonal tiles in contrasting colors
- Decorative Borders: Your transition can become an artistic strip that enhances surrounding materials
- Flower-Looking Patterns: Blue and white floral designs add charming visual appeal
Material Combinations
Mosaic transitions shine in their versatility with materials. Your material choices will affect both durability and visual appeal of the transition area. These transitions work great with:
Primary Materials:
- Porcelain tiles for high-traffic areas
- Glass tiles for decorative accents
- Natural stone for luxury appeal
Your carpet and tile surfaces should guide your material selection. The best combinations create visual harmony without sacrificing practical functionality.
Installation Steps
A perfect mosaic border transition needs attention to detail. Here's a step-by-step guide to help you achieve professional results:
- Surface Preparation: A perfectly level and smooth surface prevents future cracking
- Layout Planning: Work outwards from the center for symmetrical results
- Adhesive Application: Apply adhesive with a notched trowel in modest amounts
- Sheet Installation: Place mosaic sheets with spacers to keep gaps uniform
- Edge Finishing: Precise fits need careful cutting of mesh backing with scissors or utility knife
- Grouting: Let the installation set for 24 hours before applying grout
Bathrooms and kitchens need quality sealant to protect your investment. This step keeps your beautiful mosaic transition pristine for years.
Note that mosaic installations need more attention to detail than simpler options. The stunning results make it worth the extra effort. Your mosaic border will serve as both a practical solution and an artistic focal point that enhances your space.
Multi-Level Transition Systems

Multi-level transition systems excel at managing different floor heights in your home. These adaptable systems give you precise adjustments that simple transition strips can't deliver.
Level Adjustment Features
The adjustable covering leg in your multi-level transition system handles various height differences. These systems can tackle height variations from 8mm to 20mm. This makes them ideal for tricky transitions.
A ball-and-socket joint mechanism sits at the core of these systems. It lets you make smooth adjustments between different floor heights. The transition arm lines up perfectly with adjacent flooring, so you won't need to worry about trip hazards.
Design Options
You'll find several premium material and finish choices:
- Anodized aluminum with various color options
- Standard aluminum for affordable solutions
- Satin-finished variants for modern esthetics
- Heavy-duty options for high-traffic areas
These systems create a joint-free transition whatever your tiled surface's height relative to the carpet. You'll get a clean, professional look that boosts your home's overall appeal.
Installation Process
Your multi-level transition system needs careful installation, but you'll love the results. Here's a step-by-step breakdown:
- Select the appropriate profile based on your tile thickness
- Apply adhesive using a notched trowel where the profile will sit
- Press the perforated anchoring leg into the adhesive
- Add additional adhesive over the anchoring leg
- Embed tiles flush with the profile top
- Fill joints between profile and tile with grout
- Place the adjustable arm onto adjacent flooring
Back-filling the adjustable arm with mortar works great for high-traffic areas. This extra step adds stability and makes your transition last longer.
The dual functionality makes these systems stand out. They bridge height differences and protect your carpet and tile flooring edges. Your flooring lasts longer while keeping its smooth appearance.
These multi-level transition systems handle tough challenges well, including garage entrances or loading docks. They work great in homes and businesses where you need both durability and style.
Flush Mount Transitions
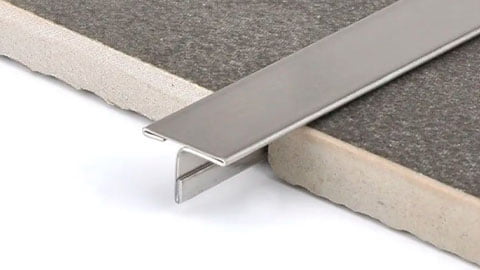
Looking to create uninterrupted transitions between your carpet and tile? Flush mount transitions are one of the most elegant ways to join different flooring materials without noticeable height differences.
Flush Mount Types
We used reducer moldings and t-moldings as the main options to serve specific transition needs. Reducer moldings create a gentle, barely-there incline that smoothly connects your floors. These transitions work especially when you have floors of slightly different heights, with gaps typically ranging from 1/4 inch to 1/2 inch.
T-moldings, which get their name from their distinctive T-shaped profile, are a great way to get coverage and stability. The 'pole' of the T slips into the space between your flooring materials, while the top creates a smooth bridge. This design works best for:
- Joining floors of equal height
- Creating expansion joints
- Managing high-traffic areas
Material Selection
As you choose your flush mount transition, you'll find materials of all types to match your needs:
Premium Options:
- Solid wood species (cherry, maple, oak)
- Brass to last longer
- Natural stone for a luxury feel
Budget-Friendly Choices:
- PVC (polyvinyl chloride) that lasts long
- Aluminum for lighter applications
- Vinyl that works well in wet areas
Each material brings unique benefits. To name just one example, PVC transitions meet ADA requirements and last long, while wood transitions match your existing flooring with the right stain.
Installation Guidelines
Your flush mount transition needs careful attention to detail for the best results. Here's what you should know:
- Surface Preparation
- Your subfloor must be clean and level
- Both flooring materials need proper installation
- Height differences should stay within range
- Installation Method
The way you install depends on your transition type:
- Reducer moldings need careful positioning with the lower end meeting flush with lower flooring
- T-moldings work best with precise center placement
- Some transitions stick better with specialty adhesive
Note that proper installation is a vital part of making your transition last. Areas with wheeled traffic need transitions built to handle such stress. All but one of these moldings need some craftsmanship to modify them on-site, so take time to get that perfect fit.
Pro tip:
Bathrooms and kitchens need water-resistant materials. Make sure all seams have proper sealing to stop water damage.
Customizable Edge Profiles
Reshape your carpet to tile transition into a customized design statement with adaptable edge profiles. These versatile options help you create transitions that match your interior style perfectly and give you professional-grade durability.
Edge Profile Designs
Looking to make your flooring transition pop? The options are way beyond the reach and influence of standard strips. Modern edge profiles give you an impressive array of design possibilities. You can choose from decorative lines within tile coverings to elegant borders that complement showrooms and galleries.
These profiles are specifically designed for:
- Decorative Accents: Create striking visual lines between different flooring materials
- Height Variations: Handle elevation changes from 8mm up to 20mm
- Corner Protection: Shield vulnerable edges while adding visual appeal
- Custom Color Matching: Match your existing grout colors or create unique color schemes
Many premium profiles feature the trapezoid-perforated anchoring leg design. This design will give a secure fit for your transition and protects tile edges from damage.
Material Options
Material choice affects both the durability and look of your transition by a lot. Modern manufacturers offer profiles in premium materials of all types. Each brings unique benefits to your project:
Premium Materials:
- Anodized aluminum: Great for abrasion and chemical resistance
- Solid brass: Superior durability for high-traffic areas
- Stainless steel: Perfect for moisture-prone locations
- PVC options: Budget-friendly solutions
These materials stand out because they handle daily wear while keeping their looks. The anodized finish options resist both chemical exposure and general corrosion exceptionally well.
Installation Methods
The installation of your adaptable edge profile needs attention to detail. The process becomes simple when you follow these steps:
- Pick your profile height based on tile thickness
- Apply thin-set mortar using the right sized notch trowel
- Press the perforated anchoring leg into the mortar
- Trowel additional thin-set over the anchoring leg
- Set tiles flush with the profile top
- Leave a consistent joint of 1/16" - 1/8"
The best results come when your profile sits about 1/32" lower than the tiled surface. This small difference creates a professional finish and maintains functionality.
Bathrooms or kitchens need profiles with specialized moisture protection features. These designs stop water seepage between flooring materials. Your transition stays pristine even in tough environments.
Your adaptable edge profile does more than just basic transition work. Good installation lets it work as an expansion joint. It protects your flooring from temperature-related stress and maintains an elegant look. This dual purpose makes it a smart investment for both homes and businesses.
Note that exact measurement is vital for success. Calculate the exact length needed and add a few millimeters for final adjustments. This detail ensures your custom edge profile fits perfectly and works well for years.
Comparison Table
Transition Type | Material Options | Key Features/Design Elements | Installation Complexity | Height Adjustment | Recommended Applications |
|---|---|---|---|---|---|
Premium Z-Bar | Brass, Aluminum | Hook system tucked away, 25-40mm wide top bar and edge protection | Needs precise base plate setup | Built-in adjustability | Busy areas, Keeps carpet tight |
Decorative Threshold | Marble, Travertine, Aluminum, Vinyl | Design patterns that block dirt and moisture | Needs clean subfloor prep | Up to .75-inch thick | Entryways, Luxury spaces |
Seamless Height Adjusters | Premium-grade steel | Arm design saves work time and levels precisely | Basic setup with regular upkeep | Adjusts 1-12cm | Heavy use areas with high foot traffic |
Mosaic Border | Porcelain, Glass, Natural stone | Custom inlays with geometric patterns and borders | Takes multiple steps plus grouting | Fixed height | Spaces focused on design, Wet areas |
Multi-Level Systems | Anodized aluminum, Standard aluminum | Ball-and-socket joint creates smooth transition | Multiple installation phases | Adjusts 8-20mm | Busy commercial spaces |
Flush Mount | Wood, Brass, PVC, Aluminum | T-shaped or reducer profiles bridge smoothly | Needs exact positioning | Adjusts 1/4 to 1/2 inch | Same-height floors, High traffic zones |
Customizable Edge | Anodized aluminum, Brass, Stainless steel, PVC | Decorative touches with trapezoid anchoring | Detailed setup needed | Adjusts 8-20mm | Wet areas, Display rooms |
Conclusion
A well-chosen carpet to tile transition can turn a basic detail into an eye-catching design feature. Your space can benefit from different transition options. Z-bar transitions provide professional-grade security, while mosaic borders add an artistic touch. Premium materials such as brass and marble will last longer, and modern multi-level systems can handle challenging height differences.
Several factors will shape your perfect transition choice. You should think over your space's traffic patterns, moisture exposure, and existing design elements. Durable options like premium Z-bars or flush mount transitions work best in high-traffic areas. Custom edge profiles or mosaic borders can make decorative spaces stand out.
Note that installation quality matters just as much as your material choice. Your surfaces need proper preparation, and manufacturer guidelines should be followed carefully. This attention to detail will give your chosen transition lasting beauty and functionality.
Want to upgrade your flooring transitions? These seven options show that practical solutions can look stylish too. Choose a transition type that fits your needs, and this simple upgrade will lift your entire space.
FAQs
Q1. What are some stylish options for transitioning between carpet and tile?
There are several stylish options, including premium Z-bar transitions, decorative threshold strips, seamless height adjusters, mosaic border transitions, multi-level transition systems, flush mount transitions, and customizable edge profiles. Each offers unique benefits in terms of design, functionality, and ease of installation.
Q2. How do I choose the right transition for high-traffic areas?
For high-traffic areas, consider durable options like premium Z-bar transitions, flush mount transitions made of brass or PVC, or multi-level transition systems. These options offer excellent wear resistance and can withstand frequent foot traffic while maintaining their appearance and functionality.
Q3. Can transition strips help with uneven floor heights?
Yes, several transition options can address uneven floor heights. Seamless height adjusters can manage differences from 1 to 12 centimeters, while multi-level transition systems typically handle variations from 8mm to 20mm. These solutions ensure a smooth, safe transition between different flooring materials of varying heights.
Q4. Are there waterproof options for transitions in moisture-prone areas?
Absolutely. For moisture-prone areas like bathrooms or kitchens, consider transitions made of water-resistant materials such as vinyl, PVC, or stainless steel. Customizable edge profiles and certain flush mount transitions also offer specialized moisture protection features to prevent water seepage between flooring materials.
Q5. How can I make my floor transition a design feature?
To turn your floor transition into a design feature, consider options like mosaic border transitions or customizable edge profiles. Mosaic borders allow for intricate patterns and designs, while customizable edge profiles offer various decorative accents and color-matching possibilities. These options can complement your interior style and serve as an artistic focal point in your space.


