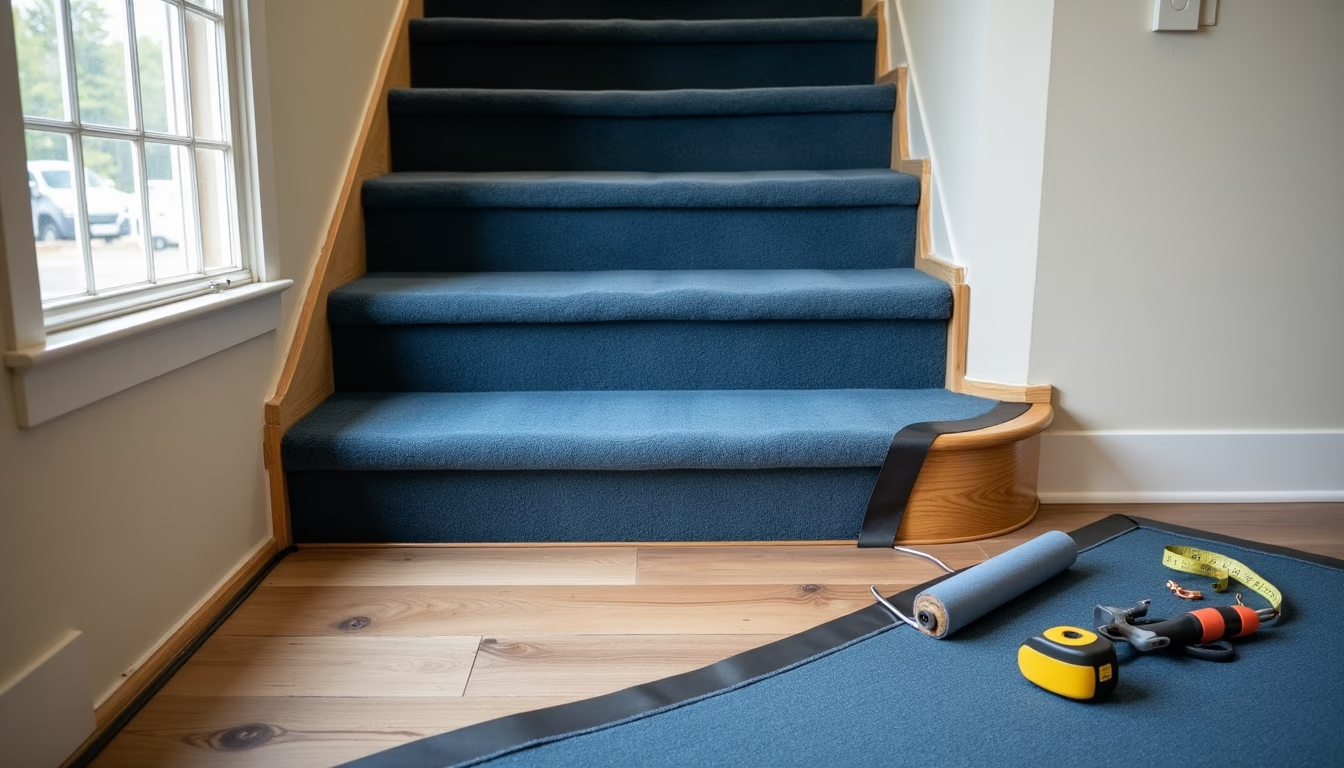
Carpeted bullnose treads add safety and style to your stairs during renovations or new construction. These unique stair coverings blend carpet's comfort with a rounded front edge that creates an elegant look and ensures secure footing.
The installation process needs careful preparation and attention to detail. Your stair coverings' life span and appearance depend on choosing the right type of bullnose carpet treads and getting accurate measurements. A proper installation can substantially extend their durability and keep them looking great.
This piece guides you through installing carpeted bullnose treads, from preparation to finishing touches. You'll discover the right tools, techniques, and professional tips to create a polished, long-lasting result.
Understanding Carpeted Bullnose Treads
Carpeted bullnose treads are a specialized type of stair covering that combines functionality with visual appeal. The distinctive rounded edge, known as the bullnose, extends slightly beyond the step below. This design creates both an appealing look and practical benefits.
What are bullnose treads and their benefits
Your staircase's bullnose design serves multiple significant purposes. Here are the main advantages:
Different types of carpet suitable for stairs
The best performance comes from carpet materials specifically made for stair installation. Nylon and wool are the most suitable options, each with its own advantages. Nylon gives you better durability and stain resistance, and it costs less too. Wool might cost more but can outlast synthetic options by up to 10 years.
Note that your carpet's pile height plays a significant role in stair safety. The pile height should be ½ inch or less, with padding of 7/16 inches or less. The pile density rating should be at least 8 pounds.
Required measurements and specifications
Proper installation needs accurate measurements. Your bullnose carpet treads should fit stairs that are 10 inches deep with a 1-inch thick tread. The standard widths you can choose from are:
The overhang should measure between ¾ and 1¼ inches to meet safety requirements and prevent tripping. This measurement becomes especially important when you have carpet thickness to consider. The pressure-sensitive adhesive backing will give secure installation without damaging your stairs.
Essential Tools and Materials
You need a detailed set of professional tools and materials to install carpeted bullnose treads successfully. Getting everything ready before you start will give a smooth installation process.
Professional installation tools needed
Your toolkit should include:
The stair tool is a 4-inch wide implement that's great for setting carpet into tack strips and driving it into gullies. Its chrome-plated steel construction makes it durable, especially when you work on multiple steps.
Types of adhesives and fasteners
The right adhesive is vital for a lasting installation. Different types serve specific purposes:
Use a hammer stapler with 1/2-inch staples and place them every 3-4 inches along the back and sides. This ensures proper penetration into hardwood steps while keeping a flush finish.
Safety equipment requirements
Safety comes first during installation. Your protective gear should include:
Clean your work area well before starting the installation. A clean surface helps adhesives bond properly. Good ventilation is necessary when you work with adhesives.
Note that you should check manufacturer guidelines for specific adhesive requirements. Using wrong products can void warranties. The right mix of tools, adhesives, and safety equipment creates a professional installation that lasts for years.
Preparing Your Stairs
Your first step in preparing stairs for carpeted bullnose treads is to remove existing materials and get the surface ready. This basic preparation will give a solid foundation for installation.
Removing old carpet or materials
You need to be systematic when removing old materials. Here's what to do:
- Start at the bottom of the stairs and work upward
- Remove the existing carpet by pulling it back from the front edge
- Extract all padding underneath the carpet
- Remove tack strips using a pry bar and hammer
- Pull out all staples with pliers
Heavy-duty work gloves and a dust mask will protect you from sharp objects and debris. Keep a shop vacuum close to clean up loose particles as you work.
Surface inspection and repair
Once everything's removed, get into the details of your stairs. Look for:
Fix any problems you find during your check. Apply wood putty to fill holes from staples and repair damage from tack strip removal. Secure loose treads with screws instead of nails to stop future squeaks.
Measuring and marking guidelines
You need exact measurements for proper installation. Each step should be measured separately since sizes can vary across the staircase. Make sure to measure:
Painter's tape helps you mark where the carpet will go and keeps everything lined up right. These visual guides help you maintain consistency during installation. Add an extra inch to your measurements to wrap around the bullnose edge properly.
Check that your stairs meet building code requirements for tread depth and riser height before moving forward. This step ensures safety compliance and your carpeted bullnose treads will perform at their best.
Step-by-Step Installation Process
A professional-looking carpeted bullnose tread installation needs precision and attention to detail. You can achieve secure and beautiful results. Let me show you how to do this with a structured approach.
Positioning and securing tack strips
Your installation's foundation starts with proper tack strip placement. Put your tack strips no more than 3/8 inch from each step's vertical surface. This spacing will give you proper carpet grip and enough room to tuck.
You should follow these placement guidelines to keep everything secure:
Padding installation techniques
Good padding creates a comfortable walking surface and protects your carpet. Cut your padding 2 inches narrower than the stair runner's width so it won't show from the sides.
Here's how to install the padding:
- Cut it to size (13 inches in depth for 10-inch treads)
- Put double-sided carpet tape along edges and center
- Line up the padding correctly
- Press down hard so it sticks well
Carpet attachment methods
We secured the attachment with staples and proper positioning. Put staples every 3-4 inches along edges and under stair noses. In fact, this spacing keeps everything secure without damaging the carpet visibly.
Clear sections need pressure-sensitive adhesive to stay in place. This method will give you a secure bond without affecting how your carpeted bullnose treads look.
The quickest way to attach everything involves:
- Securing carpet at the top riser
- Moving downward step by step
- Using a bolster knife to fit snugly against tread backs
- Stapling under each step's nose
- Checking tension as you go
Professional Tips and Techniques
Installing carpeted bullnose treads needs careful attention to tricky spots and possible problems. Success comes from knowing the right techniques for different stair types and trouble areas.
Working around curves and corners
Curved stairs need a step-by-step approach to look professional. Here's the quickest way to handle curved sections:
- Create paper templates for each curved step
- Cut individual pieces for each tread and riser
- Line up carpet with the inside edge
- Keep risers vertically aligned
- Work from inside to outside to secure edges
Simple designs or small repeating patterns work best on curved sections to avoid uneven looks. Unlike straight stairs that use one piece, curved installations need separate cuts for each step to keep everything lined up.
Securing edges properly
Edge securing needs attention to both visible and hidden spots. These proven techniques work well:
Bullnose sections need strategic slits to help carpet bend smoothly around curves. The stair's depth determines if you'll need two or three slits for proper coverage.
Common mistakes to avoid
Knowledge of installation mistakes helps create better results. Watch for these common errors:
Transparent sections need pressure-sensitive adhesive right away to stay in place. Pie-shaped or curved stairs need vertical carpet installation on risers. The carpet should go straight over the lip across the tread. This keeps carpeted bullnose treads looking professional from below.
Templates need careful positioning on curved sections. Mark stair numbers clearly to avoid cutting mistakes. Taking time to check measurements and alignment before final cuts saves materials and time.
Conclusion
Carpeted bullnose treads can change ordinary stairs into safe, eye-catching focal points at home. Your success with installation depends on proper prep work, exact measurements, and close attention to detail from start to finish.
Proper tool selection and surface preparation are the foundations of lasting results. You should take time to check your stairs, remove old materials, and fix any damage before starting the installation. On top of that, you need to pay close attention to curves, corners, and edge securing that will give your treads lasting beauty and function.
The installation of carpeted bullnose treads needs patience and precision. You can get professional-quality results by sticking to manufacturer guidelines and avoiding mistakes like wrong tackless strip placement or poor stretching techniques. The right tools and knowledge will help you tackle this home project with confidence and create beautiful, secure stairs that improve your living space.
FAQs
Q1. How do I properly install carpeted bullnose treads?
Start by preparing the stairs, removing old materials, and repairing any damage. Install tack strips, padding, and then secure the carpet using a combination of stapling and adhesive. Pay special attention to curves and corners, and ensure proper alignment throughout the installation process.
Q2. What tools are essential for installing carpeted bullnose treads?
Essential tools include a tape measure, carpet knife, hammer stapler with 1/2-inch staples, straightedge, wall trimmer, and a stair tool. You'll also need safety equipment like goggles, work gloves, and a dust mask.
Q3. How do I secure carpet stair treads in place?
Carpet stair treads can be secured using a combination of methods. Use tack strips along the back edge of each tread, apply double-sided carpet tape or adhesive, and staple the carpet every 3-4 inches along the edges and under stair noses for optimal security.
Q4. What type of carpet is best suited for stairs?
Nylon and wool are excellent choices for stair carpets. Nylon offers durability and stain resistance at a lower cost, while wool can last longer but is more expensive. Choose a pile height of 1/2 inch or less and ensure a pile density rating of at least 8 pounds for optimal safety and performance.
Q5. Can stair nosing be installed over carpet?
Yes, some traditional stair nosings can be installed over carpet. These models typically have a smaller face on the tread and are designed to both protect the carpet and enhance the room's decor. However, it's important to choose the right type of nosing that's compatible with carpeted stairs.


