When it comes to tiling, installing edge trim is a key step that shouldn’t be overlooked. It protects the edges of your tiles and gives your project a clean finish.
In this article, we’ll walk you through how to install tile edge trim, covering the tools you’ll need, the different types of trim available, and some practical tips to make the process easier. Whether you’re doing it yourself or working on a professional job, this guide will help you get it right.
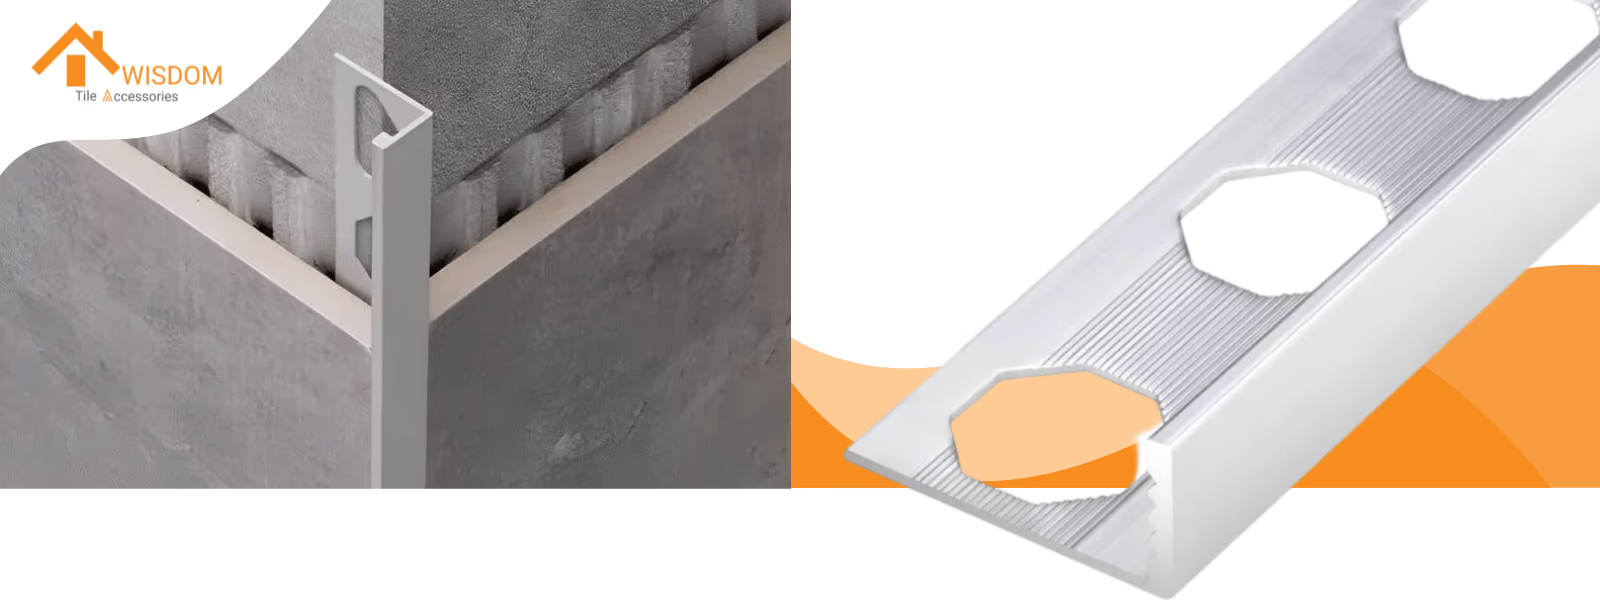
What is Tile Edge Trim and Why Install It
Tile edge trim is a strip that covers exposed tile edges where tiles end or meet other surfaces. The most common types are metal and plastic profiles, available in L-shaped and square designs.
Types of Tile Edge Trim
Benefits of Tile Edge Trim
Tools Needed for Tile Edge Trim Installation
To achieve a successful tile edge trim installation, it's important to have the right tools on hand. The following list outlines essential cutting equipment, measurement tools, and installation materials that will help you work efficiently and accurately throughout the project.
Cutting Equipment
Measurement Tools
Installation Materials
How to Install Tile Edge Trim: Step-by-Step Guide
Learning how to install tile edge trim starts with proper planning and measurement. The trim size should match your tile thickness plus a small gap for adhesive thickness. Professional tile installers typically add 1-2mm space for the adhesive layer when installing metal or plastic edge trim.
Key Steps for Tile Edge Trim Installation
Measuring and Planning
Start by measuring the installation area. Mark lines on the wall and check alignment with your level. Take time to measure twice before cutting trim pieces - wrong measurements waste materials and time.
Surface Preparation
Remove dust and debris from the installation surface. Wait until the surface is dry and level. Keep adhesive 5mm back from marked lines to avoid excess squeeze-out.
Trim Preparation
Cut trim to size with your chosen tool. For corner installations, make 45-degree cuts using a miter box. File down any rough edges on the trim without marking the visible surface.
Tile Edge Trim Installation Methods
There are two main methods for installing tile edge trim: pre-tiling and during-tiling. Each method offers different benefits, and knowing how to manage corners and edges will help achieve a polished look.
Pre-Tiling Installation Method
The pre-tiling installation method involves placing the tile edge trim before laying the tiles. This approach ensures that the trim aligns perfectly with the tiles for a seamless finish.
- Preparation: Measure the area where the trim will be installed and cut it to size using a hacksaw or angle grinder, depending on the material. Ensure cuts are clean to avoid rough edges.
- Adhesive Application: Apply a thin layer of adhesive to the wall where the trim will be placed. Use a notched trowel for even application, keeping adhesive about 5mm back from marked lines to prevent excess from squeezing out.
- Positioning: Press the trim into place, ensuring it is level and flush with the expected tile surface. Use a rubber mallet to gently tap it into position if necessary.
- Tiling: Once the trim is secured, proceed with tiling up to the edge trim, embedding the tiles into the same adhesive used for the trim.
During-Tiling Installation Method
The during-tiling installation method allows for greater flexibility as tiles are laid first, followed by the installation of the edge trim.
- Tiling First: Begin by laying your tiles according to your design plan, leaving space for the edge trim at the ends of rows or corners.
- Trim Placement: After tiling, measure and cut your edge trim to fit precisely against the installed tiles. This ensures that any adjustments can be made easily before securing it in place.
- Adhesive Application: Apply adhesive to both the back of the trim and along the edges of adjacent tiles where it will sit.
- Secure Trim: Press down firmly on the trim to ensure good adhesion and alignment with surrounding tiles.
Corner and Edge Solutions
Corners can be tricky when installing tile edge trim, but there are effective solutions:
- Mitered Cuts: For a clean look at corners, use mitered cuts (45-degree angles) on your trim pieces. This technique provides a seamless transition between two pieces of trim at an angle.
- Prefabricated Corners: Many manufacturers offer prefabricated corner pieces that match your selected trim profile. These can save time and ensure a perfect fit without complex cutting.
- Corner Profiles: Consider using specific corner profiles designed for tile edges, which can simplify installation and enhance durability in high-traffic areas.
By choosing the appropriate installation method and effectively addressing corners and edges, you can create a polished look that enhances both functionality and aesthetics in your tiling projects.
>> See 5 Mistakes about Tiling Corners With Trim
Troubleshooting Tile Edge Trim Installation
Installing tile edge trim can present several challenges. Being aware of common issues and knowing how to resolve them can help ensure a successful installation.
Common Installation Challenges
- Misalignment: Misalignment of the trim with the tiles is a frequent problem. To avoid this, double-check your measurements and use a level to keep everything straight.
- Adhesive Problems: If you don’t apply enough adhesive, the trim may not stick properly. Make sure to spread enough adhesive using a notched trowel, ensuring good coverage.
- Cutting Mistakes: Incorrect cuts can lead to gaps or uneven edges. Take your time when measuring and cutting your trim pieces, especially at corners where precise angles are required.
- Excess Adhesive: If adhesive oozes out from under the trim, it can create a mess. Keep adhesive about 5mm away from the edges of the trim during application.
Material-Specific Solutions
- Metal Trim: For metal trims like aluminum, use an adhesive designed for metal surfaces to ensure a strong bond.
- Plastic Trim: When working with plastic trims, opt for flexible adhesives that can accommodate slight movements due to temperature changes.
- Mosaic Tiles: If using mosaic tiles, ensure your tile cutter is suitable for making intricate cuts required for edge trims.
>> See A Complete Guide to Choosing and Installing Brushed Brass Tile Trim
Professional Tips
- Dry Fit First: Always dry-fit your trim pieces before applying adhesive to confirm they fit well.
- Use Tile Spacers: Incorporate spacers between tiles and trim for consistent gaps that will allow for grout or caulk application.
- Follow Drying Times: Adhere to the manufacturer’s recommended drying times for adhesives and grout to ensure everything sets properly.
Recognizing these common challenges and implementing the right solutions will help you install tile edge trim effectively. This approach not only improves the durability of your installation but also enhances the overall appearance of your tiled surfaces.
Choosing the Right Tile Edge Trim
Choosing the right tile edge trim is important for both function and style in your tiling project. Different materials have their own advantages, so it’s helpful to know what’s available. Below are popular metal and plastic edge trims, along with tips on sizing and compatibility.
Metal Edge Trim Options
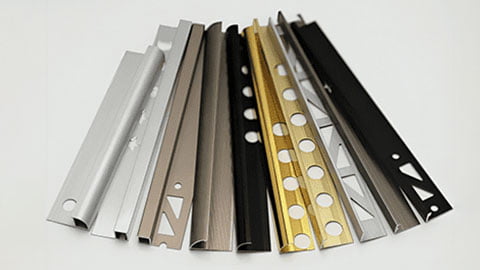
Aluminum Tile Trim
Aluminum tile trim is lightweight and resistant to rust. It’s often used in homes and businesses because it’s durable and looks good with many tile designs.
Pros | Cons |
|---|---|
Durable and rust-resistant | Can dent if hit hard |
Lightweight for easy handling | Less stylish than stainless steel |
Comes in various finishes | Not as strong as other materials |
Budget-friendly compared to stainless steel | Cell |
Easy to clean | Cell |
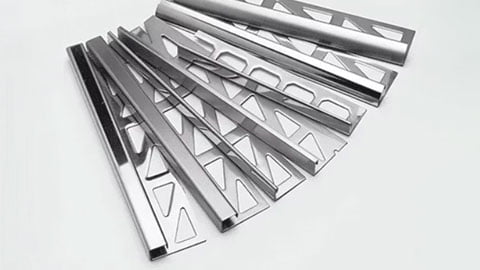
Stainless Steel Tile Trim
Stainless steel tile trim offers a sleek look and great durability. It’s perfect for busy areas where wear and tear are a concern.
Pros | Cons |
|---|---|
Long-lasting and tough | More expensive than aluminum |
Won't rust or corrode | Scratches can show up easily |
Modern appearance that fits many styles | Heavier than plastic trims |
Simple to clean | Cell |
Great for high-traffic areas | Cell |
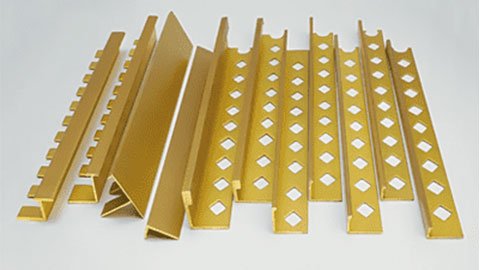
Brass Tile Trim
Brass tile trim adds warmth to any tiled surface. Its rich color enhances the overall look, making it a favorite for decorative uses.
Pros | Cons |
|---|---|
Resists tarnish | Costs more than aluminum or plastic |
Stylish appearance | Can scratch easily |
Gives a luxurious feel | May need polishing to keep its shine |
Durable | Cell |
Easy to maintain | Cell |
Plastic Edge Trim Options
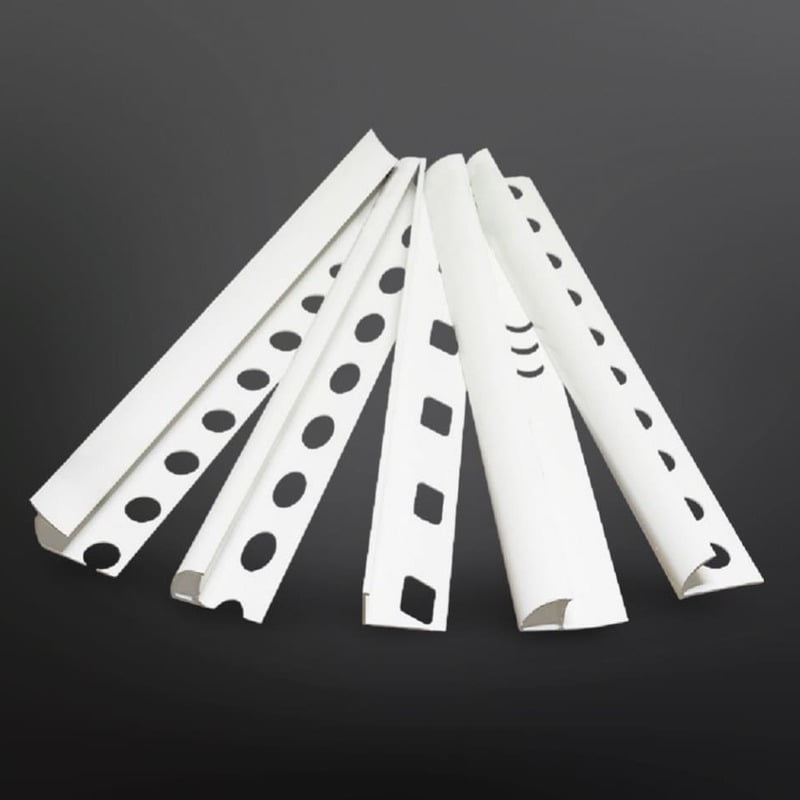
Plastic edge trims are usually cheaper than metal options. They’re lightweight, easy to install, and work well in wet areas like bathrooms.
PVC Tile Trim
PVC tile trim is moisture-resistant, making it a good choice for kitchens and bathrooms. It’s lightweight but still sturdy, with various colors available.
Pros | Cons |
|---|---|
Lightweight for easy installation | Not as durable as metal |
Good moisture resistance | Can become brittle in extreme temperatures |
Available in many colors | Less appealing visually than metal trims |
Affordable | Cell |
Composite Material Trim
Composite trims combine durability with style. They can mimic wood or metal looks while resisting moisture.
Sizing and Compatibility
When choosing tile edge trim, keep these factors in mind:
- Trim Depth: Match the trim depth to your tile thickness. For example, if your tile is 10mm thick, choose a trim that’s slightly deeper (around 12mm) for a flush finish.
- Installation Location: Think about where the trim will go—on floors, walls, or countertops—as this affects your choice.
- Design Style: The profile of the trim should match your tile design. Options range from rounded edges to square profiles; pick one that fits your style.
Understanding these options for both metal and plastic edge trims will help you choose what works best for your project, so you get both the functionality you need and a great look for your tiled surfaces.
>> See How to choose the perfect tile trim for your tile
Some Final Thoughts
Following these tips on how to install tile edge trim will help you achieve a clean and professional finish in your projects. If you pay attention to detail and use the right techniques, your work will not only last but also look great.
FAQs: Tile Edge Trim Installation
1. Can I install tile edge trim after tiling?
Yes, you can install tile edge trim after tiling, but it requires careful preparation. You’ll need to create a gap in the thinset where the trim will go. This can be tricky, so make sure to measure accurately and use the right adhesive for a secure fit.
2. What type of adhesive should I use for metal tile trims?
For metal trims like aluminum or stainless steel, use an adhesive specifically designed for metal surfaces. This will help ensure a strong bond and prevent issues like rust over time.
3. How do I choose the right height for my tile edge trim?
To choose the right height, measure your tile thickness and add a little extra for the adhesive layer. A good rule of thumb is to select a trim that’s about 1-2mm taller than your tiles to ensure a flush finish.
4. What are some common mistakes when installing tile edge trim?
Common mistakes include misaligning the trim, not applying enough adhesive, and making inaccurate cuts. Double-check your measurements before cutting and use a level to keep everything straight.
5. How can I ensure my tile edge trim looks professional?
For a neat finish, measure carefully and cut cleanly. Use spacers to maintain consistent gaps between tiles and trim, and apply grout or caulk neatly to fill any gaps after installation.
6. Is it better to install tile edge trim before or during tiling?
Both methods have their pros and cons. Installing before tiling allows for easier alignment, while installing during tiling gives you more flexibility for adjustments.
7. Can I use plastic edge trims in wet areas like bathrooms?
Yes, plastic edge trims are suitable for wet areas because they resist moisture well. Just make sure to choose high-quality PVC or composite trims designed for such environments.
8. What tools do I need for installing tile edge trim?
Essential tools include a hacksaw or angle grinder for cutting, a notched trowel for applying adhesive, a level for alignment, and tile spacers to maintain consistent gaps.


