Are you still using the conventional running bond tile pattern? In fact, the variety of tile laying patterns far exceeds your imagination. Even if you're not a professional tile installer, you can use them.
Now, let's explore 19 types of tile laying patterns together through this article. You will learn about their stylistic features, historical origins, and installation difficulty.
What is Tile Laying Pattern?
To understand tile laying patterns, it's essential to recognize them as more than mere decorative elements. Essentially, tiling patterns are sophisticated fill styles utilized to enhance the visual appeal and functionality of a space. They work by systematically repeating a set of tiles or objects across a specified area, such as the interior of a shape, the outline, or even within a transparency mask.
What sets tiling patterns apart is their inherent geometry or the arrangement mode. This geometry dictates how the tiles are laid, whether in straight lines, diagonals, or specific artistic patterns. Additionally, the spacing between tiles and the directional flow of the pattern play a significant role in the overall aesthetic and practicality.
Tiling patterns are not just about filling space, and they're about creating harmony, rhythm, and visual interest in an area. Whether it’s enhancing the elegance of a room or adding functional value to a surface (like slip resistance in flooring), these patterns are a blend of art and science. Understanding their attributes and applications can profoundly impact interior design and architectural planning.
Click to See Different Types of Tile Layout Pattern
What are the Rules for Tile Layout Pattern?
It's important to understand the fundamental rules that govern tile layout. One of the cardinal rules in tile installation is achieving a sense of balance and symmetry. Ideally, the tile cuts on opposite ends of the installation area (left and right, top and bottom) should mirror each other in size. This symmetry ensures a cohesive and aesthetically pleasing appearance.
However, the rule of centering and balancing goes beyond mere visual appeal. It's also about optimizing the use of materials and ensuring structural integrity. When tiles are symmetrically aligned, it leads to fewer cuts and less material wastage. Additionally, balanced tile layouts distribute weight evenly, which is crucial for the durability of the installation.
19 Types of Tile Patterns
#1 Running Bond Tile Pattern (Offset Tile Pattern)
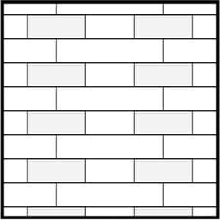
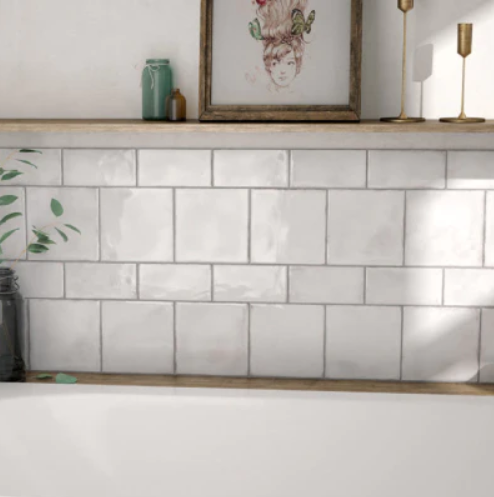
The running bond tile pattern, also known as offset tile pattern, is a classic and versatile design that resembles traditional brickwork. This pattern is achieved by offsetting each tile at the midpoint of the tile below it, creating an alternating arrangement. The offset is typically half the tile's width, which defines the joints by the pattern's grout lines.
One of the key advantages of the Running Bond pattern is its ability to accommodate irregularities in wall and floor surfaces. The staggered layout can help to mask small discrepancies in alignment or tile size, making it a forgiving choice for less-than-perfect spaces. Its simplicity in design also makes it a go-to pattern for various applications, including kitchens, bathrooms, and fireplace surrounds, where it can complement a range of architectural styles from Victorian to Mid-Century Modern.
Difficulty of Laying:
The staggered layout helps to accommodate irregularities, making it forgiving and versatile.
#2 50% Brick Pattern Tile
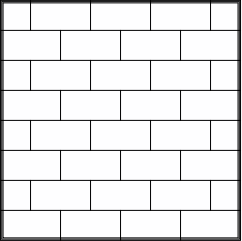
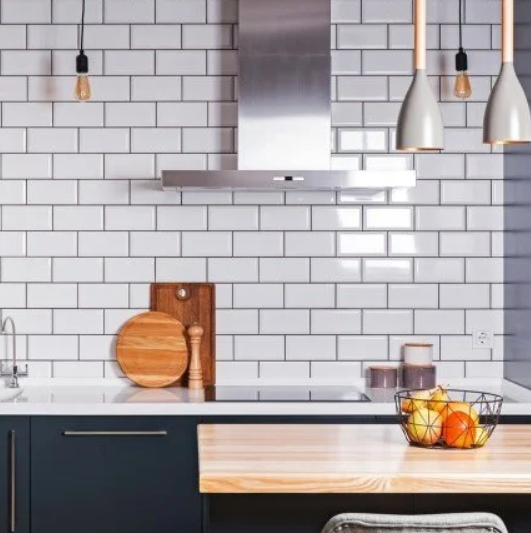
The 50% Brick Pattern Tile, often referred to as the offset or staggered pattern, is a widely utilized method in tile installation, recognized for its aesthetic appeal and its ability to replicate the classic look of brickwork. In this pattern, each tile is offset by 50% from the row directly above or below, creating an alternating arrangement reminiscent of traditional brick laying. This method is especially popular due to its simplicity and the dynamic visual interest it adds to a space.
However, while this pattern is frequently used and admired, it's important to address a notable caveat when it comes to its application, particularly with larger, longer tiles such as 6x24" tiles or wood plank tiles. The concern lies in the inherent property of these larger tiles. Due to their extended length, they can exhibit a slight curvature or bowing, a characteristic that is often a natural result of the manufacturing process.
Difficulty of Laying:
The risk of lippage with larger tiles makes this pattern slightly more challenging than simpler patterns.
Professional Tips:
The issue with using a 50% offset in such cases is that it positions the highest point of one tile - typically at its midpoint where the bow is most pronounced - adjacent to the lowest point of the next tile, near its end. This juxtaposition creates what is known as "lippage" – a condition where there is a noticeable height difference between the edges of adjacent tiles. Lippage can be a concern for both aesthetic reasons, as it disrupts the smoothness of the tile surface, and for practical reasons, as it can create a tripping hazard and make the surface more difficult to clean.
In light of this, when working with larger, long-shaped tiles, professional installers often recommend alternative laying patterns that minimize the risk of lippage. These might include a 1/3 offset pattern or other variations that distribute the tiles in a way that avoids aligning the highest and lowest points of adjacent tiles, thus ensuring a more even and aesthetically pleasing surface.
>> See How Much Tile Lippage is Acceptable
>> See The Best Tool to Make Tile Level
#3 1/3 Offset Tile Pattern
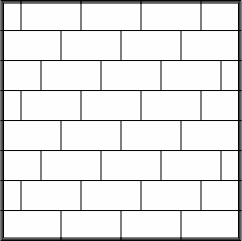
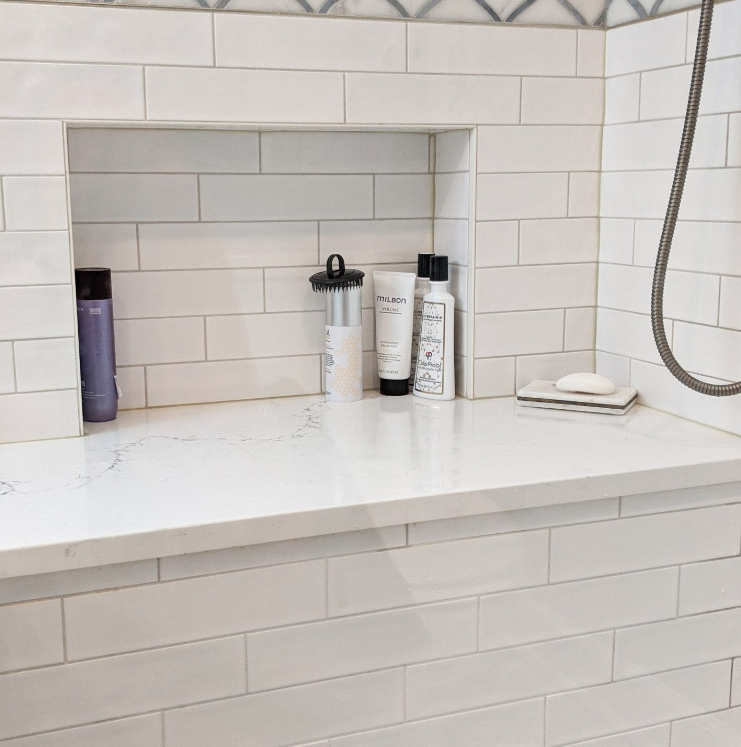
The 1/3 Offset Tile Pattern, also known as the one-third stagger, is an advanced and refined method of tile laying. This pattern involves offsetting each tile by one-third of its length, compared to the half-length offset in the 50% brick pattern. This layout is particularly beneficial when working with large-format, rectangular tiles, a trend that has gained significant popularity in modern tile design.
The key advantage of the 1/3 offset pattern lies in its ability to mitigate the issue of lippage, which is a common concern with the 50% offset pattern, especially when dealing with longer tiles.
By offsetting the tiles by one-third of their length, the 1/3 offset tile pattern significantly reduces the chances of such alignment, thereby diminishing the risk of lippage. This pattern creates a more harmonious and visually pleasing surface, ensuring that the tiles lay flatter and more uniformly. It is particularly effective for porcelain and ceramic tiles, commonly used in flooring and wall applications, where long, linear tiles are desired for a contemporary look.
Difficulty of Laying:
It mitigates the issue of lippage, particularly with larger tiles, but requires careful planning to avoid alignment problems.
#4 Vertical Stacked Tile Pattern
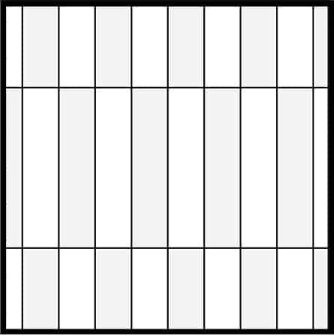
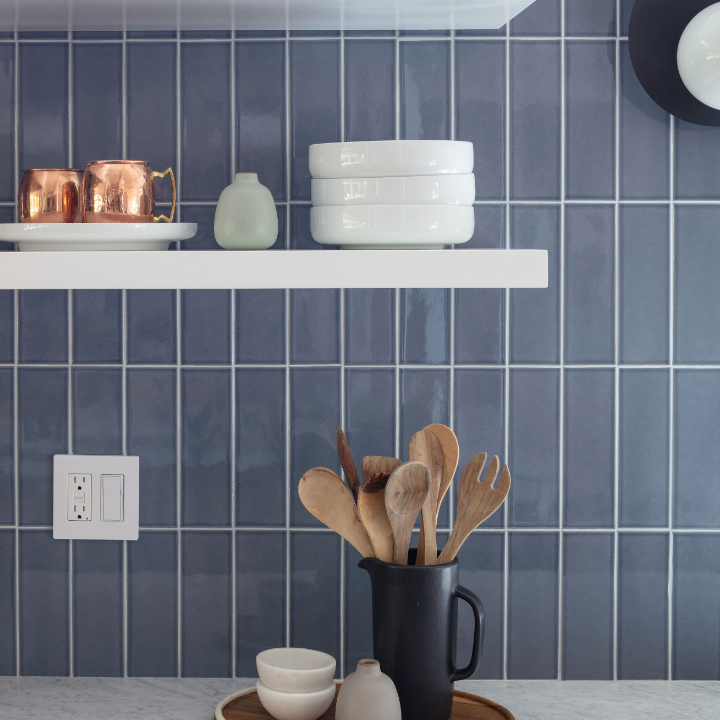
The vertical stacked tile pattern represents a contemporary evolution in tile layout design, diverging from traditional subway tile characteristics by altering both its offset and direction. This pattern is increasingly favored by those seeking a modern, trendy aesthetic, especially in settings where a fresh and distinct look is desired.
In the vertical stacked tile pattern, tiles are aligned directly above one another, creating clean, straight columns that can significantly impact a room's perception. This layout is particularly effective in enhancing the verticality of a space. By emphasizing the height, it can make rooms, especially those with limited space, appear taller and more expansive.
While the debate between staggered and stacked subway tile continues, each has its distinct advantages. The stacked pattern is known for its ultra-contemporary appeal, clean lines, and ability to visually widen or elongate a space. However, it's also noted that the stacks can seem "boxy," offering different opportunities for installation creativity.
Difficulty of Laying:
The straightforward stacking of tiles vertically is easy to execute, though it requires precision for a clean look.
#5 Herringbone
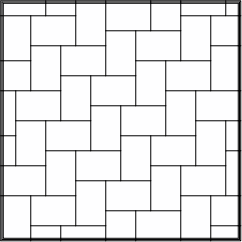
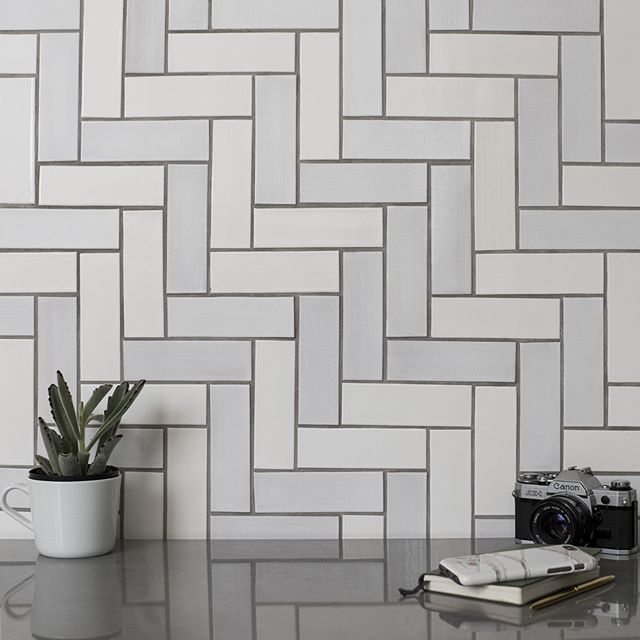
The Herringbone tile pattern, renowned for its historical significance and unique aesthetic appeal, is a classic design choice in the world of tiling.
There are two main types of herringbone patterns: single and double tile. The single tile pattern, the more traditional style, uses one rectangular tile per diagonal, creating an intricately detailed effect. The double tile pattern, a bolder variation, pairs two rectangular tiles per diagonal, emphasizing the arrow shape for a more dramatic layout.
One of the unique aspects of the herringbone pattern is how the overall layout can change based on the length and width of the tiles used. Using brick-format tiles, such as subway tiles, results in a dense, staggered geometric pattern. In contrast, longer, plank-format tiles give a more directional look, emphasizing a linear and diagonal design.
Difficulty of Laying:
The intricate diagonal arrangement can be complex and involve significant cutting, especially for more traditional styles.
Interesting facts about Herringbone:
Originating from the Roman Empire, where it was used for constructing roads, the herringbone pattern has evolved over centuries and remains a popular choice for modern interior design. The name itself is derived from the resemblance of the pattern to the skeleton of a herring fish, characterized by its sharp diagonal lines.
#6 Chevron
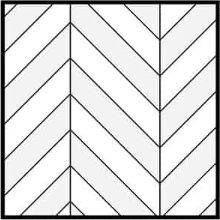
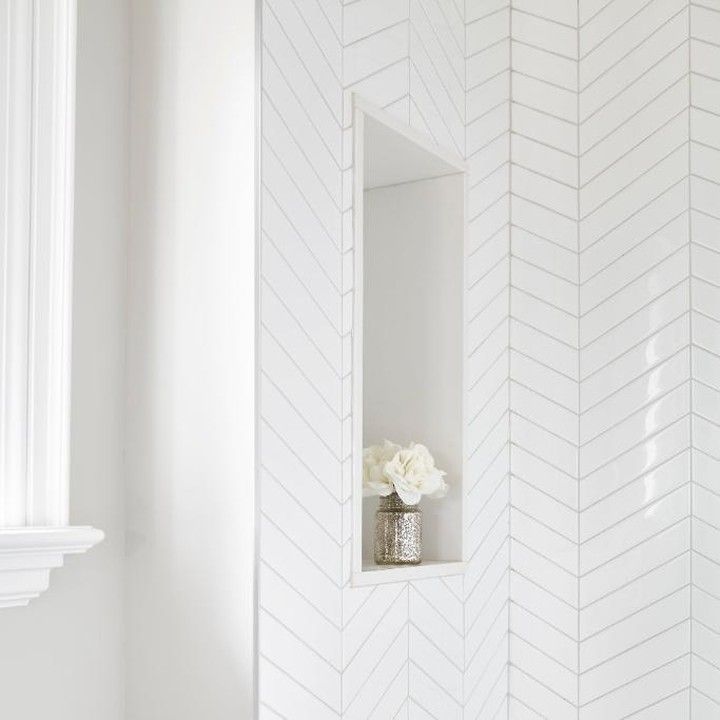
Chevron is a distinctive tile pattern that consists of parallelogram-shaped tiles, which are aligned to create a seamless zigzag design. This pattern has been utilized in various forms of design and architecture since Neolithic times, gaining prominence in Ancient Greece, notably in the Palace of Knossos on Crete. The Chevron pattern has evolved through medieval times, where it symbolized architectural achievements, and into the modern era, where it's often seen in fashion and interior design.
The Chevron pattern's key feature is its symmetrical V-shapes. The tiles are cut at an angle, typically 45 degrees, allowing them to meet point-to-point in a perfect alignment.
Difficulty of Laying:
Similar to Herringbone but with cut tiles at angles, this pattern also requires precise alignment and cutting.
Professional Tips:
Unlike Herringbone, where tiles are staggered to create a broken zigzag look, Chevron tiles interlock seamlessly, resulting in clear, straight lines that can either lengthen a space or create a dynamic focal point.
#7 Tile Grid Pattern
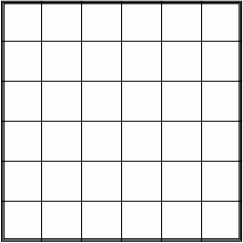
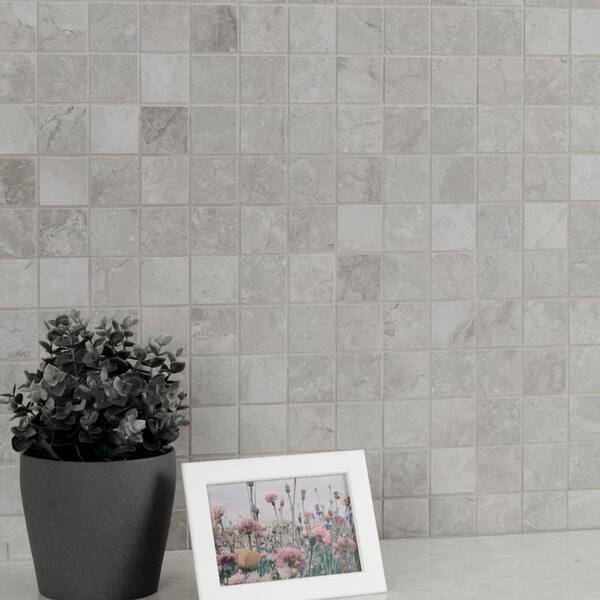
The Tile Grid Pattern is a classic and straightforward tile layout that offers a clean and structured look. This pattern is created by aligning square tiles in straight lines both vertically and horizontally, forming a simple yet elegant grid. This layout is sometimes referred to as a straight lay or stack bond pattern.
The grid pattern is considered one of the easiest tile layouts to install, making it a great choice for DIY projects or first-time tile installers. Its simplicity lies in the straightforward alignment of tiles, which doesn’t require the complex cuts or intricate planning needed for more elaborate patterns.
A unique aspect of the grid pattern is how it can change its appearance based on the color of the grout used. When contrasting grout colors are applied, the individual tiles are emphasized, highlighting the grid layout and adding a striking visual element to the space. This can be particularly effective in contemporary designs where bold contrasts are a key feature.
On the other hand, using grout that matches the color of the tiles can create a more seamless and understated look, suitable for more traditional or minimalist styles.
Difficulty of Laying:
The simplicity of aligning square tiles in straight lines makes this one of the easiest patterns to install.
>> See What are the Best Subway Tile and Grout Color Combinations?
#8 Mosaic Tile Patterns
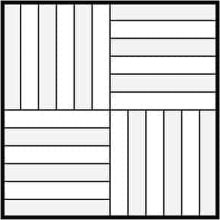
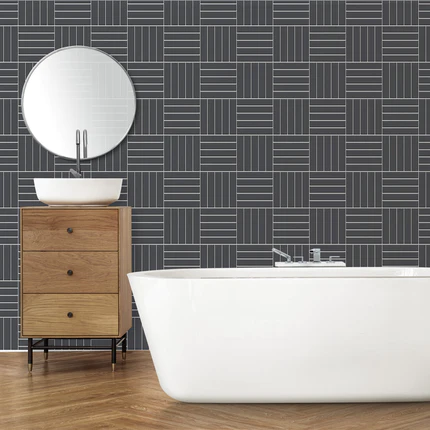
Mosaic tile patterns are a diverse and intricate aspect of tile design, offering a wide array of creative possibilities. These patterns come in a variety of shapes, sizes, and materials, each bringing its unique aesthetic to a space.
The mosaic tiles can be made from various materials, including natural stone, ceramic, glass, and even pebble stones. Each material has specific cutting and installation requirements. Modern mosaic tiles are relatively straightforward to install, thanks to the mesh backing that allows for faster and more accurate pattern layout. However, installing them still requires care, especially when sealing the grout and laying the tiles correctly.
Difficulty of Laying:
Varies in complexity depending on tile size and layout but generally requires careful planning.
#9 Diagonal (Diamond)
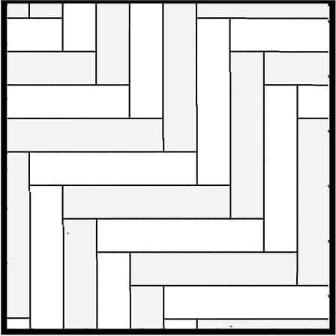
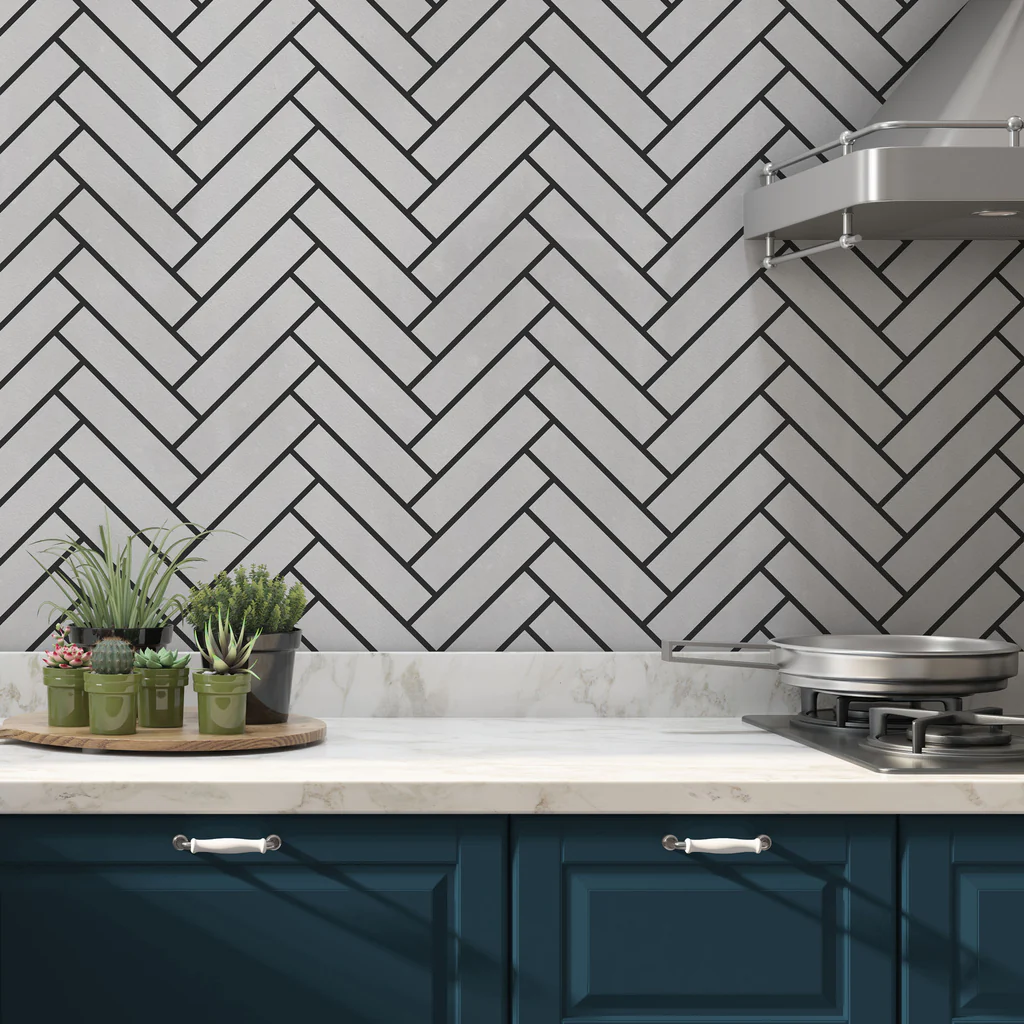
The diagonal tile layout can make spaces appear larger. This is because the human brain finds it difficult to gauge the exact size of a space with tiles laid out diagonally, unlike standard parallel tile layouts.
Moreover, the diagonal tile layout can make spaces appear larger. This is because the human brain finds it difficult to gauge the exact size of a space with tiles laid out diagonally, unlike standard parallel tile layouts.
Difficulty of Laying:
Involves laying tiles at a 45-degree angle, demanding precise cutting and alignment.
#10 Hexagon
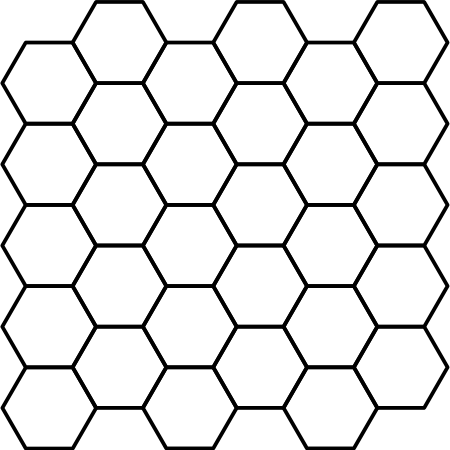
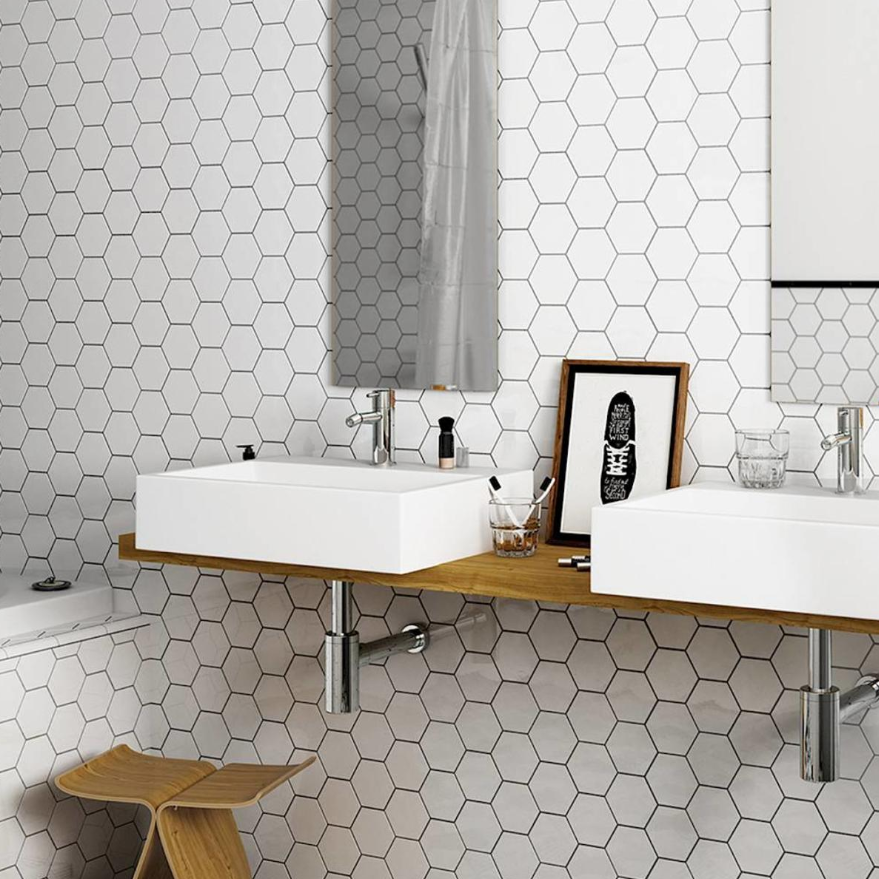
Hexagons, typically equilateral in shape with six sides of equal length, create a pattern that's easy to repeat and inherently appealing due to their natural, honeycomb-like design. These tiles have a history that dates back to the early 1900s, predominantly used in bathrooms to promote a sense of cleanliness and sanitation. Today, their timeless geometric shape and clean lines continue to make a significant impact in various design styles, from classic to modern and everything in between.
The beauty of hexagon tiles lies in their diversity. They are available in a range of materials, including ceramic, porcelain, and natural stone, each lending a different aesthetic and texture to the design. These tiles are available in sizes ranging from 1" to 12" in diameter, with smaller sizes often coming with mesh backing for easier installation.
Difficulty of Laying:
The unique shape of hexagon tiles can make fitting and cutting more challenging.
Professional Tips:
While hexagon tiles are trending and offer a multitude of design possibilities, they also have some cons. The installation of these tiles can be intricate due to their interlocking design, and the abundance of grout lines may require more maintenance.
#11 Windmill
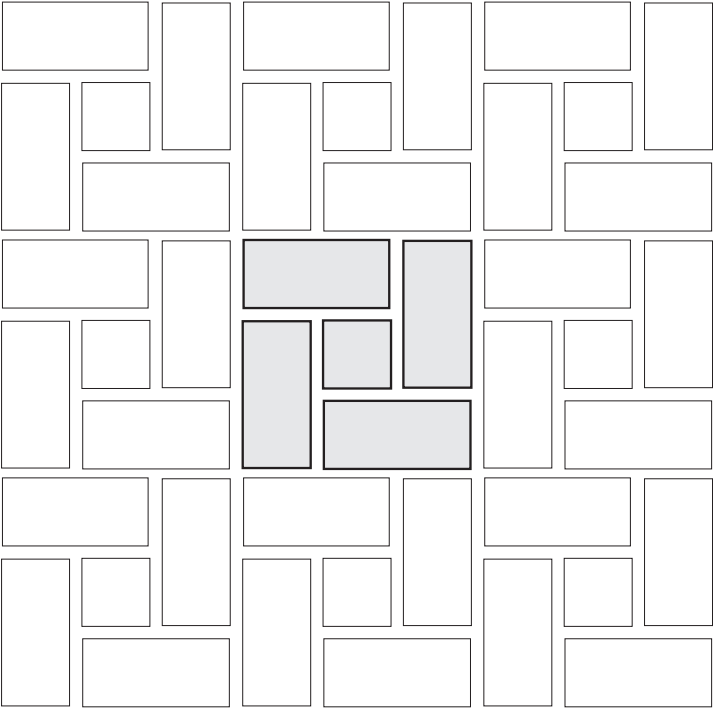
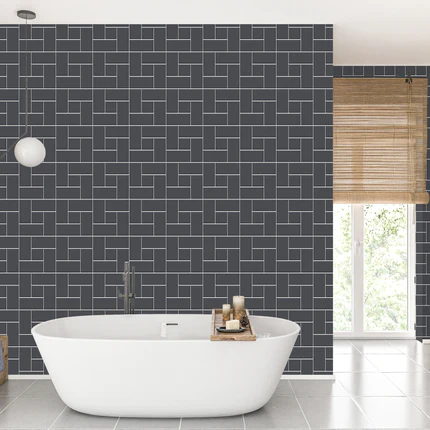
In the Windmill pattern, each 'windmill' is formed using four rectangular tiles placed back-to-back to create a square shape. At the center of these four tiles, a small square tile is positioned to complete the look of the windmill. This central tile can be of a contrasting color to enhance the pattern's visual appeal, making it stand out more prominently.
When using the Windmill pattern, it's important to use rectangular tiles with a length-to-width ratio of 2 to 1. The square tiles in the center should be the same width as the rectangular tiles to ensure that the squares end up being half their length, maintaining the pattern's proportionate look.
Difficulty of Laying:
The pattern consists of a square surrounded by rectangles, requiring careful layout for a balanced appearance.
#12 Basket weave (Geometric)
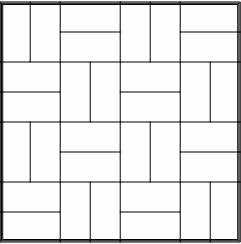
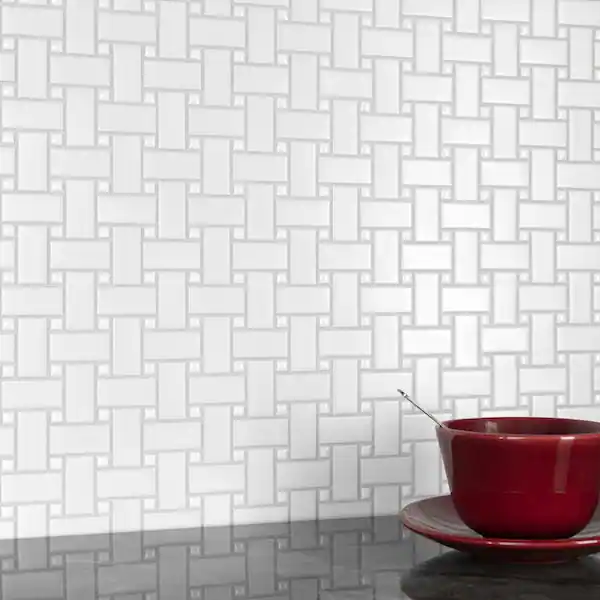
The Basket Weave tile pattern is a distinctive and classic choice in tile design, known for its resemblance to the texture of a woven basket.
The pattern is particularly recommended for smaller spaces, or you can use it on just a part of a larger surface, such as a backsplash or an accent wall. In larger areas, the depth and sense of movement provided by the basket weave pattern will not go unnoticed. It can be used in full walls and floors of a traditional kitchen or even a kitchen with a country theme.
Difficulty of Laying:
The pattern can be intricate but is generally manageable, especially in smaller spaces.
Professional Tips:
There are two main methods for installing basket weave tile patterns. The traditional and simpler one involves stacking brick-shaped tiles horizontally next to vertically stacked ones, alternating the angle for each set. The more complex method creates more texture, placing brick-shaped tiles next to small square tiles to create an interlocking pattern.
#13 Pinwheel
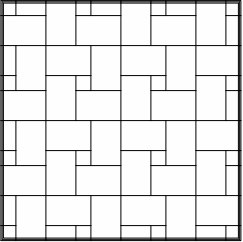
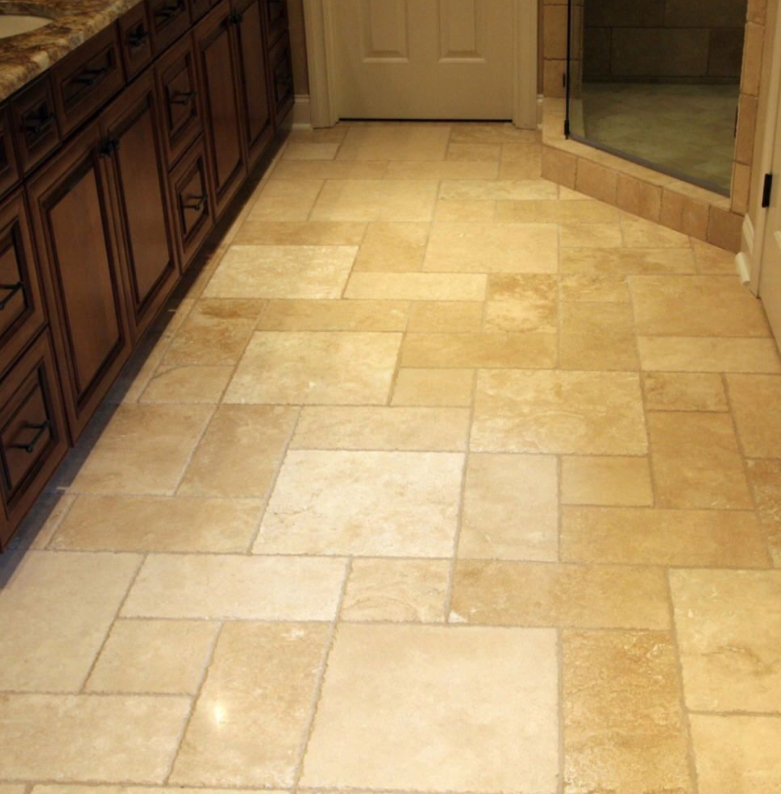
The Pinwheel tile pattern is a distinctive and versatile layout that adds significant visual interest to various spaces. This pattern is characterized by its simple yet captivating design, which involves two rectangular tiles placed at a 90-degree angle to form a pinwheel shape. The pinwheel pattern is particularly popular for its ability to integrate solid color tiles with decorative elements, creating a timeless and dynamic design.
Difficulty of Laying:
Involves a simple but captivating design, requiring some precision in layout.
#14 Versailles
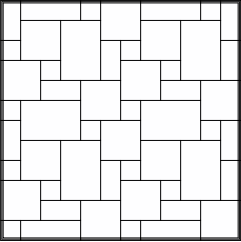
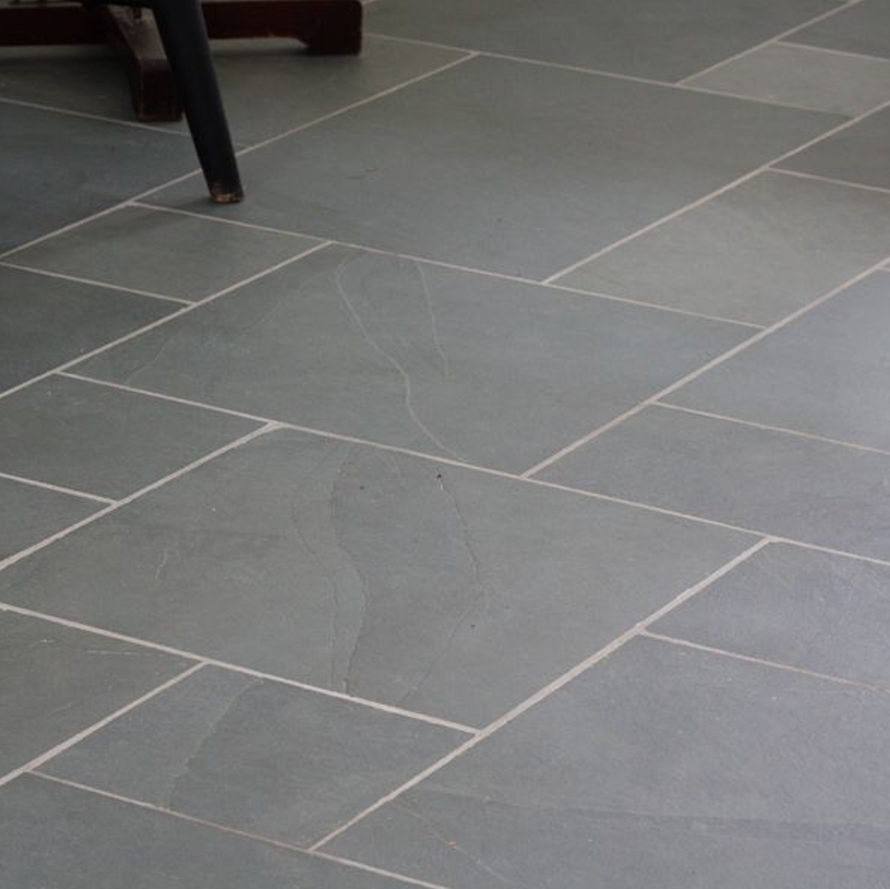
The Versailles pattern, also known as the French pattern, is a classic and elegant design that has been used in architecture and flooring for centuries. Its origins are tied to the Palace of Versailles near Paris, where this pattern was used to create aesthetically appealing and intricate designs with an exotic collection of marbles.
The pattern is typically composed of tiles or stone slabs in four different sizes: 8"x8", 8"x16", 16"x16", and 16"x24". These are bundled together to cover a 16-square-foot area using only six pieces.
Difficulty of Laying:
This complex layout using multiple tile sizes is intricate and usually requires professional installation.
#15 Checkerboard Tile
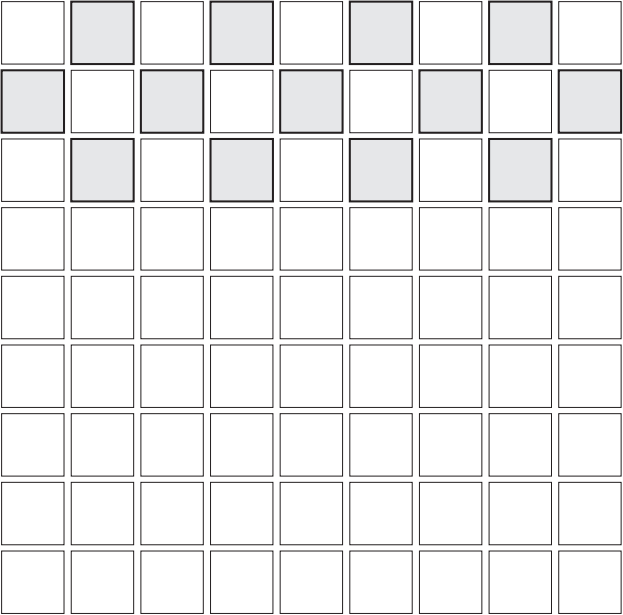
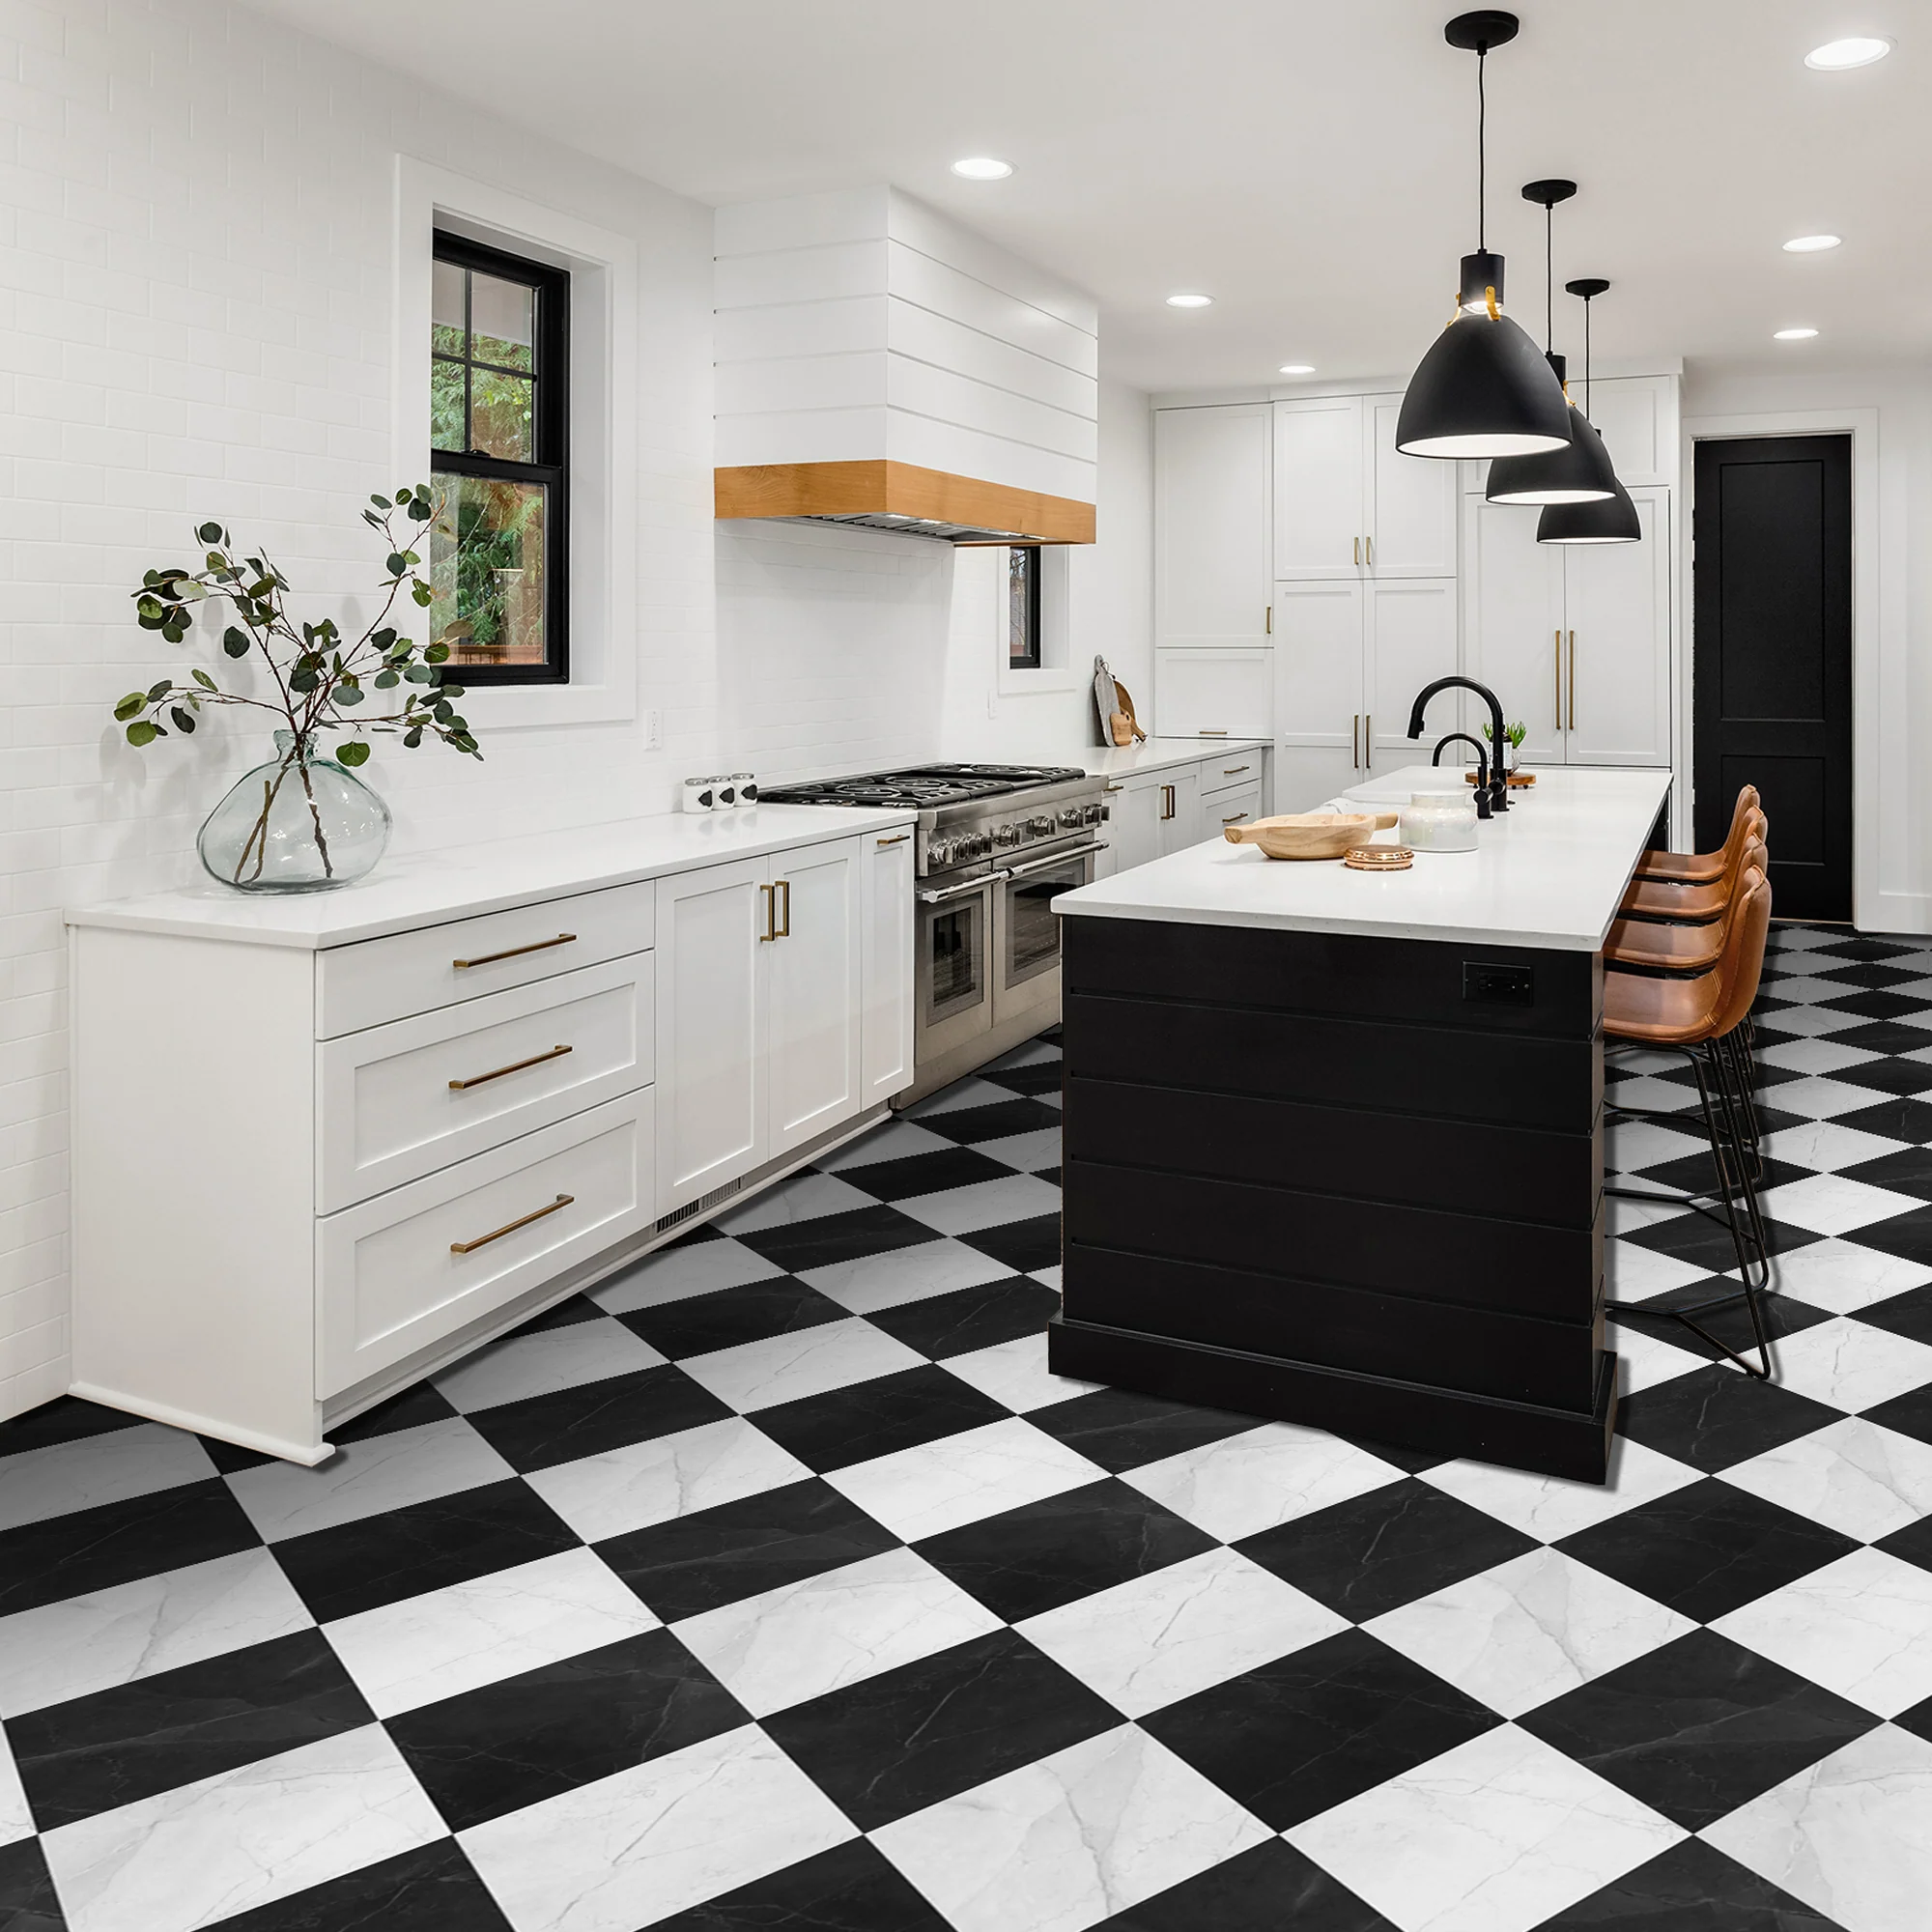
The Checkerboard Tile pattern, a classic and enduring design in the world of tiling, offers both a traditional and contemporary appeal. This layout typically involves the use of black and white square tiles arranged in an alternating color pattern, creating a striking visual contrast. The pattern's origins are rich and varied, with historical references ranging from Ancient Egyptian temples to the "Queen's Staircase" in the Palace of Versailles and Victorian Era designs.
In contemporary settings, checkerboard tiles are often used to complement monochrome color schemes, particularly in kitchens, where they add a retro yet modern flair.
The checkerboard layout, while classic, can be adapted for a more modern look. For instance, using colored tiles instead of the traditional black and white can add a unique twist to the design, creating an earthy or vibrant atmosphere.
Difficulty of Laying:
The pattern is straightforward, but alignment and the use of contrasting colors can add complexity.
#16 Lantern Pattern
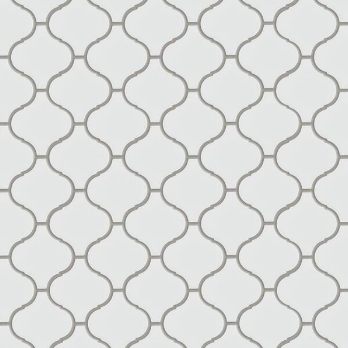
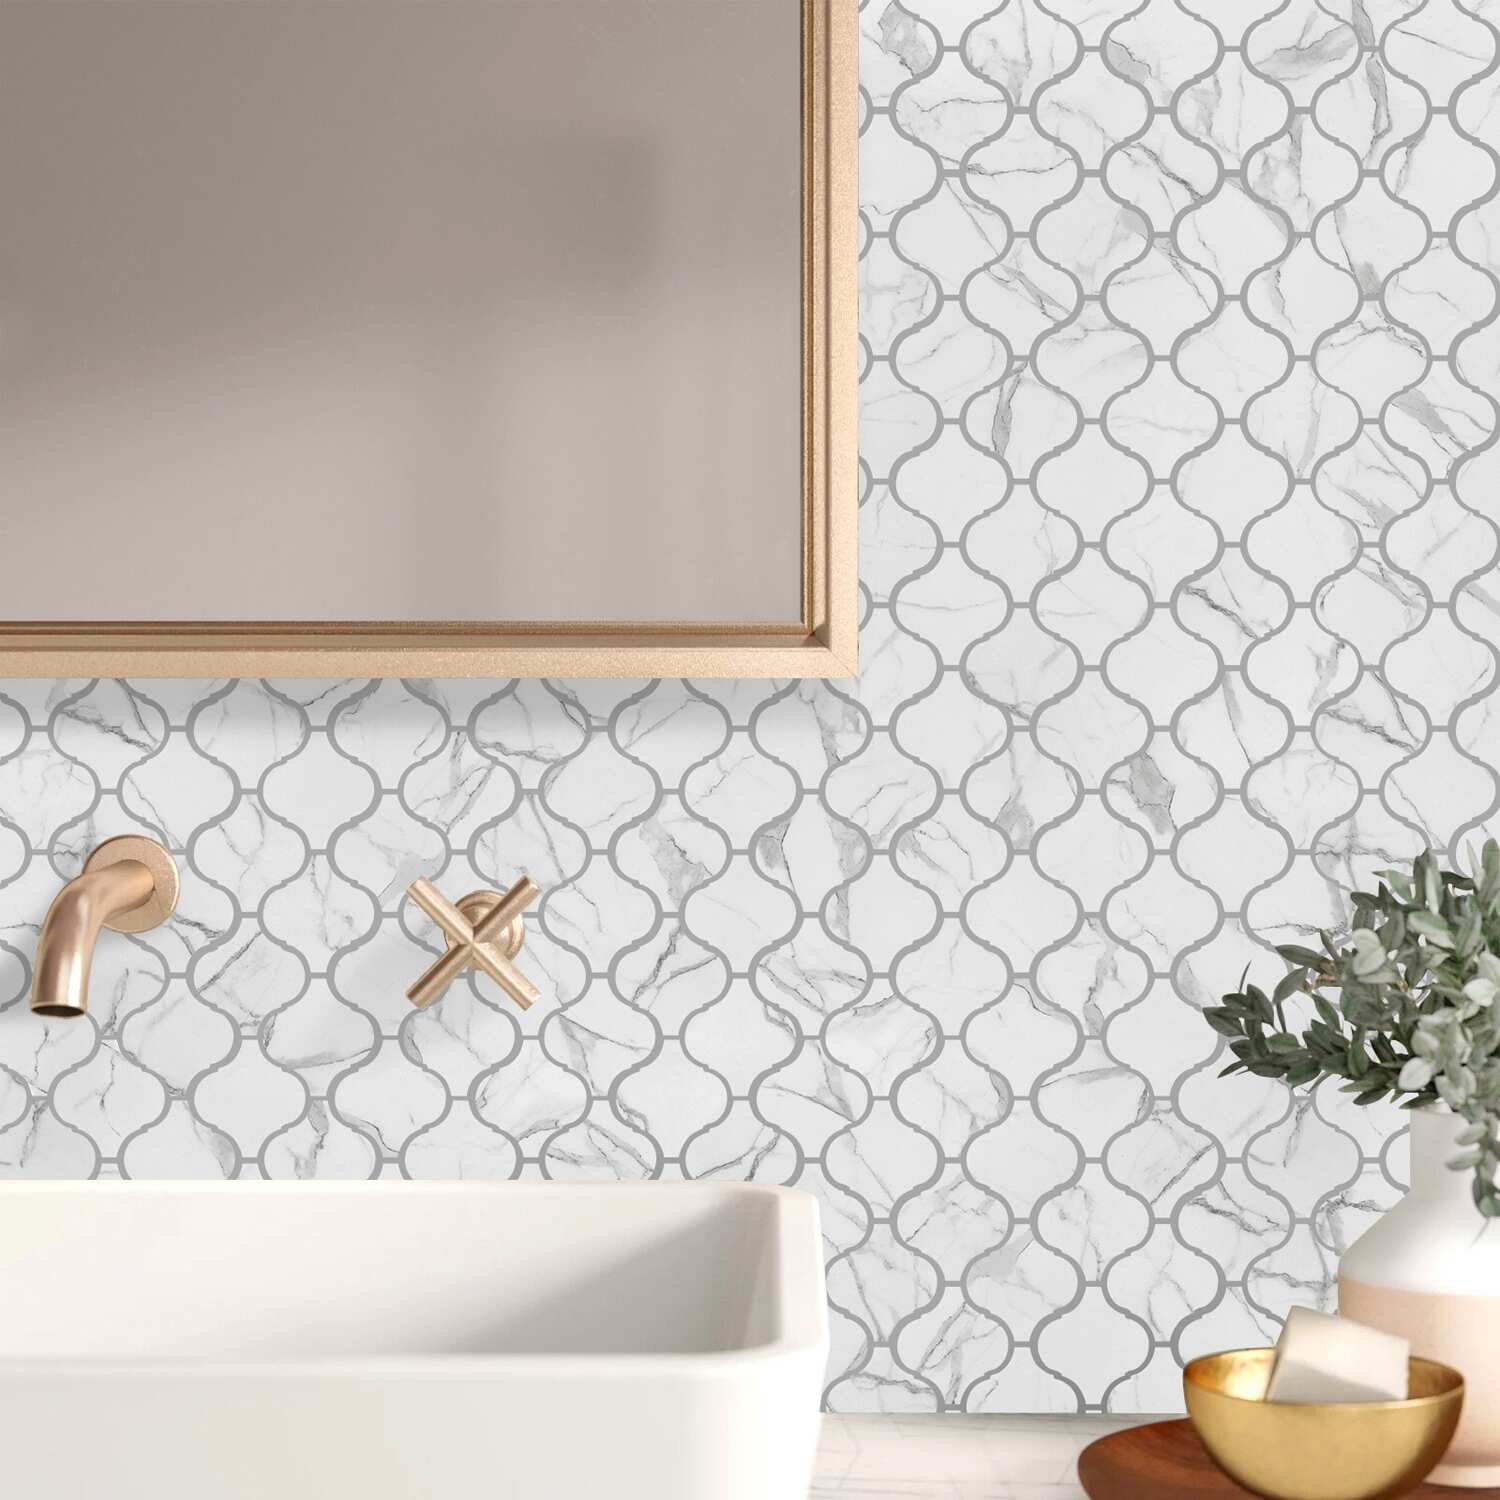
Lantern pattern typically features tiles shaped like a lantern or arabesque, providing a unique and elegant touch to any design project.
Lantern tiles are particularly popular for kitchen backsplashes, where their attractive shape combines functionality with style. They are resistant to water, heat, and stains, making them not only visually appealing but also practical for spaces prone to moisture and spills.
In bathrooms, lantern tiles serve both aesthetic and functional purposes. Their availability in different finishes allows for creative design choices, such as using textured, slip-resistant finishes for floors and metallic finishes for walls.
Difficulty of Laying:
The unique shape of the tiles requires careful planning and placement.
#17 Scale Tile Pattern
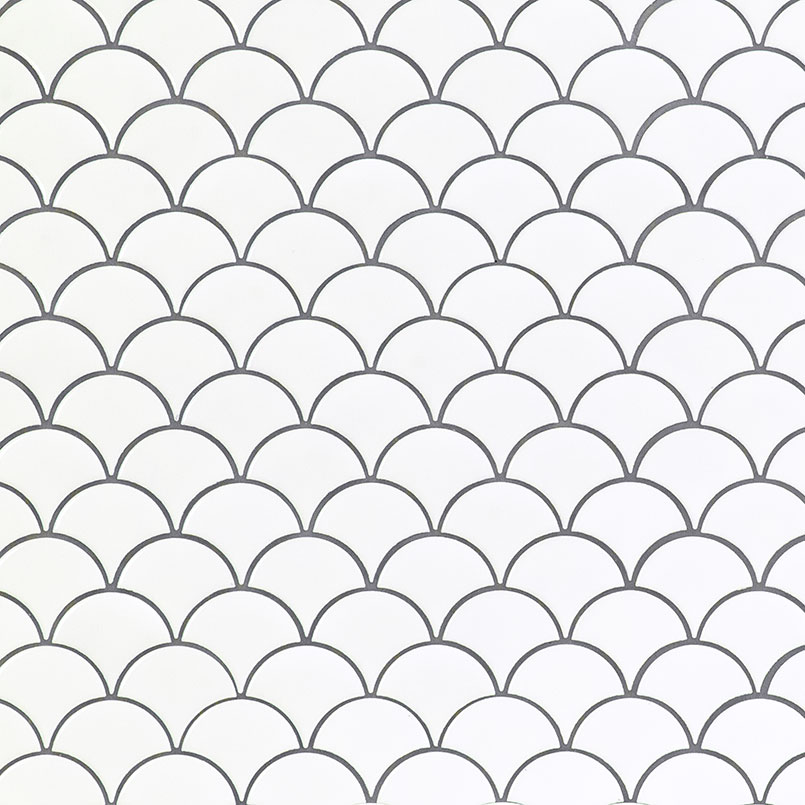
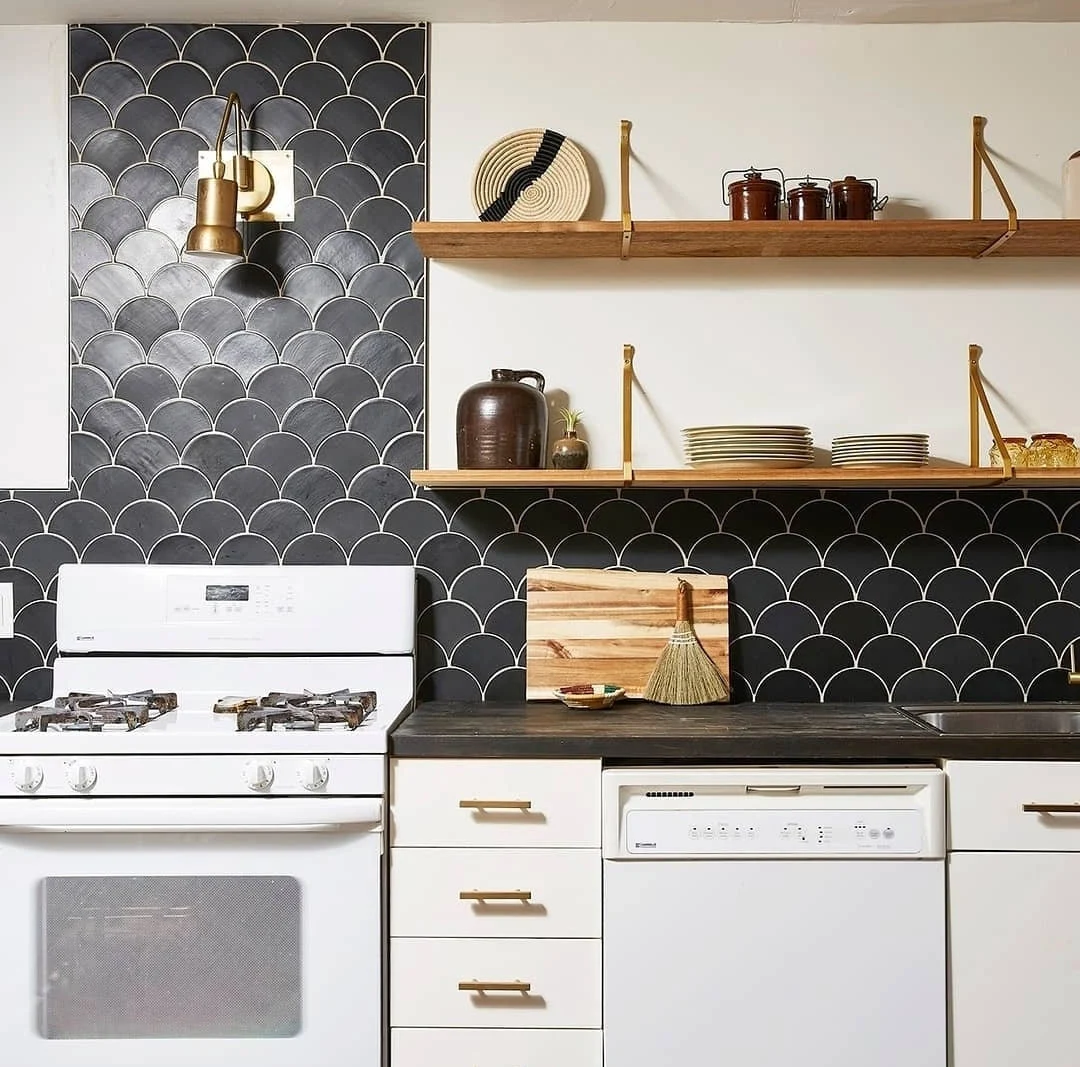
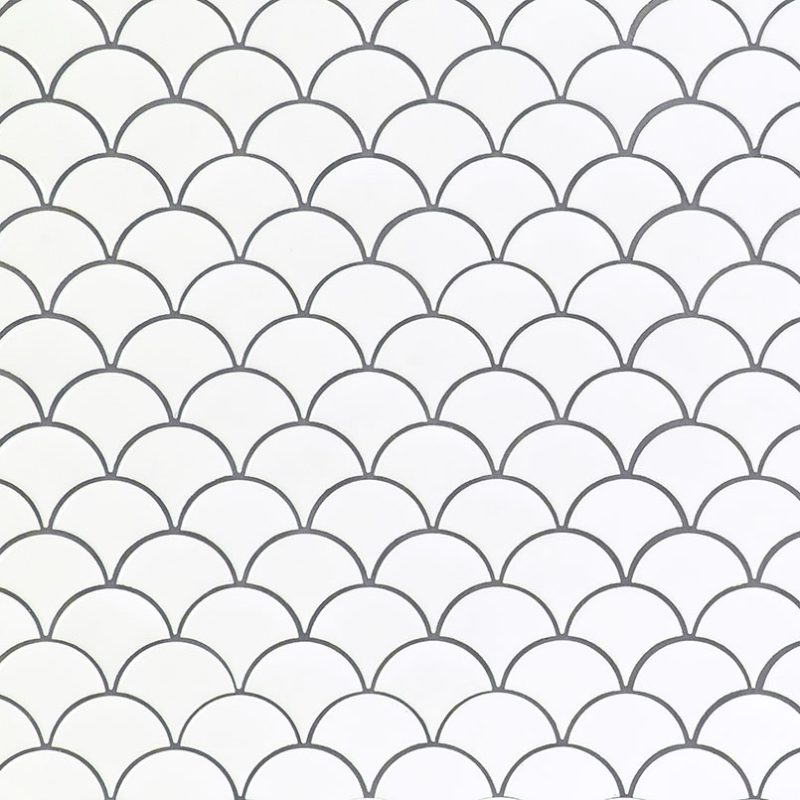
The Scale Tile Pattern, often referred to as the fish scale pattern, is a unique and visually striking tile arrangement frequently used in both residential and commercial designs. This pattern consists of tiles shaped like scales or fans, closely resembling the scales of a fish, hence the name.
Scale tiles can be used in various applications, including backsplashes, shower walls, bathroom floors, and even as accent walls. They work well in both small and large spaces.
Difficulty of Laying:
The distinct shape and arrangement of tiles can be intricate, demanding precise layout.
#18 Strips Tile Pattern
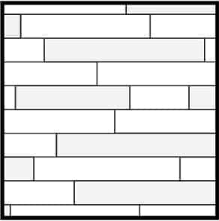
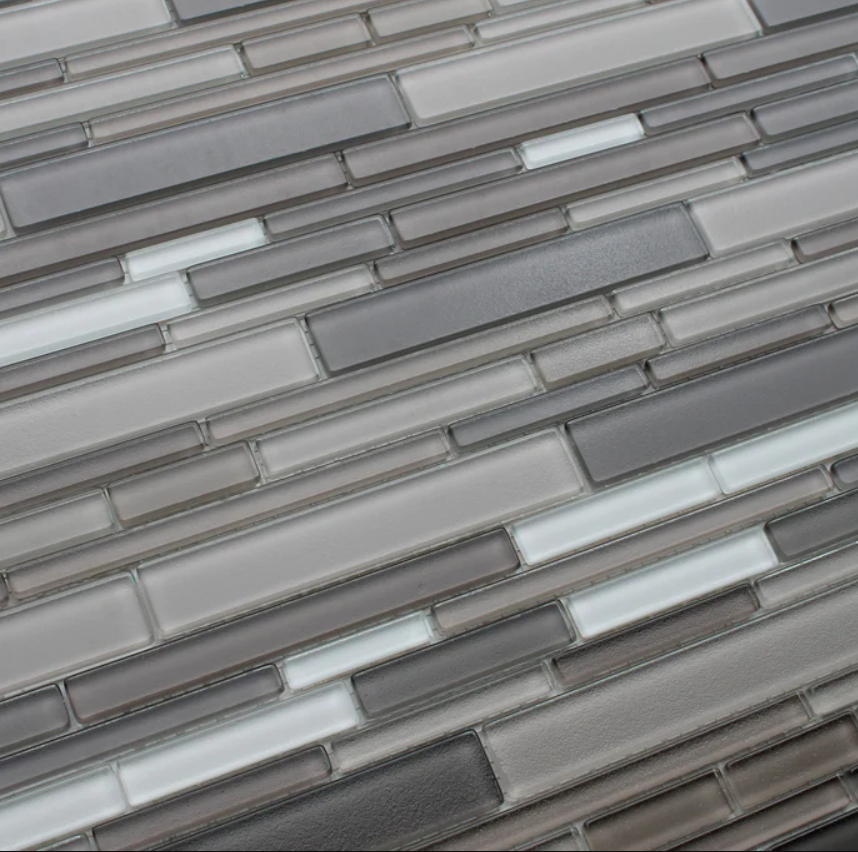
The Strips Tile Pattern, as the name suggests, utilizes long, thin rectangular tiles to create visually striking and complex designs. This pattern is particularly versatile and can be adapted to a range of interior spaces, offering a unique aesthetic that can range from subtly elegant to boldly contemporary.
One of the defining characteristics of the Strips Tile Pattern is its ability to create intricate patterns and designs. Due to the thin and elongated nature of the tiles used, this pattern can be arranged in various ways to produce different visual effects. For instance, aligning these strips end-to-end in either horizontal or vertical orientations can transform a space, giving it a more structured and elongated appearance.
However, it's important to note that the installation of the Strips Tile Pattern can be quite labor-intensive due to the size and shape of the tiles.
Difficulty of Laying:
While the pattern is versatile, it can be labor-intensive due to the size and shape of the tiles.
#19 Modular Tile Pattern (Random)
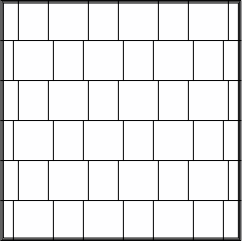
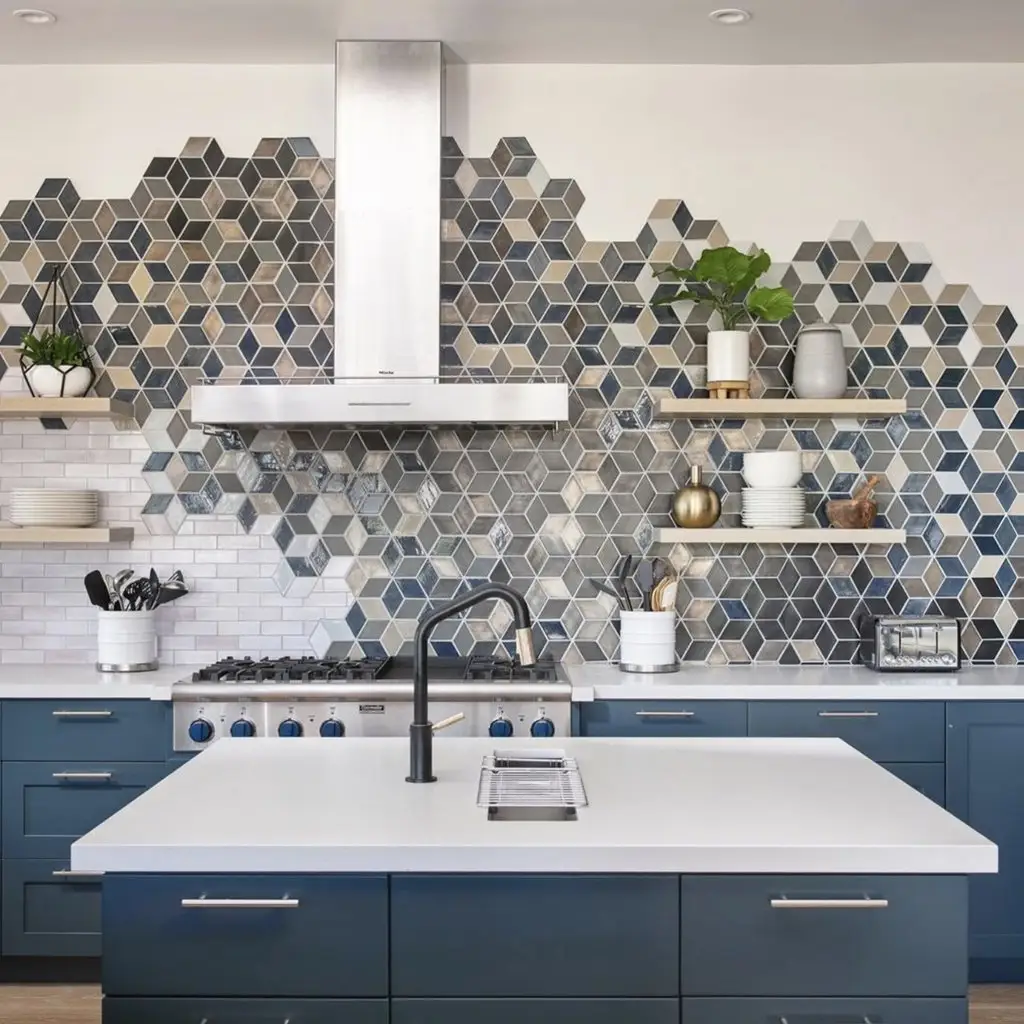
The Modular Tile Pattern, also known as the Random Tile Pattern, is a unique and creative approach to tile laying. Unlike more structured patterns, this method encourages individual expression and experimentation in tile arrangement. The key characteristic of the Modular Tile Pattern is its lack of a fixed or repetitive design, allowing for a diverse and dynamic appearance.
This method is particularly appealing for those who want to explore bolder, more personalized design choices. By freely combining various tile sizes, shapes, and colors, individuals can create a one-of-a-kind look that reflects their personal style and the specific character of the space. This approach also allows for the incorporation of different laying methods, offering a playground of possibilities for creative expression.
Difficulty of Laying:
The lack of a fixed design requires creativity and careful planning for a balanced look.
How to Make Your Tile Pattern Perfect?
Achieving the perfect tile pattern is as much about precision and technique as it is about using the right tools. Let's explore how you can ensure your tile laying is flawless every time.
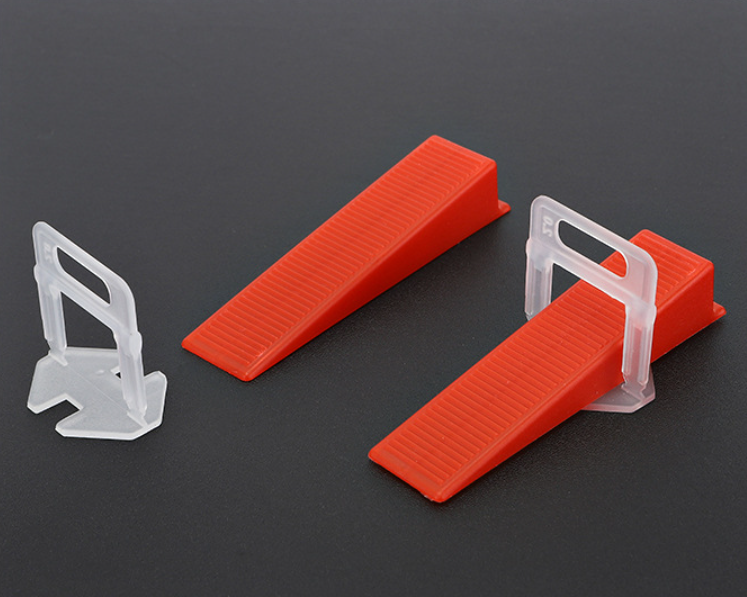

- Consistency with Tile Leveling Systems: One of the challenges in tile installation is maintaining an even level across all tiles. This is where a tile leveling system can be a game-changer. At Awisdom, we've developed a state-of-the-art tile leveling system that ensures each tile is perfectly aligned and level. It's an indispensable tool for avoiding uneven tile lippage, which can detract from the beauty of your pattern.
- Efficiency Through Vibration: Another key to perfect tile installation is ensuring each tile is firmly seated in the adhesive. Our tile vibration machine simplifies this process, efficiently settling tiles into place. This reduces air pockets and guarantees a solid bond, which is crucial for long-lasting results. It's especially useful for larger tiles that can be challenging to set manually.
Whether you're working on a complex herringbone pattern or a simple grid, having the right tools can make all the difference. With Awisdom's tile leveling system and vibration machine, you can achieve professional-grade results every time, regardless of the complexity of your tile pattern.
FAQ about Tile Laying Patterns
What are standard tile sizes?
Standard tile sizes range widely, from small mosaic tiles of about 1 inch square to large format tiles of up to 24 inches square or larger. The most commonly used sizes for floor tiles include 12x12 inches, 12x24 inches, and 18x18 inches, offering versatility for various room sizes and design preferences.
What is the 3 4 5 rule for laying tile?
The 3-4-5 rule, a fundamental principle in construction, is used to establish right angles and ensure square corners. It involves creating a triangle with sides measuring 3, 4, and 5 units respectively. When these measurements form a right triangle, the angle between the 3 and 4 unit sides is exactly 90 degrees, indicating a square corner.
What is the best offset for 12x24 tile?
For 12x24 tiles, the best offset is typically a 33% offset, also known as a one-third offset. This pattern involves placing each tile at one-third the length of the previous tile, which helps minimize lippage and creates a visually appealing staggered effect. It's particularly suitable for large format tiles to ensure evenness in the installation.
What is the best spacing for 12x24 tile?
The recommended grout line spacing for 12x24 tiles is usually 3/16 inch. This width balances aesthetic appeal with practical considerations like tile expansion and contraction. It's essential to consult the tile manufacturer's guidelines, as specific tile types may require different spacing for optimal results.
What tile pattern makes a room look bigger?
The Versailles Pattern, which mixes tiles of three or more sizes, effectively makes a room look bigger. It creates an illusion of space and expansiveness. Additionally, diagonal tile placement, with the wider part of the pattern facing the room's entrance, also tricks the eye into perceiving more space, thereby enhancing the room's apparent size.
What is the most common flooring pattern?
The most common flooring pattern is the Herringbone pattern. Known for its elegance and dimensional stability, this pattern interlocks each tile, limiting movement and creating a visually striking effect. However, it is less suitable for small spaces as it can make them appear even smaller.
Should floor tiles be straight or staggered?
The choice between straight or staggered floor tiles depends on aesthetic preference and the space's design. Staggered tiles offer a traditional, European-inspired look, while straight-laid tiles align with modern, minimalist styles. Both patterns can significantly impact the room's overall appearance and should align with the intended design theme.


