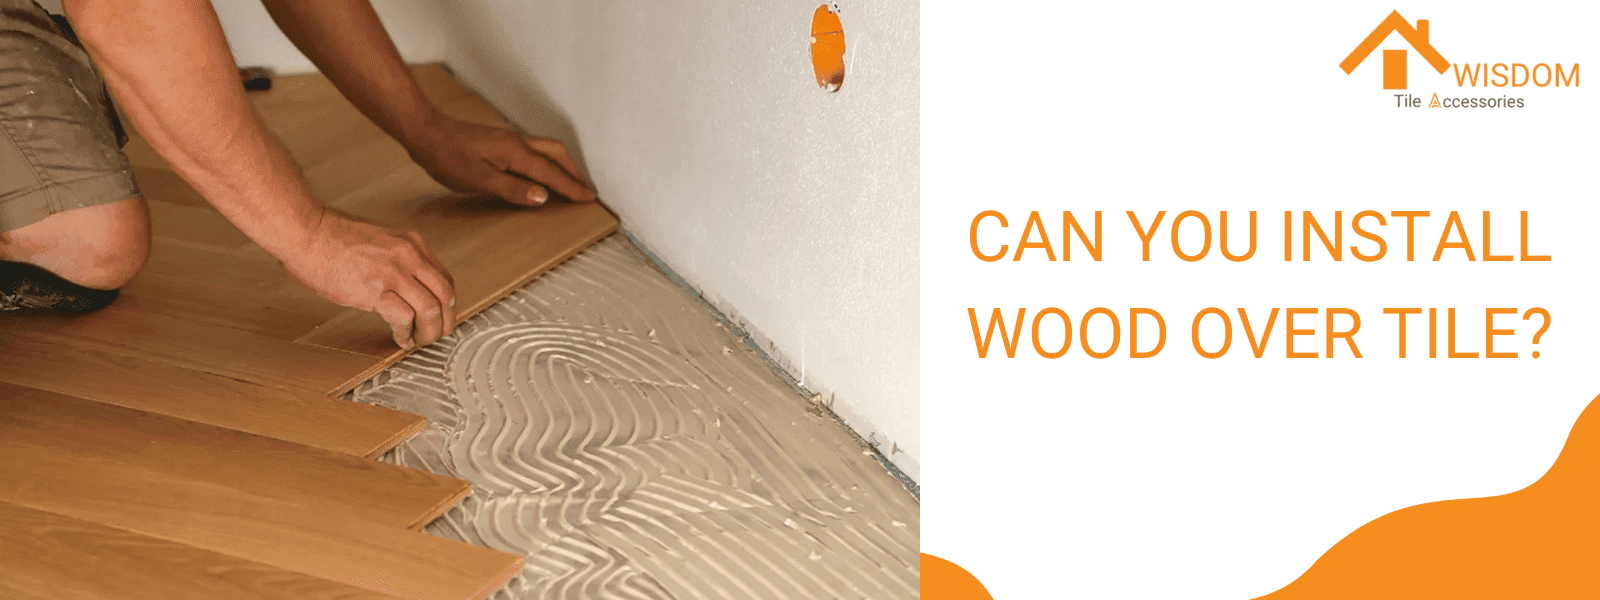
Are you considering updating your flooring and wondering, can you install wood over tile? Yes, it is possible and often a practical solution. This approach allows you to upgrade to wood flooring without the need to remove the existing tiles, which can be both time-consuming and costly. In this article, we will explore the steps involved in installing wood over tile, ensuring a smooth and efficient transition. By following these guidelines, you can achieve a professional finish and enjoy the benefits of wood flooring in your home.
Can You Install Wood Flooring Over Tile?
Yes, you can install wood flooring over tile. This method avoids the high costs, dust, and time associated with tile removal, making it a practical option for many homeowners.
If you've already made your initial plans, read on to learn what you need to know.
Things to Know Before Installing Wood Over Tile
1. Type of Wood Flooring
Different types of wood flooring can be installed over tile, including:
- Engineered Hardwood: This type of flooring is often recommended for installation over tile because it is more stable and can handle variations in the subfloor better than solid hardwood. Some engineered hardwood products are designed to be installed as floating floors, which do not require adhesive or nails.
- Solid Hardwood: While it can be installed over tile, it typically requires a more complex installation process, such as the double glue-down method, which involves gluing an underlayment to the tile and then gluing the hardwood to the underlayment.
- Floating Floors: These include engineered hardwood and laminate flooring that can be installed without adhesives by clicking and locking the planks together. This method is often easier and faster.
2. Condition of the Tile Floor
Before installing wood flooring over tile, ensure that the tile floor is in good condition:
- Level Surface: The tile floor must be level. Uneven tiles can cause the wood flooring to have an uneven surface, leading to potential damage and discomfort. Use a leveling compound if necessary to create a smooth surface.
- Clean and Dry: The tile surface should be thoroughly cleaned to remove any dirt, grease, or debris that could interfere with the adhesion of the new flooring. It should also be completely dry to prevent mold and mildew growth.
3. Underlayment
An underlayment can provide a smooth surface for the wood flooring and offer additional benefits such as sound insulation and moisture protection:
- Moisture Barrier: If moisture is a concern, especially in areas like basements, use an underlayment with a built-in moisture barrier to protect the wood flooring.
- Sound Insulation: Some underlayments can help reduce noise, which is particularly beneficial in multi-story homes or apartments.
>> See Our Guide: 14 Tile Underlayments You Need to Know [2024]
4. Installation Method
Choose the installation method based on the type of wood flooring and the condition of the tile:
- Floating Installation: This is suitable for engineered hardwood and laminate flooring. It involves laying the planks over the underlayment without adhesives, making it a popular DIY option.
- Double Glue-Down Method: This method is used for solid hardwood and involves gluing an underlayment to the tile and then gluing the wood flooring to the underlayment. It provides a more permanent solution but is more labor-intensive and may require professional installation.
5. Cost Considerations
Installing wood flooring over tile can vary in cost depending on several factors:
- Material Costs: Engineered hardwood typically ranges from $4.50 to $16 per square foot, while solid hardwood can range from $5 to $28 per square foot.
- Labor Costs: Professional installation costs can range from $3 to $10 per square foot. DIY installations can save on labor costs but require time and effort.
- Additional Costs: Consider the cost of underlayment, leveling compounds, and any necessary tools or equipment.
>> See Our Guide: Don’t Break the Bank: Cheaper Alternative to Self-Leveling Compound
6. Potential Challenges
Be aware of potential challenges that may arise:
- Height Differences: Adding a layer of wood flooring over tile can increase the floor height, which may affect door clearances and transitions to other rooms.
- Telegraphing: If the tile has deep grout lines or uneven surfaces, these imperfections can telegraph through the wood flooring over time, creating an uneven appearance.

Pros and Cons of Installing Wood Flooring Over Existing Tiles
Pros | Cons |
|---|---|
Cost-effective compared to tile removal | Potential height increase and door clearance issues |
Time-saving installation process | Risk of moisture problems if not properly sealed |
Preserves existing subfloor | Possible unevenness if tiles are damaged or uneven |
Adds insulation and reduces noise | May require special adhesives or installation methods |
Provides a warmer, more natural look | Could affect resale value if not done professionally |
Easier to maintain than some tile floors | Potential for hollow sounds when walking |
Can increase home value if done well | May not be suitable for all types of existing tiles |
Allows for quick style updates | Risk of telegraphing (showing tile patterns through wood) |
Reduces demolition mess and waste | Possible adhesion issues over time |
Can be a DIY project for some homeowners | May void flooring warranty if not installed correctly |
Common Installation Technique You will Use
When installing wood flooring over existing tiles, several common techniques can be used. Each method has its own advantages and disadvantages, and the choice depends on the type of wood flooring, the condition of the existing tiles, and personal preferences. Here are the most common installation techniques:
1. Nail-Down Method
Description
- Process: Involves nailing the wood planks directly to a wooden subfloor.
- Tools: Requires a nail gun and nails specifically designed for wood flooring.
Pros
- Stability: Provides a very stable and secure installation.
- Durability: Reduces the risk of the floor moving or creaking over time.
Cons
- Subfloor Requirement: Can only be used if there is a wooden subfloor beneath the tiles.
- Complexity: More complex and labor-intensive compared to other methods.
2. Staple-Down Method
Description
- Process: Similar to the nail-down method but uses staples instead of nails.
- Tools: Requires a staple gun.
Pros
- Ease of Use: Easier and faster to install compared to the nail-down method.
- Secure: Provides a secure attachment to the subfloor.
Cons
- Subfloor Requirement: Also requires a wooden subfloor.
- Potential for Movement: Slightly less secure than nails, which may lead to minor movement over time.
3. Glue-Down Method
Description
- Process: Involves gluing the wood planks directly to the subfloor.
- Tools: Requires adhesive and a trowel.
Pros
- Versatility: Can be used on various subfloors, including concrete and tile.
- Stability: Provides a strong and stable bond that minimizes movement.
Cons
- Preparation: Requires thorough preparation of the subfloor to ensure proper adhesion.
- Complexity: Can be messy and requires careful application of adhesive.
4. Floating Method
Description
- Process: The wood planks are not attached to the subfloor but are connected to each other, often using a click-lock system.
- Tools: Minimal tools required, typically just a tapping block and mallet.
Pros
- Ease of Installation: Quick and easy to install, making it a popular DIY option.
- Flexibility: Can be installed over various subfloors, including tile, without the need for adhesives or nails.
Cons
- Stability: May not be as stable as other methods, especially for solid hardwood.
- Sound: Can produce a hollow sound when walked on if not properly installed with underlayment.
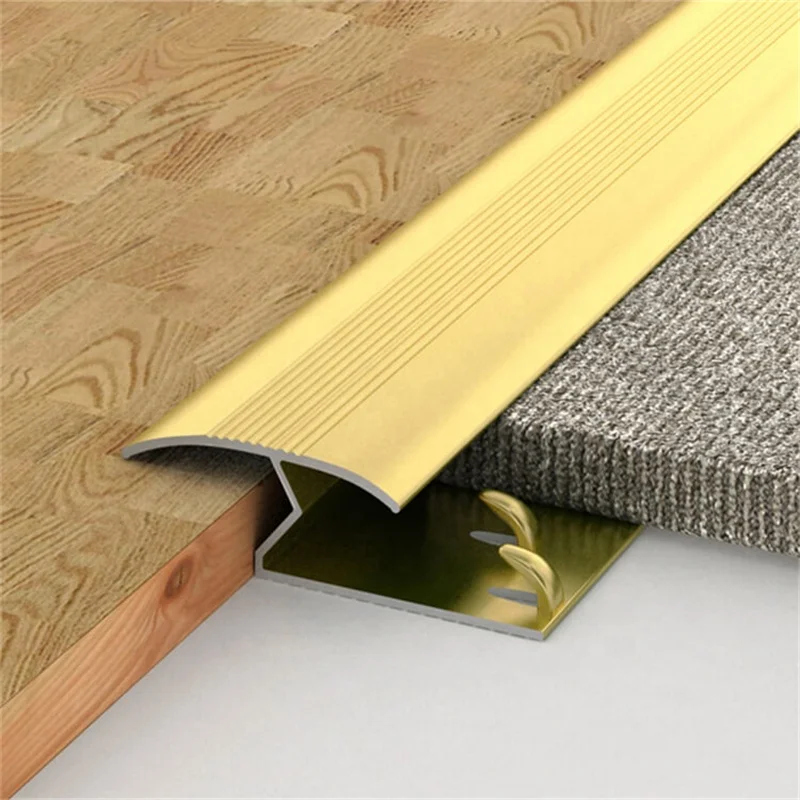
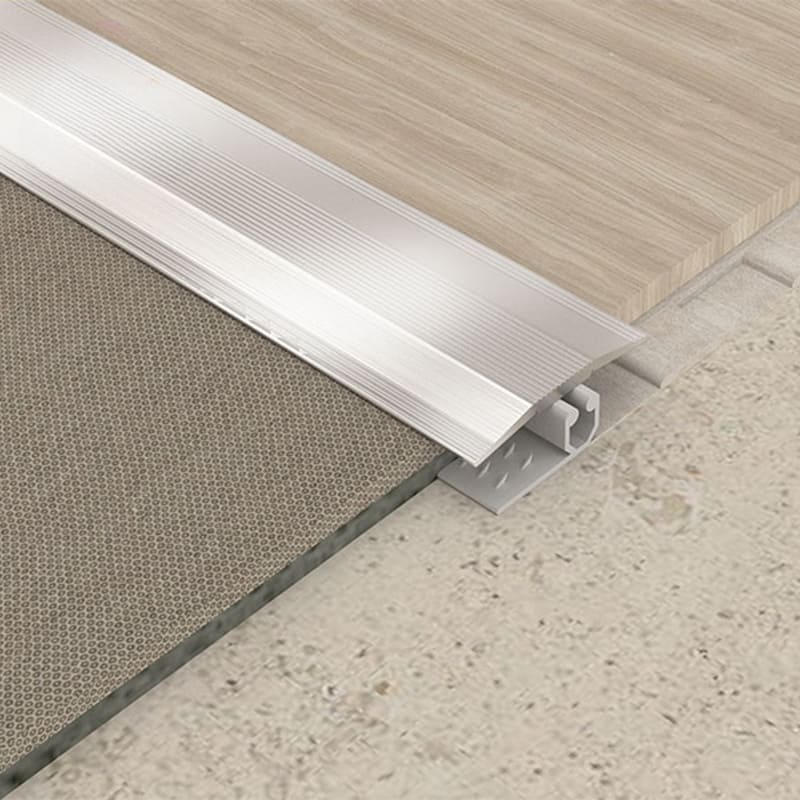
Advanced Tips: How to Transition on Wooden Floors?
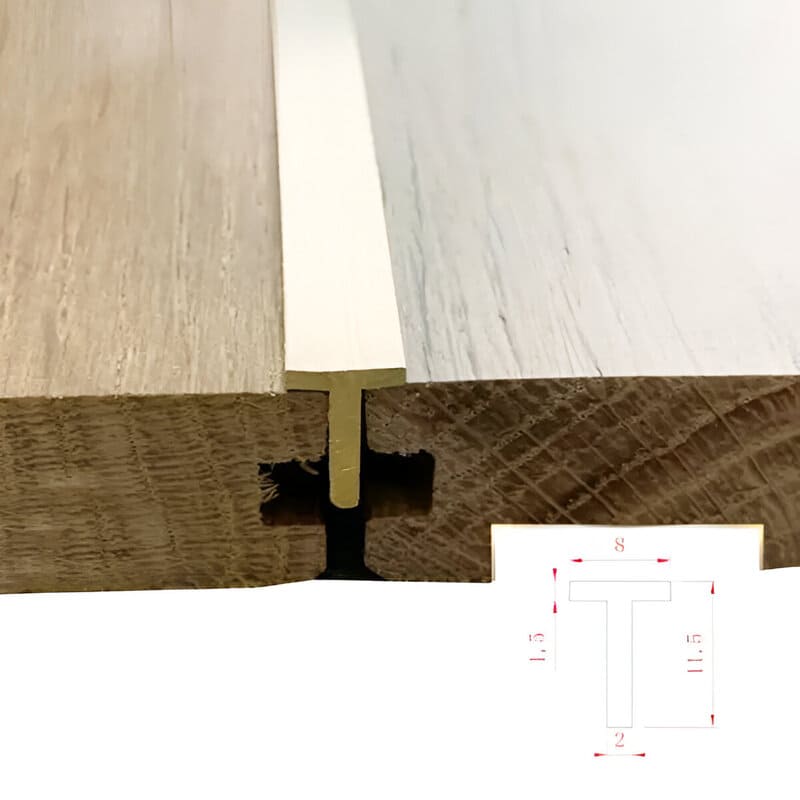
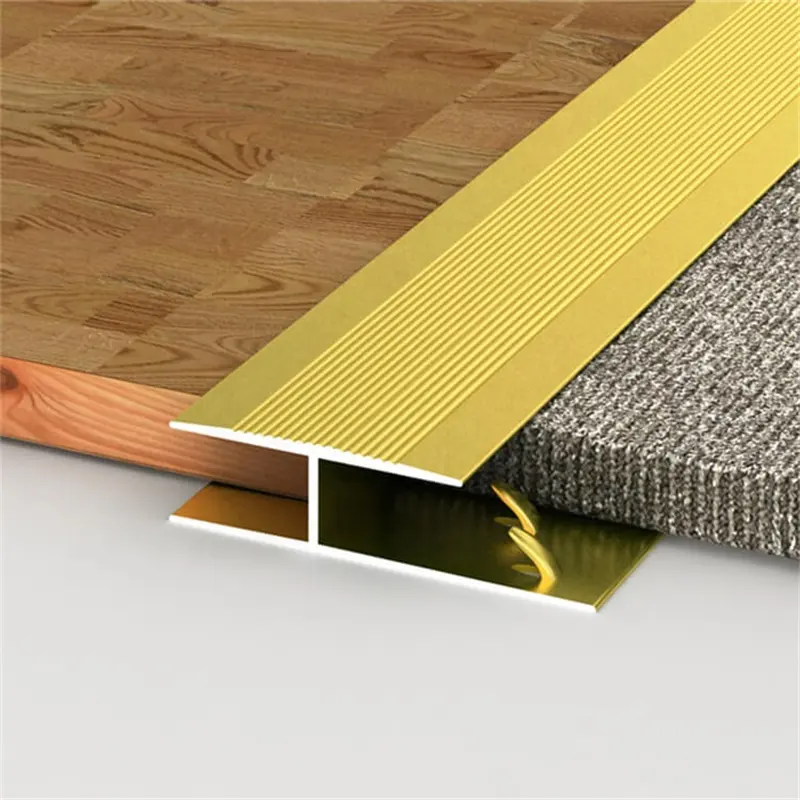
For beginners, completing the installation of wooden flooring on ceramic tiles is already a success. But if you want to further enhance the design of your interior, metal transition strips are a practical choice. Here are some tips on how to effectively use metal transition strips:
- Choose the Right Strip:
- Wooden Floor Transition Strips: Ideal for creating a smooth transition between wooden floors and other surfaces.
- Laminate Transition Strips: Suitable for connecting wooden floors to laminate flooring.
- LVP Transition Strips: Use these for transitioning between wooden floors and luxury vinyl planks.
- Installation Steps:
- Measure and Cut: Measure the gap between the floors accurately and cut the transition strip to the required length.
- Secure the Strip: Depending on the type, either use adhesive or screws. Adhesive works well for low-traffic areas, while screws provide a more secure fit for high-traffic zones.
- Align and Install: Place the strip in position and ensure it sits flush with both flooring surfaces. Press firmly if using adhesive, or screw it down securely.
- Additional Tips:
- Height Differences: Use a reducer strip if there’s a height difference between the floors.
- Aesthetic Matching: Choose transition strips that match or complement the color and finish of your floors to maintain a cohesive look.
FAQs about Installing Wood Over Tile
What do you put between wood and tile?
To transition smoothly between wood and tile flooring, you can use a floor transition strip. These strips can ramp up or down to accommodate the height difference between the two types of flooring. They are typically made from materials like wood or aluminum and can be cut to the required length using tools such as a miter saw or hacksaw. The transition strip not only covers the seam between the two floors but also prevents tripping hazards and adds a finished look to the installation.
How do you stick wood to tile?
Adhering wood to tile requires a strong and reliable adhesive. Here are some options:
- Polyurethane Glue: Ideal for situations requiring a waterproof bond, such as external installations.
- Alco-Flex Polyurethane Adhesive & Sealant: This provides a flexible yet strong bond, suitable for areas with temperature fluctuations.
- Epoxy Adhesive: Provides a very strong bond and is suitable for heavy-duty applications.
- Construction Adhesive: General-purpose adhesive that works well for wood-to-tile applications.
- Super Glue: Fast-setting adhesive for small, precise applications.
Ensure the surfaces are clean and dry before applying the adhesive for the best results.
What is the best wood to tile over?
When installing wood over tile, using plywood as a base is often recommended. Plywood provides a stable and rigid surface for the wood flooring. Opt for a plywood thickness of at least 12mm to ensure adequate support and to prevent flexing, which could lead to future issues with the wood flooring.
What flooring can you lay over tile?
There are several options for flooring that can be laid directly over existing tile:
- Carpet: Soft and comfortable, it can easily be installed over tile with the use of underlayment.
- Sheet Vinyl: Provides a smooth, waterproof surface that can be installed over tile.
- Laminate Flooring: A versatile and easy-to-install option that can give the look of wood or stone.
- Engineered Wood: Offers the appearance of hardwood with easier installation and better tolerance to moisture.
Before installation, ensure the tile surface is clean and level, and use an appropriate underlayment if needed.
What goes under tile on wood?
To ensure a solid and stable base for tile on a wood subfloor, install cement-based backer board. This backer board provides a rigid surface that prevents flexing, which can cause tiles to crack. Follow the manufacturer's instructions for installation, including securing the backer board with appropriate screws and using fiberglass tape on the seams. This ensures a durable and long-lasting tile installation over a wood subfloor.

