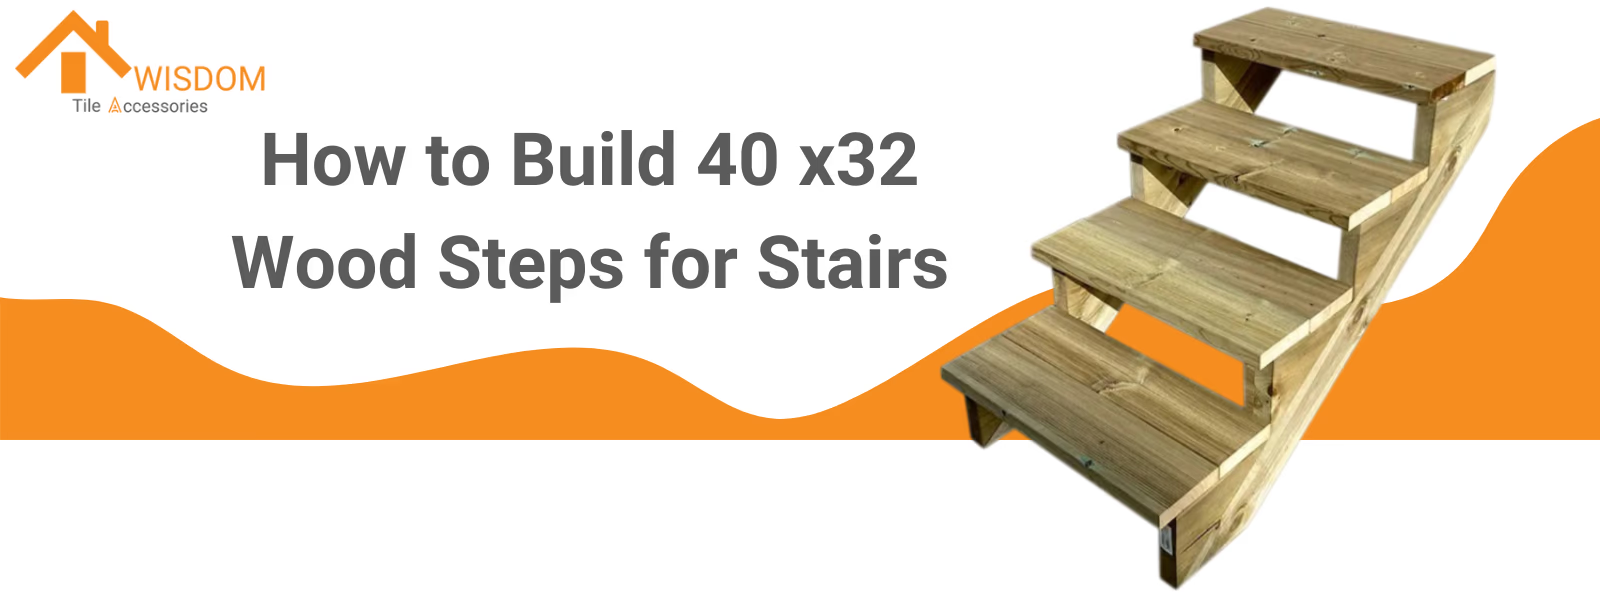
If you’re planning to build a staircase, you probably already know that even a small mistake can lead to frustrating results: uneven steps, wasted wood, and even dangerous, unstable stairs. But don’t worry—this guide is here to show you how to build 40 x32 wood steps for stairs without mistakes, so you can achieve a sturdy, functional, and professional result on your first try.

How to Build 40 x32 Wood Steps for Stairs
What Does “40 x32” Mean?
When we talk about “40 x32 wood steps,” we’re referring to stairs with the following dimensions:
- 40 Inches Wide: This width provides enough space for comfortable foot traffic, whether it’s a single person or two people passing by each other. It’s especially practical for outdoor stairs leading to decks or porches.
- 32 Inches High: The total vertical rise of 32 inches (from the ground to the top of your deck or porch) typically requires 4 to 5 steps, depending on the riser height (usually 7–7.5 inches per step).
Why These Dimensions Work
Let’s say you’re building stairs to connect a small backyard deck to the ground. A 40-inch-wide staircase offers a safe, sturdy platform for both adults and children. At the same time, a total rise of 32 inches is perfect for a moderately elevated deck, striking a balance between accessibility and minimal footprint.
These dimensions are popular for residential projects because they are easy to construct, fit most outdoor settings, and don’t require excessive materials.
What You’ll Learn
In this guide, we’ll walk you through the entire process of building 40 x 32 wood steps for stairs, step by step. From planning and measuring to cutting and assembling, you’ll learn everything you need to:
- Avoid common mistakes that waste time and money.
- Create a staircase that is safe, durable, and professional-looking.
- Build with confidence, even if it’s your first DIY project.
Step 1: Plan and Measure Accurately
Planning and accurate measurements are the foundation of any staircase project. A small mistake during this stage can lead to uneven steps, wasted materials, and even a staircase that’s unsafe to use. Here’s how to measure 40 x 32 stairs step by step.
How to Measure for 40 x 32 Stairs
- Start by Measuring the Total Rise
Use a tape measure to find the exact vertical height from the ground to the top of the deck or landing. This is your total rise. For example, if the deck is 32 inches off the ground, your total rise is 32 inches. - Calculate the Number of Steps
Divide the total rise by the desired riser height (typically 7–7.5 inches). For example:- A 32-inch rise divided by 7 inches per step equals approximately 4.57 steps.
- Round this to 5 steps, ensuring consistent riser heights.
- Determine Tread Depth
Each tread (the flat part of the step) should be at least 10 inches deep. Multiply the number of steps by the tread depth to calculate the total horizontal run.- For 5 steps: 5 × 10 inches = 50 inches total run.
- Find the Stringer
The stringers (angled supports for the stairs) need to match the combined rise and run. Use the Pythagorean theorem:
$$ \text{Stringer Length} = \sqrt{\text{Total Rise}^2 + \text{Total Run}^2} $$
For a 32-inch rise and a 50-inch run:
$$ \sqrt{32^2 + 50^2} = \sqrt{1024 + 2500} = \sqrt{3524} \approx 59.3 \, \text{inches.} $$
Avoiding Common Mistakes
Even small errors in the measurement phase can lead to big problems. Here are three common issues and how to prevent them:
- Miscalculating Step Heights: Always double-check your math and ensure every riser is the same height.
- Forgetting Tread Thickness: If your treads are 1.5 inches thick, subtract this from the riser height to avoid uneven steps.
- Skipping Building Codes: Research local building codes to ensure compliance. For example, many areas require risers no taller than 7.75 inches and treads no shallower than 10 inches.

Step 2: Gather Tools and Materials
Before cutting or assembling anything, make sure you have all the necessary tools and materials. Preparation saves time and ensures smoother progress.
Essential Tools
- Tape Measure: For accurate measurements.
- Framing Square: To mark precise rise and run on stringers.
- Circular Saw: For cutting stringers and treads.
- Level: Ensures everything is aligned during assembly.
Materials Checklist
- Pressure-Treated Lumber: Use 2x12 boards for stringers and 2x6 or 2x12 boards for treads.
- Weather-Resistant Screws: For outdoor durability.
- Wood Glue: Adds extra stability to joints.
Pro Tips for Material Selection
- Inspect Wood Carefully: Look for straight boards without warping or large knots.
- Consider Climate: In humid areas, opt for pressure-treated wood to resist rot
>> Use a Stair Calculator
Step 3: Prepare and Cut the Wood
Each piece of wood must be cut accurately to ensure your staircase is sturdy, level, and safe. Even minor errors at this stage—like uneven cuts or misaligned stringers—can cause problems during assembly. Here’s how to cut and prepare your materials step by step.
Cutting the Stringers
- Mark the Rise and Run
- Place a 2x12 board flat on your workbench or sawhorses. Using a framing square, align one side with your calculated rise (e.g., 7 inches) and the other with the run (e.g., 10 inches). Start at one end of the board and carefully mark each step.
- Pro Tip: Clamp the framing square to the board to prevent it from shifting as you draw the outlines.
- Check Your Measurements
- Measure the total rise and total run of the marked stringer. These should match your earlier calculations. If the total rise is off, check the riser height for inconsistencies. If the run doesn’t align, adjust the depth of each step slightly.
- Cut with Precision
- Use a circular saw for straight cuts along the marked lines. Stop just short of the corners to avoid overcutting, which can weaken the stringer. Finish the corners with a handsaw for clean edges.
- Test Fit the First Stringer
- Place the cut stringer against the deck or landing. Check that:
- The top sits flush with the deck surface.
- The bottom rests evenly on the ground.
- If Issues Arise: Uneven ground can be leveled with shims, while minor misalignments in the stringer can be corrected with sanding.
- Place the cut stringer against the deck or landing. Check that:
- Duplicate the Stringer
- Use the first stringer as a template to mark and cut the remaining stringers. Stack the boards together to ensure all stringers are identical.

Step 4: Assemble the Stairs
Once your materials are cut and prepared, it’s time to assemble the staircase. Precision and attention to detail are key at this stage, as this will directly affect the stability and safety of your stairs. Follow these steps carefully to assemble everything securely and accurately.
Attach the Stringers
- Position the Stringers
- Place the stringers in their designated positions. They should be evenly spaced (typically 12–16 inches apart) and aligned so that the top of each stringer is flush with the deck or landing.
- Use a level to ensure all stringers are vertically and horizontally aligned.
- Secure the Top of the Stringers
- Attach the tops of the stringers to the deck or landing using metal brackets or hangers. Use screws that are rated for outdoor use if this is an exterior staircase. Tighten all screws to prevent any wobbling.
- Tip: Check the alignment with a level after attaching each stringer to ensure the setup remains consistent.
- Anchor the Bottom of the Stringers
- The bottoms of the stringers should rest securely on a concrete pad, wood block, or other solid foundation. Secure them with brackets, anchors, or screws to prevent shifting over time.
- Common Issue: If the ground is uneven, use shims to level the base before securing the stringers.
Install the Treads and Risers
- Start from the Bottom
- Begin by attaching the first riser to the bottom of the stringers. Use screws and wood glue to secure it firmly. The riser should fit snugly between the stringers with no gaps.
- Follow this by installing the first tread. Ensure it slightly overhangs the riser for a finished look and improved safety.
- Continue Upward
- Work your way up the staircase, attaching each riser followed by its corresponding tread. After installing each piece, check that:
- The tread is level from side to side.
- The riser is flush with the stringers and treads.
- Work your way up the staircase, attaching each riser followed by its corresponding tread. After installing each piece, check that:
- Reinforce All Connections
- Once all treads and risers are installed, reinforce the connections with additional screws or nails, especially where the treads meet the stringers. This adds extra durability and prevents loosening over time.
Check for Alignment
- Stand back and visually inspect the entire staircase. Look for:
- Even spacing between steps.
- Consistent overhangs and flush connections.
- If adjustments are needed, loosen and realign components before tightening them back into place.
Step 5: Ensure Stability and Safety
Testing your staircase before regular use is crucial to ensure it’s stable, secure, and safe. This step helps you identify and fix any potential issues before they become hazards.
Test for Stability
- Walk the Stairs
- Slowly walk up and down the staircase, applying pressure to each step. Pay attention to:
- Any creaking noises, which could indicate loose screws.
- Slight movement or wobbling, which could mean the stringers or treads aren’t properly secured.
- Slowly walk up and down the staircase, applying pressure to each step. Pay attention to:
- Check the Fasteners
- Inspect all screws, brackets, and joints. Tighten anything that feels loose or appears misaligned. For outdoor stairs, ensure screws are corrosion-resistant to maintain long-term durability.
- Apply Additional Support if Needed
- If the stairs feel unstable, consider adding a cross-brace between the stringers for added rigidity. Alternatively, add extra screws or brackets to reinforce the connections.
Step 6: Finish and Protect the Stairs
To ensure your staircase is not only functional but also durable and visually appealing, apply finishing touches that protect the wood and enhance safety.
Sand and Smooth
- Smooth All Surfaces
- Use medium-grit sandpaper or a power sander to remove rough edges, splinters, and sharp corners from the treads and risers.
- Round Off Edges
- Slightly round the edges of each tread for a more polished look and added safety, especially for outdoor stairs.
Apply a Protective Coating
- Choose the Right Product
- For outdoor stairs, use a weather-resistant sealant or paint to protect the wood from moisture, UV rays, and general wear. For indoor stairs, consider a polyurethane finish for added durability.
- Apply Evenly
- Use a roller or brush to coat all surfaces, including the stringers, treads, and risers. Apply at least two coats for maximum protection, allowing adequate drying time between coats.
- Inspect for Missed Spots
- After the coating dries, inspect the stairs under good lighting to ensure all surfaces are covered.

Add Anti-Slip Features
- Install Anti-Slip Strips
- Adhesive anti-slip strips can be placed on each tread to improve traction, especially for outdoor stairs or stairs exposed to wet conditions.
- Use Anti-Slip Paint
- Alternatively, apply a layer of anti-slip paint on the treads. This option provides a cleaner look while still enhancing safety.
- Test for Safety
- Walk on the stairs after finishing to ensure the anti-slip features are effective and securely in place.
Common Mistakes and How to Avoid Them
Even small mistakes during construction can cause your stairs to become unstable, uneven, or unsafe. Below, we’ll address common issues you may encounter, explain why they happen, and provide step-by-step solutions to fix them.
1. Uneven Steps
Why It Happens:
- The riser height was calculated incorrectly, often because the thickness of the treads wasn’t included.
- The stringers were cut inconsistently or not properly aligned during assembly.
How to Identify It:
- Use a tape measure to check the height of each step from the ground. If the heights vary by more than ⅛ inch, adjustments are needed.
How to Fix It:
- Before Assembly: Recheck your riser height calculations, ensuring you’ve accounted for the tread thickness. Cut new stringers if necessary to correct errors.
- After Assembly: If the steps are already installed, sand down the higher risers or use shims under the treads to even out the heights.
2. Misaligned Stringers
Why It Happens:
- The stringers were spaced unevenly or not leveled during installation.
- The base of the stringers sits on uneven ground, causing the entire structure to tilt.
How to Identify It:
- Lay a level across the tops of the stringers. If the bubble isn’t centered, your stringers are misaligned.
How to Fix It:
- Before Installing Treads: Adjust the stringers by loosening the brackets or screws and re-leveling them. Use shims or a concrete leveling pad to stabilize the base.
- After Installing Treads: If misalignment persists, remove the treads and realign the stringers before reattaching them.
3. Loose or Wobbly Treads
Why It Happens:
- Screws or fasteners were not tightened securely, or holes weren’t pre-drilled, causing splitting.
- The wood has warped due to moisture (common in outdoor stairs).
How to Identify It:
- Walk up and down the stairs, paying attention to movement or squeaking sounds when stepping on the treads.
How to Fix It:
- Tighten all screws and add additional fasteners where necessary.
- Apply wood glue along the edges of loose treads before re-securing them.
- For outdoor stairs, replace any warped boards and reseal the wood to prevent future damage.
Conclusion
Building stairs requires precision and attention to detail at every step. By understanding potential issues, predicting problems, and implementing clear solutions, you can ensure your staircase is safe, stable, and built to last. Remember:
- Double-check every measurement before cutting.
- Test each component during assembly to catch alignment issues early.
- Regular maintenance, like tightening screws and resealing wood, can prevent long-term damage.
With this guide, you’re well-equipped to handle common challenges and build a staircase you can be proud of. Let’s get to work!


