Over time, tile floors lose their shine and luster. But instead of bearing the cost and hassle of a full replacement, many homeowners are turning to tile floor refinishing as a cost-effective solution.
This guide will walk you through the process of tile floor refinishing step by step, allowing you to restore your floor's beauty on a budget.

Safety First: Prepping Yourself and Your Space
Before diving into the intricacies of tile floor refinishing, it's essential to put safety first. Refinishing involves using tools and materials that can be hazardous if mishandled.
Necessary Safety Gear:
- Safety goggles: Protect your eyes from splashes and dust.
- Gloves: Protect your hands from chemicals and sharp tools.
- Knee pads: Give your knees some cushion as you'll be on the floor.
- Dust mask or respirator: Avoid inhaling dust or harmful fumes.
Preparing the Workspace:
Tile floor refinishing can be messy. Prepare your workspace to ensure an efficient process and minimize post-refinishing cleanup.
- Ventilation: Open windows or use fans. Proper airflow is essential, especially if using chemicals.
- Clear the area: Remove furniture, rugs, and other obstacles. A clear space means fewer obstructions.
- Protect adjacent areas: Plastic sheeting or drop cloths can shield your walls and fixtures from accidental splashes.
Materials and Tools Needed for Refinishing
To achieve that professional finish in your DIY tile floor refinishing project, having the right tools and materials is key.
Essential Materials:
- Cleaning solution: A tile-specific cleaner will help remove deep-seated grime.
- Stain or paint: If you're looking to change the tile's color.
- High-quality sealant: This will protect your tiles after refinishing.
- Sandpaper (various grits): For smoothing out the tiles.
Recommended Tools:
- Tile scrubber: Makes cleaning easier and more efficient.
- Vacuum or broom: For cleaning up dust and debris.
- Paint trays: To hold your paint or stain.
- Roller extenders: Helps in applying paint or sealant more evenly.
- Tack cloths: Useful for wiping down tiles and ensuring they're dust-free.
The Refinishing Process
The core of tile floor refinishing is a methodical process. Follow each step carefully for best results.


Step 1: Deep Cleaning
Before any refinishing begins, the tiles need to be immaculately clean.
- Surface Cleaning: Sweep or vacuum the floor to remove loose dirt.
- Deep Cleaning: Use a tile scrubber with a tile cleaning solution. Ensure all grout lines and tile surfaces are free from dirt and stains.
- Drying: Make sure the floor is completely dry. Any moisture can affect the refinishing process.
Step 2: Sanding the Tiles
Sanding helps the tiles adhere to the new finish. It's a critical step in the tile floor refinishing process.
- Start Coarse: Begin with a coarse-grit sandpaper. This helps remove any superficial blemishes.
- Finish Fine: Progress to finer grits to ensure the tiles are smooth and ready.
- Clean Up: After sanding, it's crucial to clean up. Vacuum the dust and then wipe down the tiles with a tack cloth.
Step 3: Applying the Stain or Paint (Optional)
If you're reinventing the look of your tiles, this step is for you.
- Choosing: Ensure you select a paint or stain suitable for tile floor refinishing.
- Application: Using brushes or rollers, apply evenly. You might need multiple coats.
- Drying: Allow ample drying time between coats. Rushing this can result in an uneven finish.
Step 4: Sealing the Tiles
A sealant protects your freshly refinished tiles.
- Selecting: Choose a high-quality sealant compatible with your tiles.
- Application: Apply it evenly over the tiles. This will give your tiles a fresh shine and protect them from wear and tear.
- Drying: Let the sealant dry completely. It's vital to keep the area free from foot traffic until fully cured.

Post-Refinishing Care and Maintenance
With the tile floor refinishing complete, the focus shifts to maintaining the new look.
Immediate Aftercare:
- Ventilation: Keep the room ventilated to help the floor cure.
- No Traffic: The freshly refinished floor needs time. Restrict movement on it for the recommended period.
- Cleaning: Clean tools immediately and dispose of any used materials safely.
Long-term Maintenance:
A refinished floor is a rejuvenated floor. But like all floors, it needs care.
- Routine Cleaning: Regular sweeping and mopping will maintain the shine.
- Protection: Use felt pads under furniture legs. This reduces the risk of scratches.
- Regular Checks: Periodically check for areas that might need touch-ups, ensuring your floor remains pristine.
Troubleshooting Common Issues
Despite best efforts, sometimes issues arise post-refinishing. Here's how to address them:
Streaky or Uneven Finish:
- Causes: Rushed applications, inadequate drying time between coats, or using outdated products.
- Solutions: Sand the affected area lightly and reapply the finish.
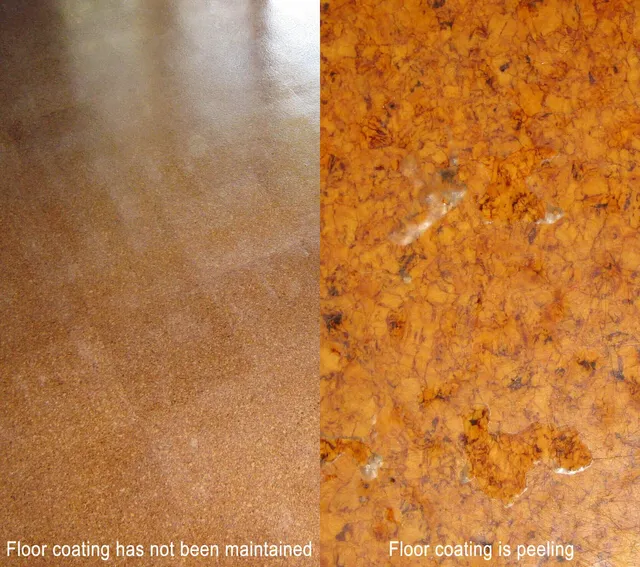
Peeling or Chipping:
- Causes: Often due to moisture on the tiles before refinishing or an incompatible sealant.
- Solutions: Address the root cause of the moisture, sand the affected area, and reapply the finish.
Conclusion
Tile floor refinishing is an effective way to rejuvenate old, worn-out tiles. With the right approach and attention to detail, a DIY refinishing job can rival professional ones, breathing life back into your floors.
For those eager to explore more on this topic, there are numerous resources available online. Tile floor refinishing not only makes financial sense, but it's also an eco-friendly choice. Embrace the challenge and enjoy the transformation!
FAQ for Tile Floor Refinishing
Can tile floors be refinished?
Yes, tile floors can indeed be refinished. The process involves applying a new, high-tech coating over the existing tile, which not only gives the floors a new look but also makes them easier to clean. This process can be done professionally, and it involves a two-step cleaning process to remove dirt, detergents, and body oil to ensure that no contaminants interfere with the adhesion of the new coating. If grout repairs are necessary, the grout is floated with a special quick-drying mix to fill in any voids. Once the grout is dry, a bonding agent is applied to ensure adhesion of the new coating
Can ceramic tiles be refinished?
Yes, ceramic tiles can be refinished. The process involves applying a new coating over the existing tile, which not only gives the tiles a new look but also makes them easier to clean. Ceramic tile refinishing is a practical way to reproduce the look of original tile without the need for removal and replacement, making it a less expensive and less messy option.
What is a tile refinishing?
Tile refinishing, also known as tile resurfacing or reglazing, is a process that involves applying a new coating over the existing tile to give it a fresh, new look. This process is a cost-effective way of renovating your home without having to replace your existing tiles. It can drastically transform the look and feel of your home, enhancing the aesthetic appeal and making the tiles look brand new again.
Is tile refinishing worth it?
The main advantages of tile refinishing is that it is significantly cheaper than replacing the tiles. The cost of tile refinishing typically ranges from $4 to $12 per square foot, while tile replacement costs can range from $7 to $25 per square foot. This makes tile refinishing a more affordable option, especially for larger areas.


